A quick introduction to Photography
Photography stands as an entire discipline which is constantly and rapidly evolving, especially as it is driven by continuous technological innovation. As such there is an enormous amount of knowledge that can be explored on the subject, and it is easily beyond the scope of the ScannerBox guide, however as photographical skills are crucial to the photogrammetry process, the following section aims to equip the reader with some fundamental knowledge of photography concepts which apply for any sort of photography, whether with top of the line camera, a phone camera, or even film.
A good place to understanding photography is to understand how light works. Everything we ‘see’ is essentially light reflected of the objects around us. Our eyes are sensitive to this light and in broad terms our brains make sense of the light our eyes ‘capture’ and produce the images we see, or our visual perception in other words. Medically speaking this is a oversimplification of the process, however the principle stands: if we want to record the image of something, we need to capture the light it reflects.
Take a moment to look around you and consider the light sources around you and how they interact with your environment and produce the images you see. You are most likely reading this on a computer or phone screen which is producing a predominantly harsh white light. You may have a desk lamp or overhead lighting on, which are casting their own light, perhaps creating shadows as the light is occluded by the objects in its way. You may have a window open, with bright sunlight washing out every other source of light, or it may be coming through curtains, lending a colour to the entire room. Whatever the case that light can be imagined as as rays of light, originating from the light source in every direction and bouncing off every surface. These surfaces play a considerable role, and everything about them matters: their colour, their material, their surface, even their temperature. White surfaces bounce considerably more light than black surfaces which absorb it – in fact that it where colour comes from. Image white marble in sunlight, which even our own eyes struggle to look at it directly, or a black piece of rough cloth where you struggle to make out any detail.
The practical side of photography is essentially the technique of capturing a scene of light. How this is done is by focusing the viewed light through a lens onto a light-sensitive surface or sensor. In the era of film the surface was a piece plastic covered with chemicals which reacted to light. The different levels of light discoloured the parts of the film in to a different degree, thus forming an image. The same principles still apply for digital cameras, however instead of film, the light-sensitive surface is actually a digital sensor. The sensors used in digital cameras are most commonly one of two types: Charge Coupled Devices (CCD) or Complementary Metal Oxide Semiconductors (CMOS), but essentially they are both devices that convert light into electrons, in other words a measurable electric signal. Regardless of exact type the sensors can be imagined as a rectangular grid of microscopic light sensors, each corresponding to a pixel – a small coloured square – on the final image. In simple terms, just like with the film cameras, the light from a scene is focused onto the sensor, with each ‘pixel’ on that sensor getting a reading. All of those readings together form a picture composed of those pixels.
This however is just the beginning. Capturing the ‘right’ amount of light to recreate the scene we want is not quite as straightforward as it sounds. It is more than likely that you have taken pictures before, either with a phone, or a camera. It is also quite likely that they often did not turn out the way you wanted. Some would have been too dark (Underexposed) and some would have been too bring (Overexposed). Some would have been blurry, others would have been grainy. Sometimes you would find that parts of the scene are blurry while others are pin-sharp. So what went wrong? (Or right, depending on your intent).
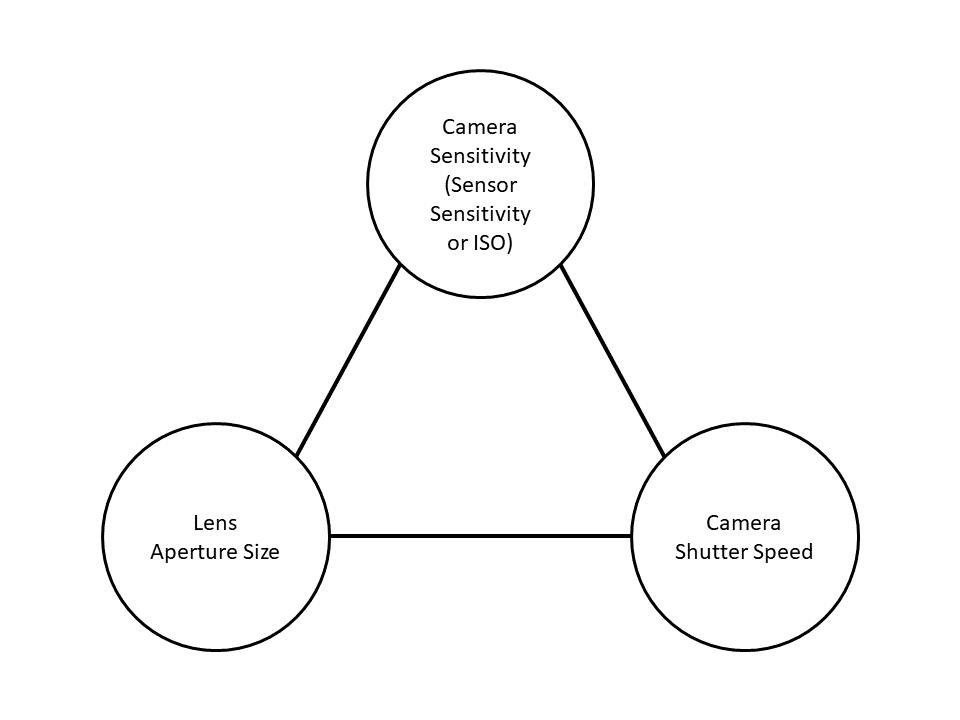
The answer is that each picture is a balance of several factors. Depending on the circumstances, your intent and your equipment there could be hundreds of things to consider, but fundamentally we can reduce it to three things: the camera’s Sensitivity (ISO), the Aperture Size of the lens you are using (f-stop), and the Shutter Speed of the camera. Balancing these three factors is what controls the Exposure of a picture. In general, unless you are aiming for a particular creative or artistic effect, you will want your pictures to have a balanced exposure so as not to have parts of it too dark or too bright. A useful mental model for this relationship is the Exposure Triangle. While it is relatively simplified it is a good way to keep in mind the three major factors you have control of with your camera, and understanding what effect each of the has on your final picture.
The first one is the Camera Sensitivity. You will often see this referred to, or labelled as, the ISO of a camera, which refers to the International Standard which was combined the various proprietary sensitivity scales in 1974. Essentially this measures the sensitivity of your light-sensitive surface or sensor. If you are using a film camera then this used to be referred to as the ‘Film Speed’ and was stipulated by the type of film you are using in your camera. In the more likely case were you are using a digital camera, then the ISO will be adjustable within a range that depends on the quality of the sensor. The sensitivity is expressed with a number, with higher values being more sensitive to light. In practical terms, the higher the ISO setting, the less light you will take to take a picture. However there is a major trade-off – the higher the ISO is set to, the worse the quality of the picture. High ISO settings create ‘Noisy’ or ‘Grainy’ pictures with low detail which are generally undesirable. The rule of thumb is to always have the ISO set to the lowest value possible, and only raise it when as a last resort.
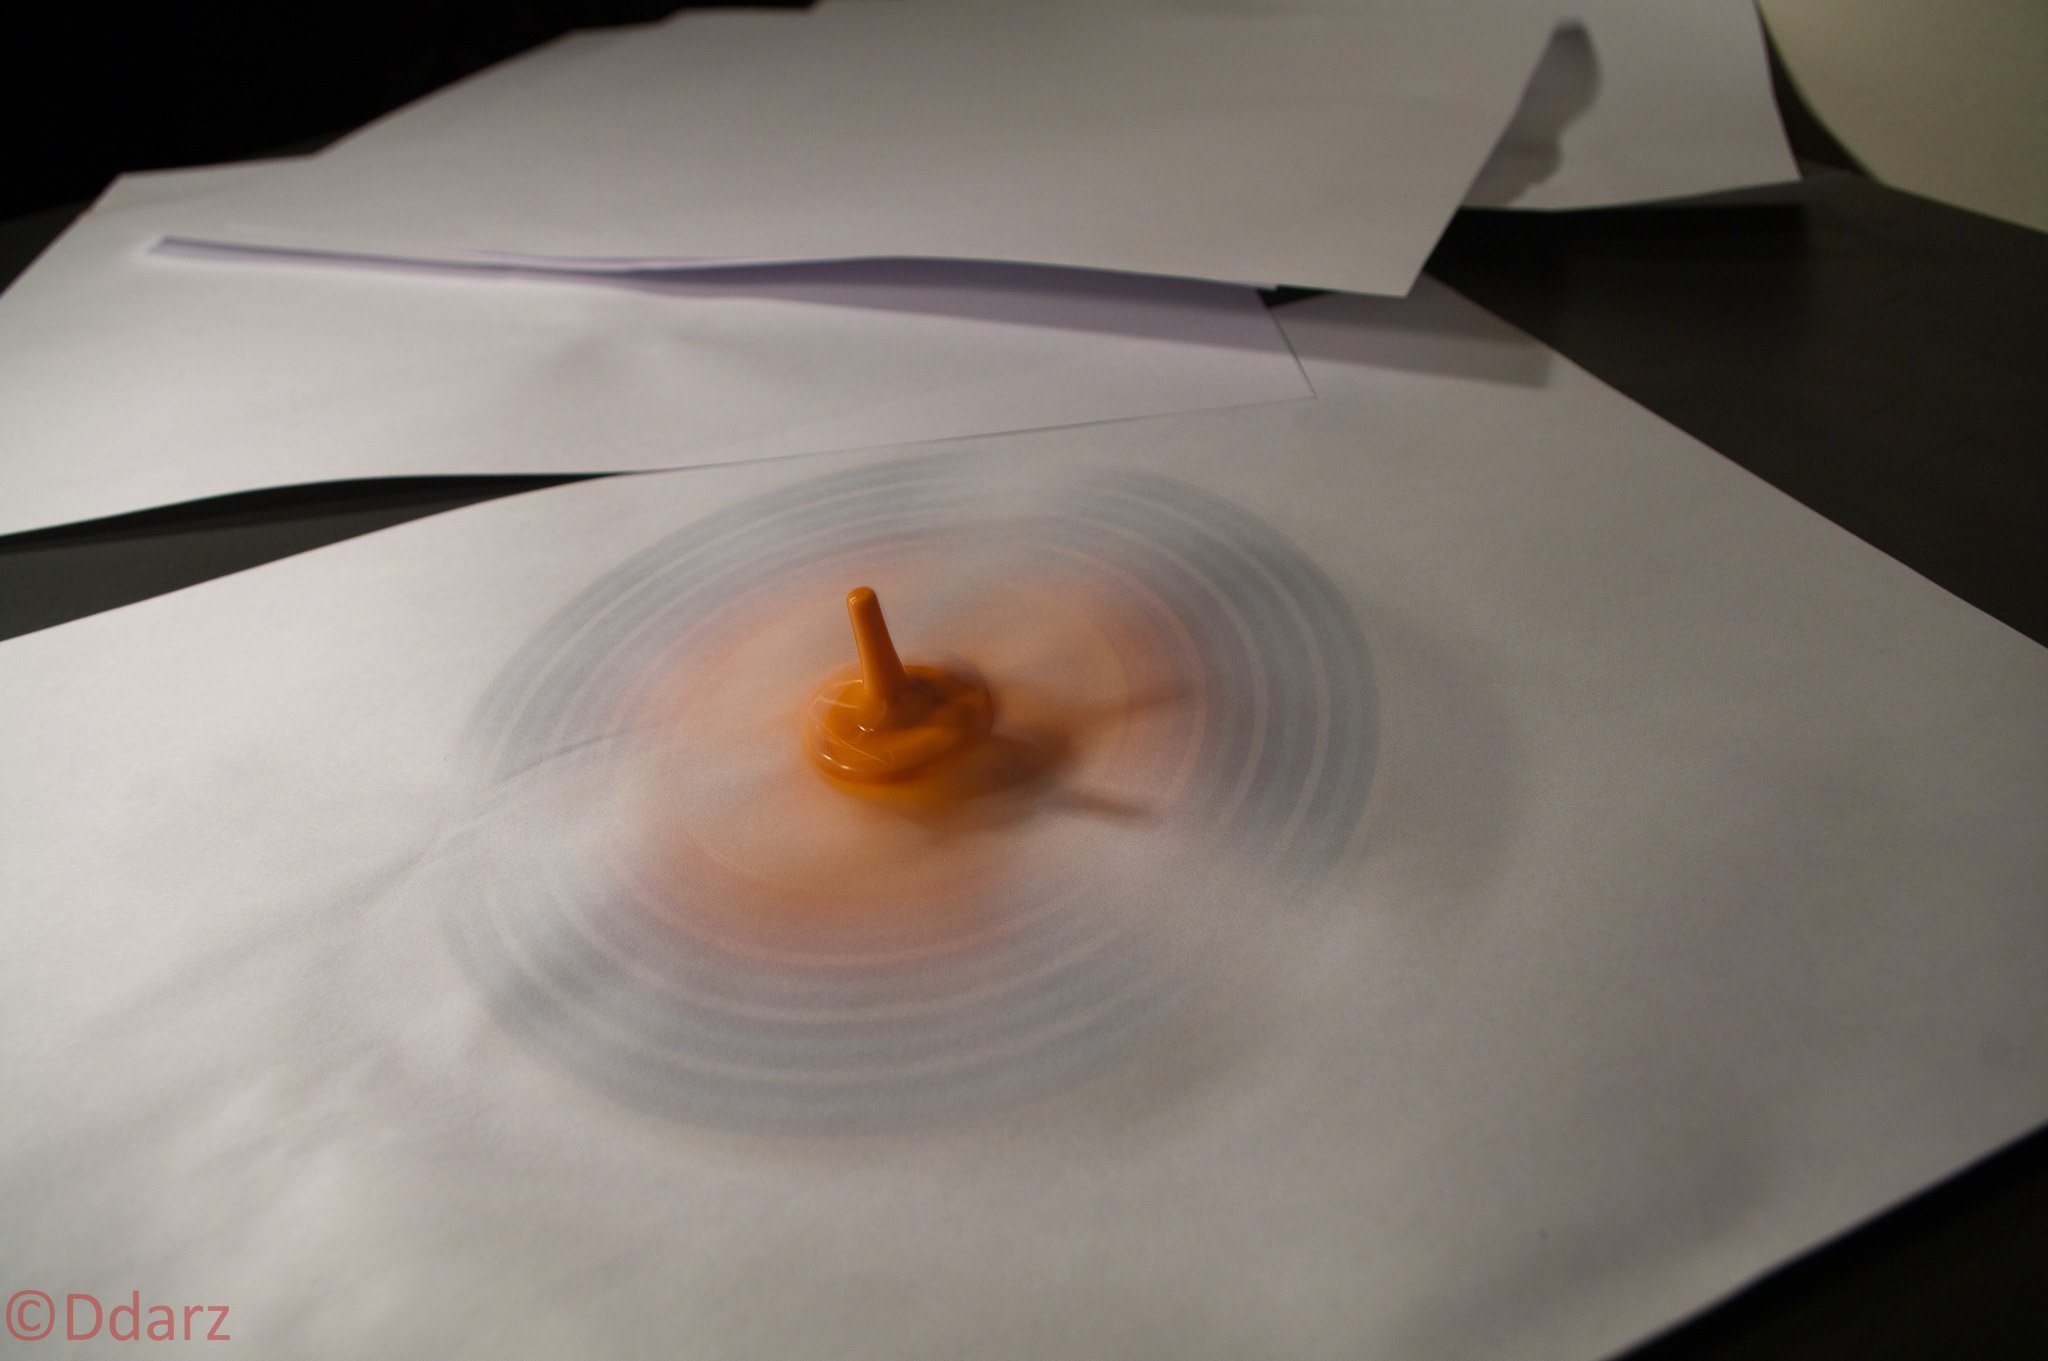
The second is the Shutter Speed. While the term refers to the speed by which the mechanical shutter in a camera opens and closes to expose the sensor, some cameras don’t have mechanical shutters at all, but is just the time a camera’s sensor turns on and off. This is usually the case with mobile phone cameras. Essentially the Shutter Speed is the the amount of time a camera’s sensor is exposed and receiving light. The speed is most often expressed in fractions of a second, so a “1/30” notation means “One thirtieth of a second”. Typical modern cameras have shutters as fast as 1/8000th of a second. As you would expect, the longer the shutter remains open, the more light is allowed to ‘hit’ the sensor. Thus it would make sense that you want want to keep the shutter open for longer exposures with slower shutter speeds when you need to take pictures in low light situations. However, depending on your objective and the subject of your picture, the exposure time has considerable implications. Essentially, the slower the exposure time, the longer there is for something to interfere with your shot, whether it is a change in the scene or something else. The most common effect of a slow exposure time is a blurry image. While 1/30th of a second may sound fast, it can be a considerable amount of where you, your camera or your subject might move, and the effect is far more pronounced with fast moving subjects. When you are photographing a still object all you will need to worry about is your own hands shaking, or the mirror of the camera flipping up and making the camera judder momentarily. But when you are trying to photograph a race car, a bird in flight, or a running child, the difficulties increase exponentially and the ability to have a fast shutter speed becomes crucial. Essentially a fast shutter speed can freeze a moment in time, while a slow one will potentially capture ‘many’ moments and amalgamate them into a blurry image. However, unlike the ISO where it is most often best to keep it as low as possible and have a clean image, there is often a case for having a slower shutter speed, beyond just necessity. Slower shutter speeds can cause desirable visual effect, such as smooth transitions, softer edges and interesting artistic effects, such as flowing waterfalls and the like. Thus the choice of shutter speed will often depend on your purpose just as much as your circumstances.


The third factor is the Aperture Size. Just like the shutter speed this is a seemingly straightforward aspect, however it is actually critical and probably the choice that you will most often want to have control over. Each camera lens has an opening, through which light hits the sensor. This is expressed as a fraction with an “f-number”. As the actual size of the opening is specific to the dimensions of the individual lenses, the f-number is used as a relative across lenses. You will often see it expressed with notations such as f/2.8, f/5.6, f/16, etc. Since it is a fraction, the smaller the number the wider the opening and the larger the number the smaller it is. In general, you will be using a wide aperture when you need more light in less time – so a faster exposure, and a smaller aperture when you need need less light, but for some reason need a longer exposure time – such as perhaps taking a picture in bright sunlight. However there is perhaps a more important reason to be careful about choosing your Aperture Size.
-

- Examples of Lens Apertures
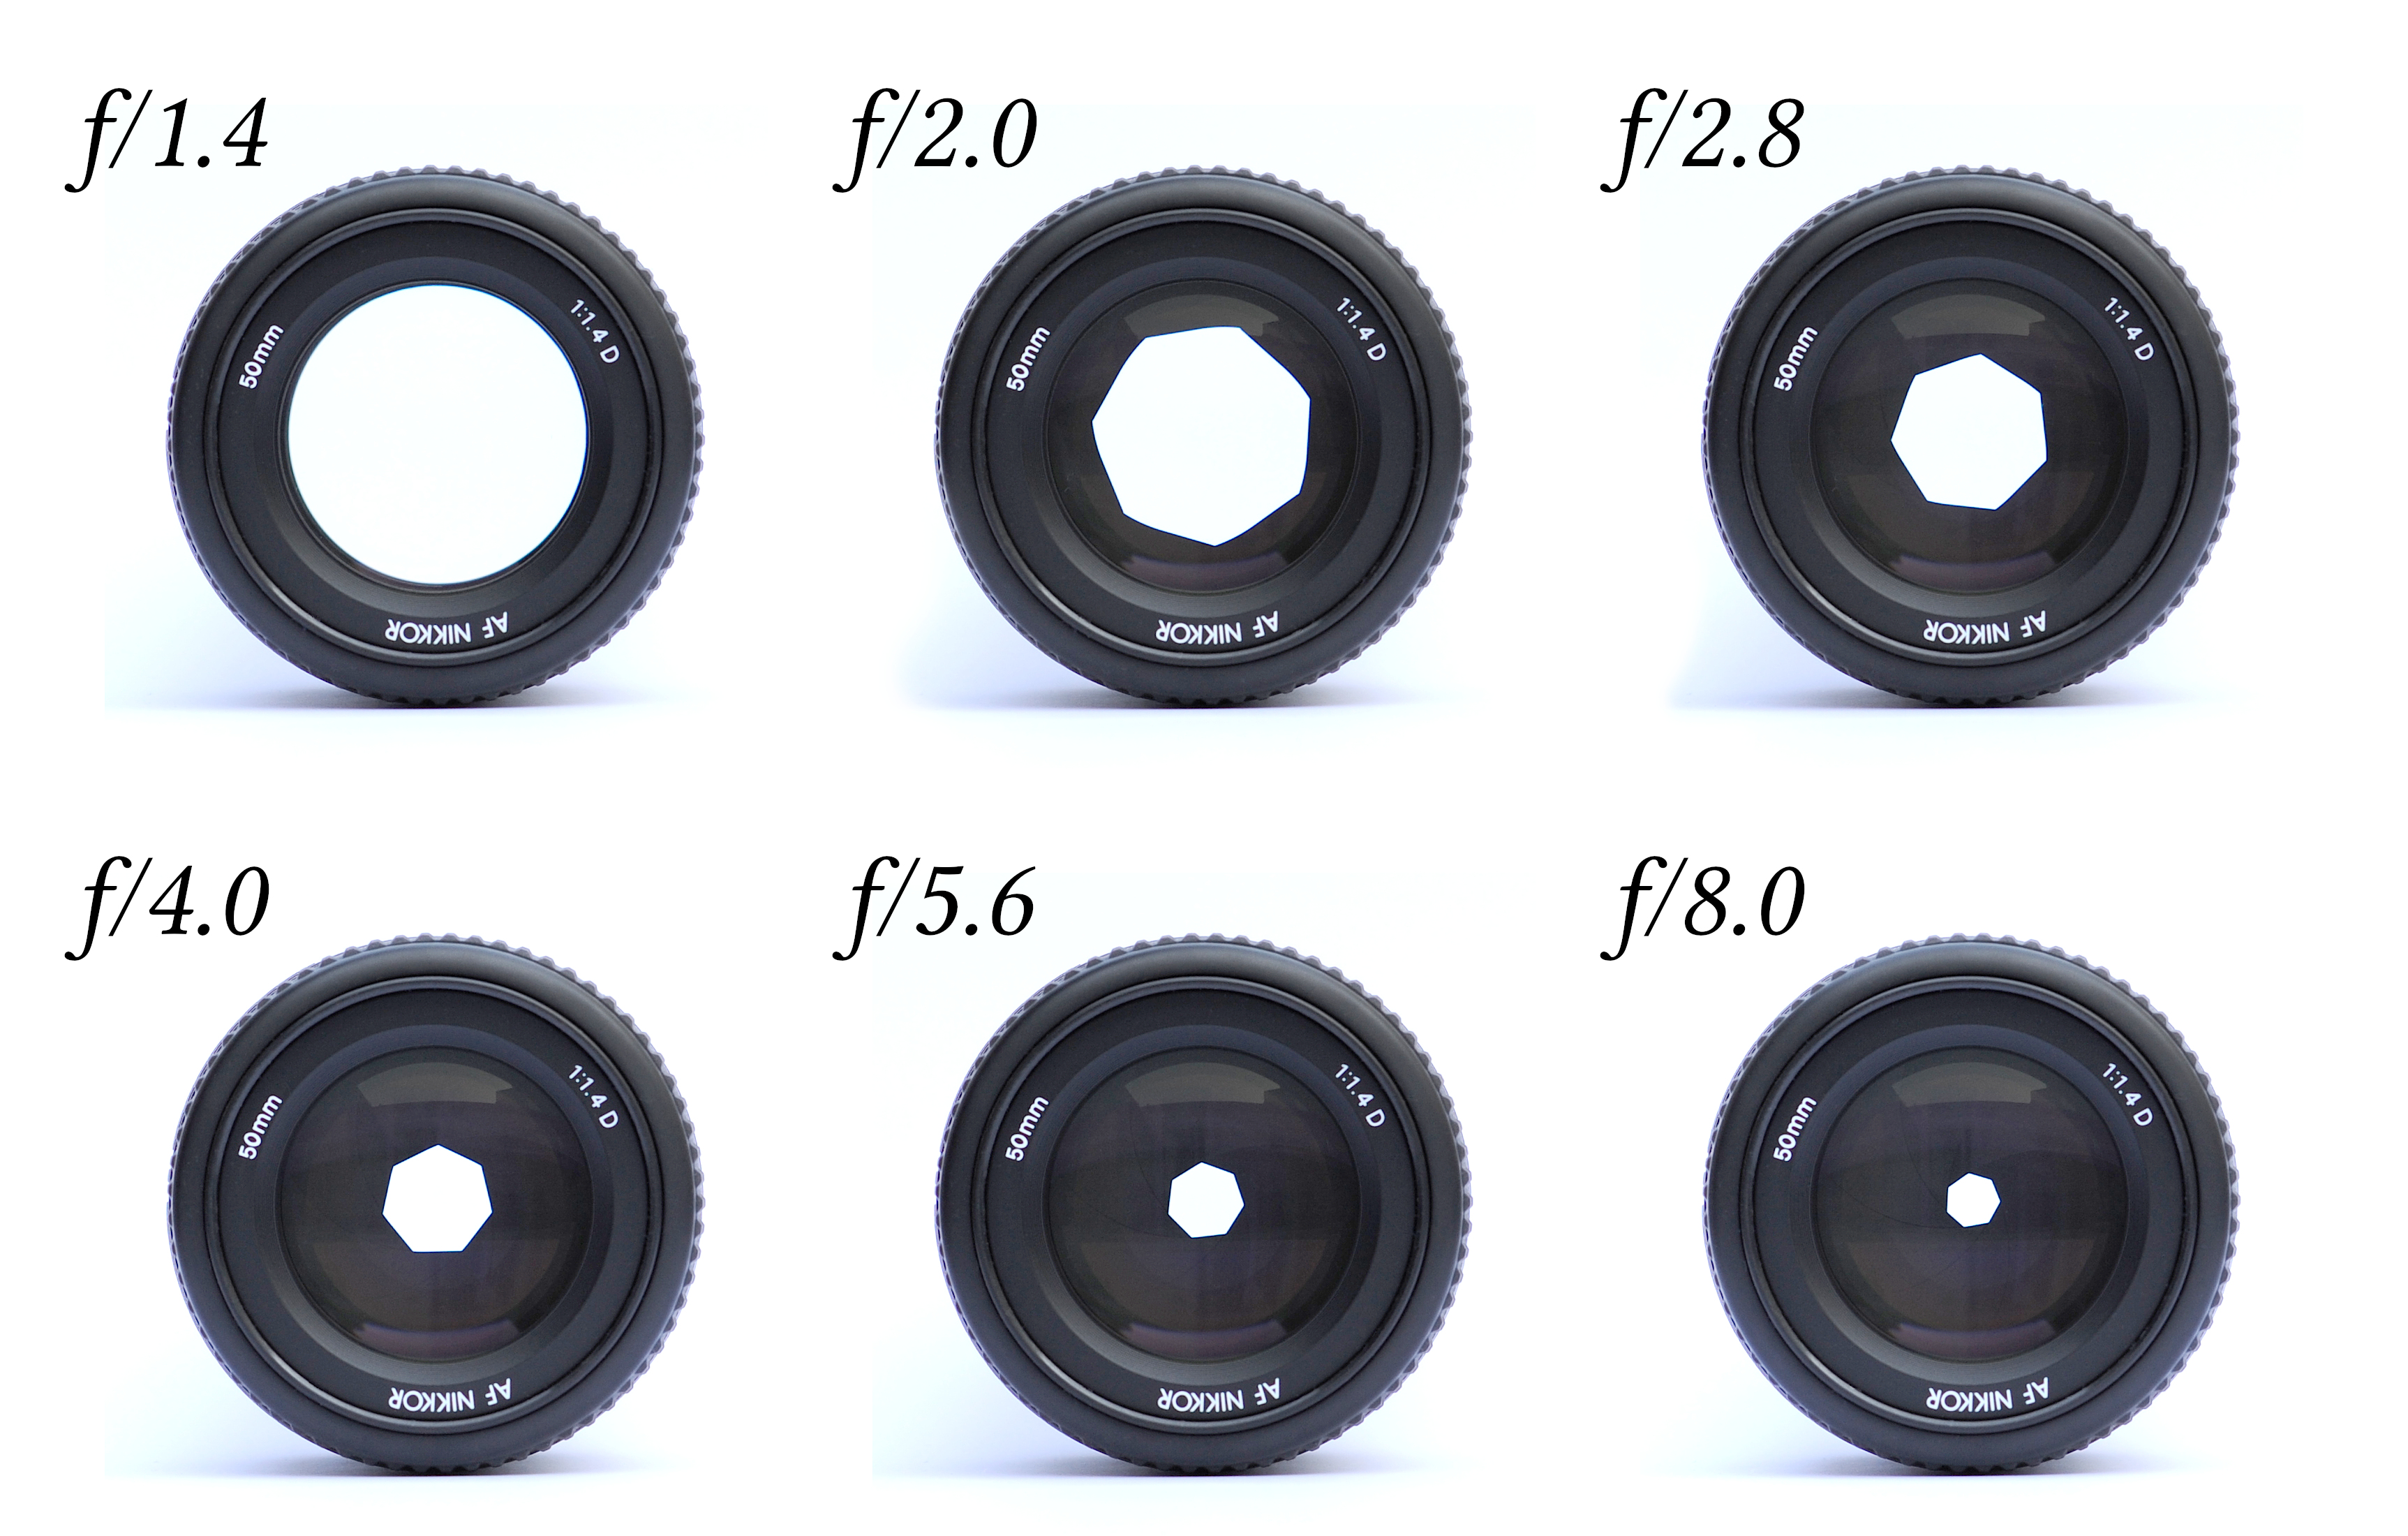
-
- Aperture Diagram
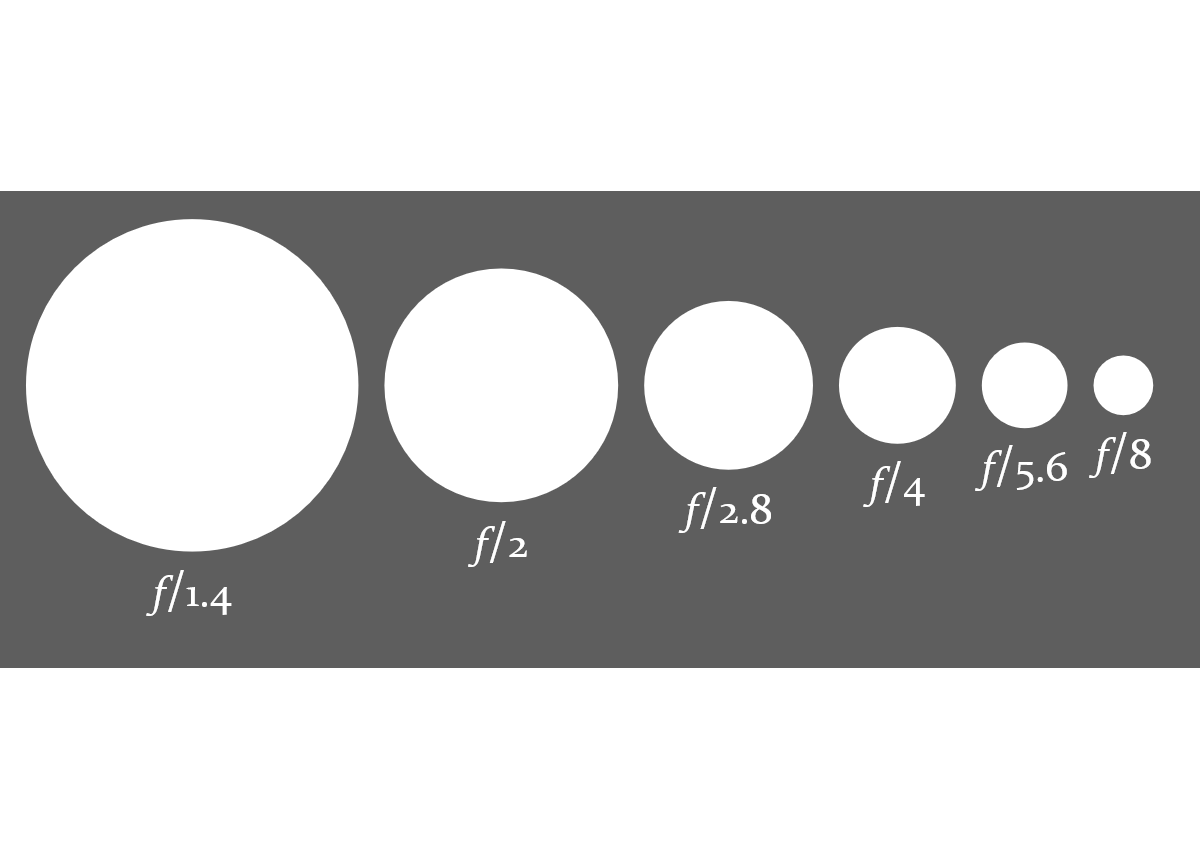
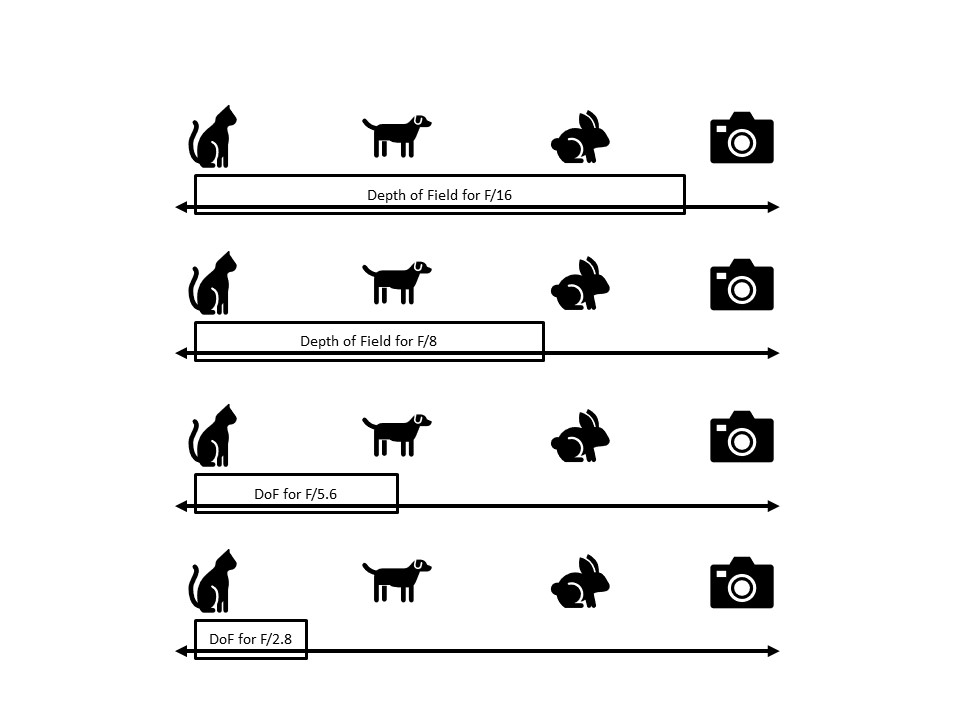
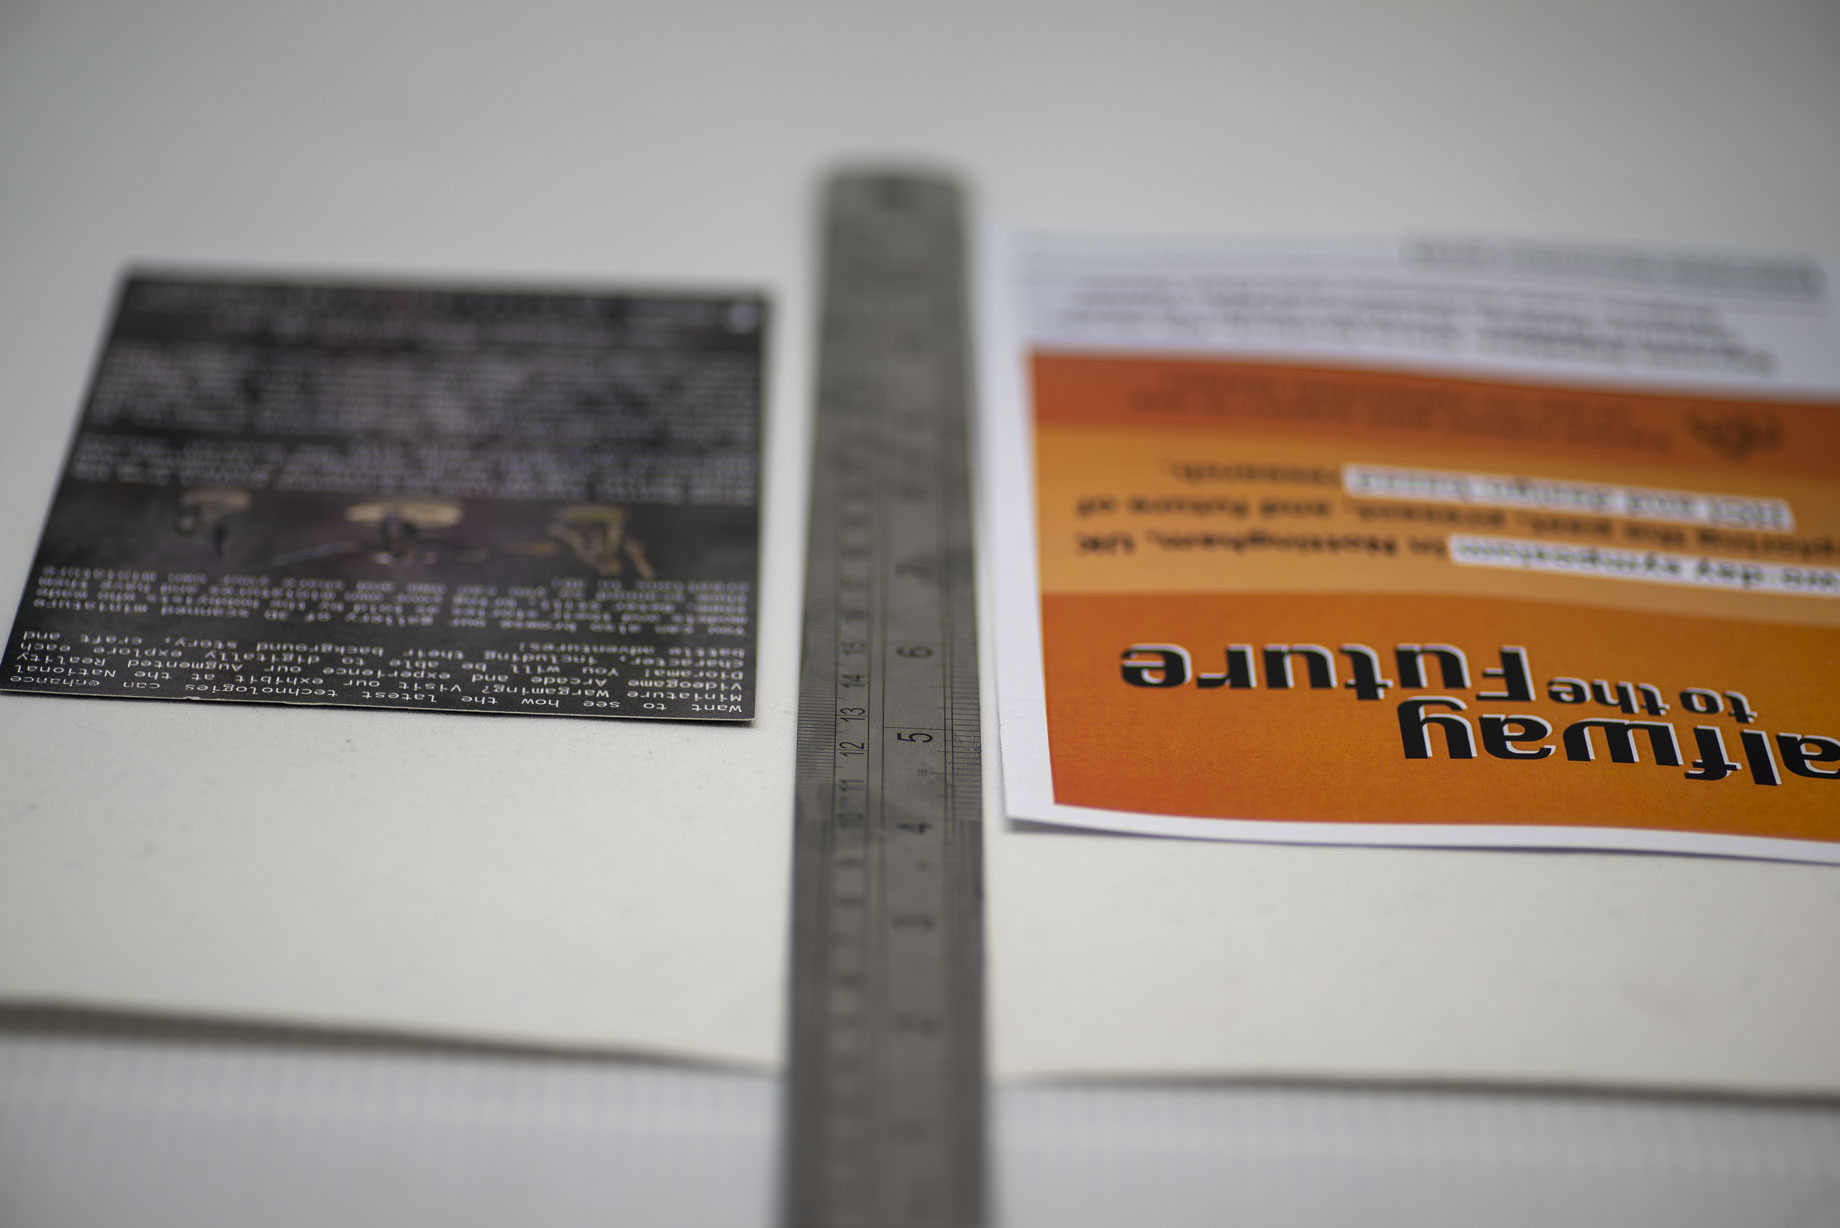
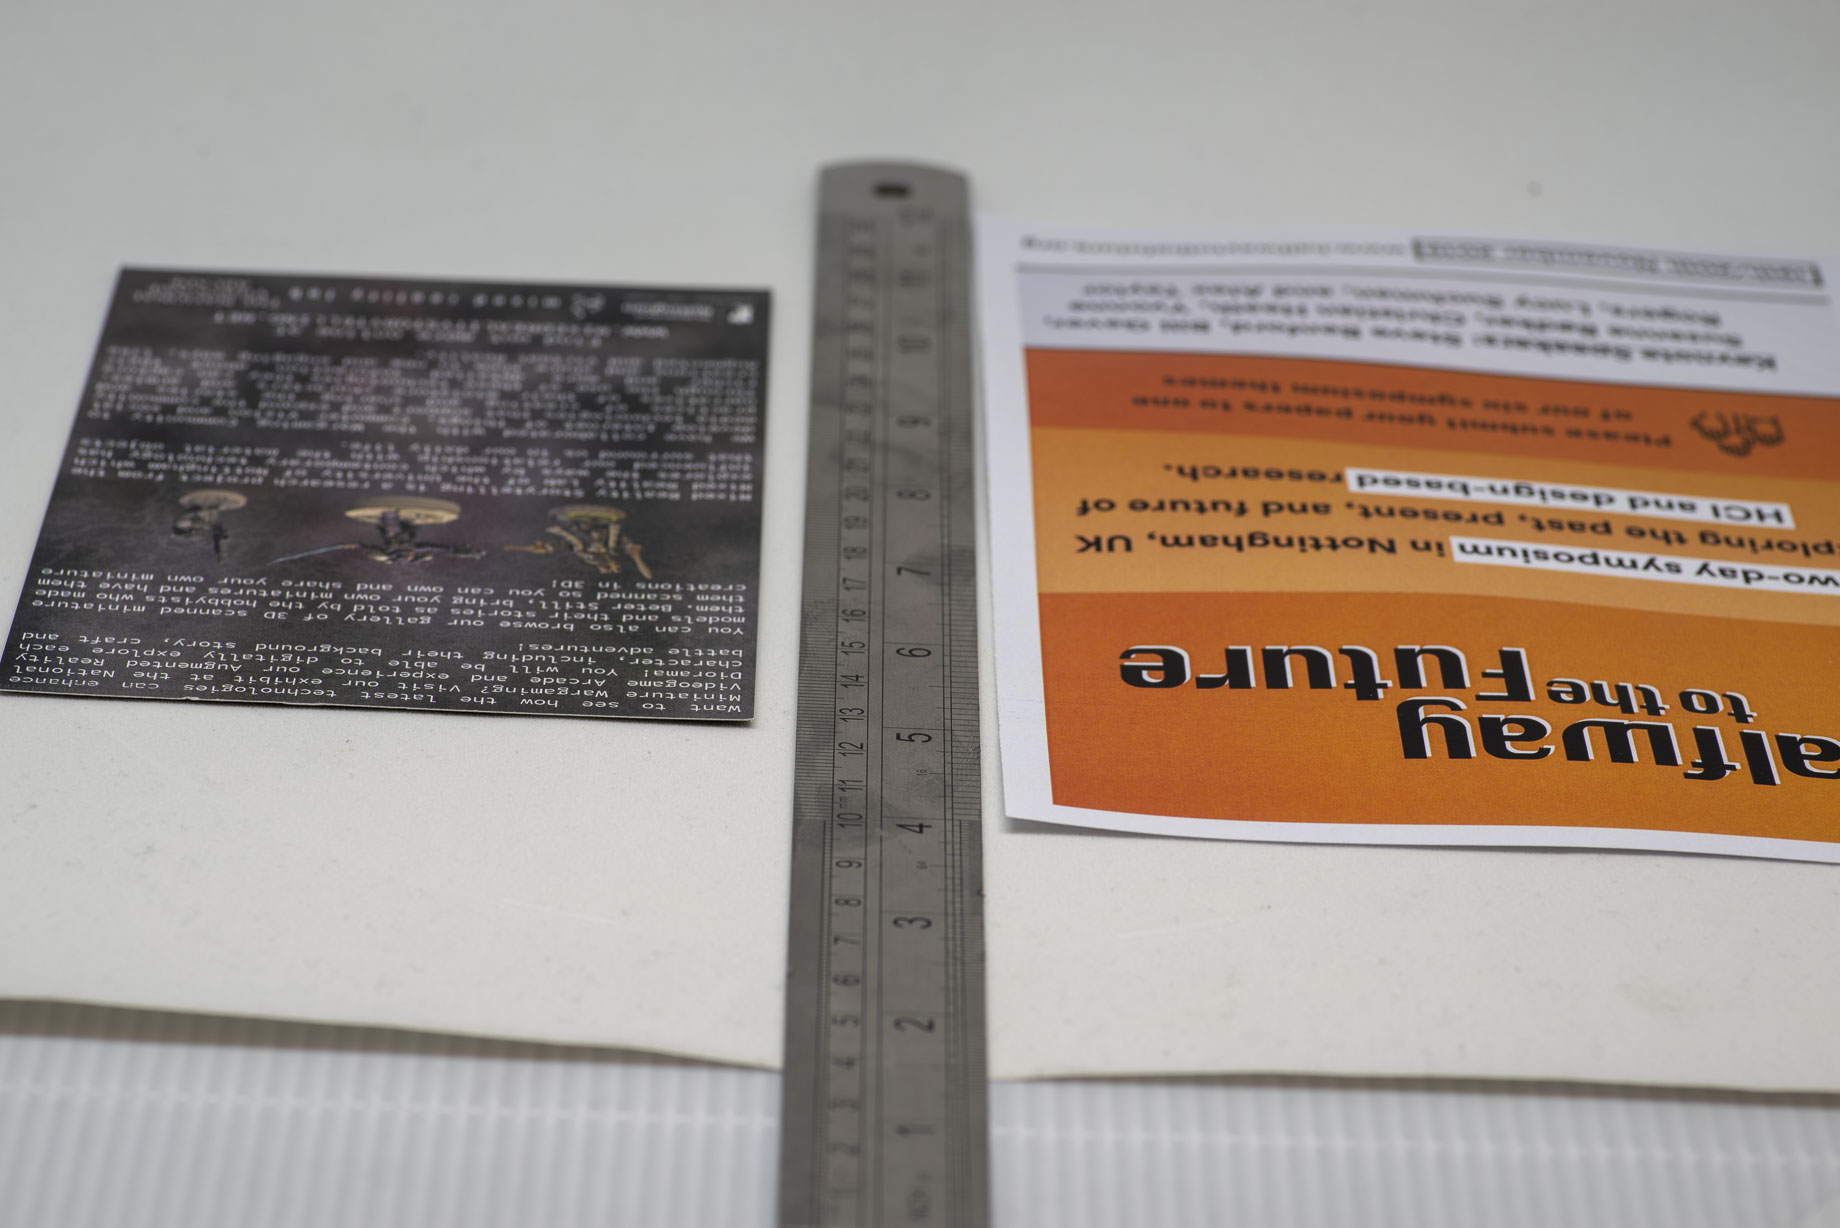
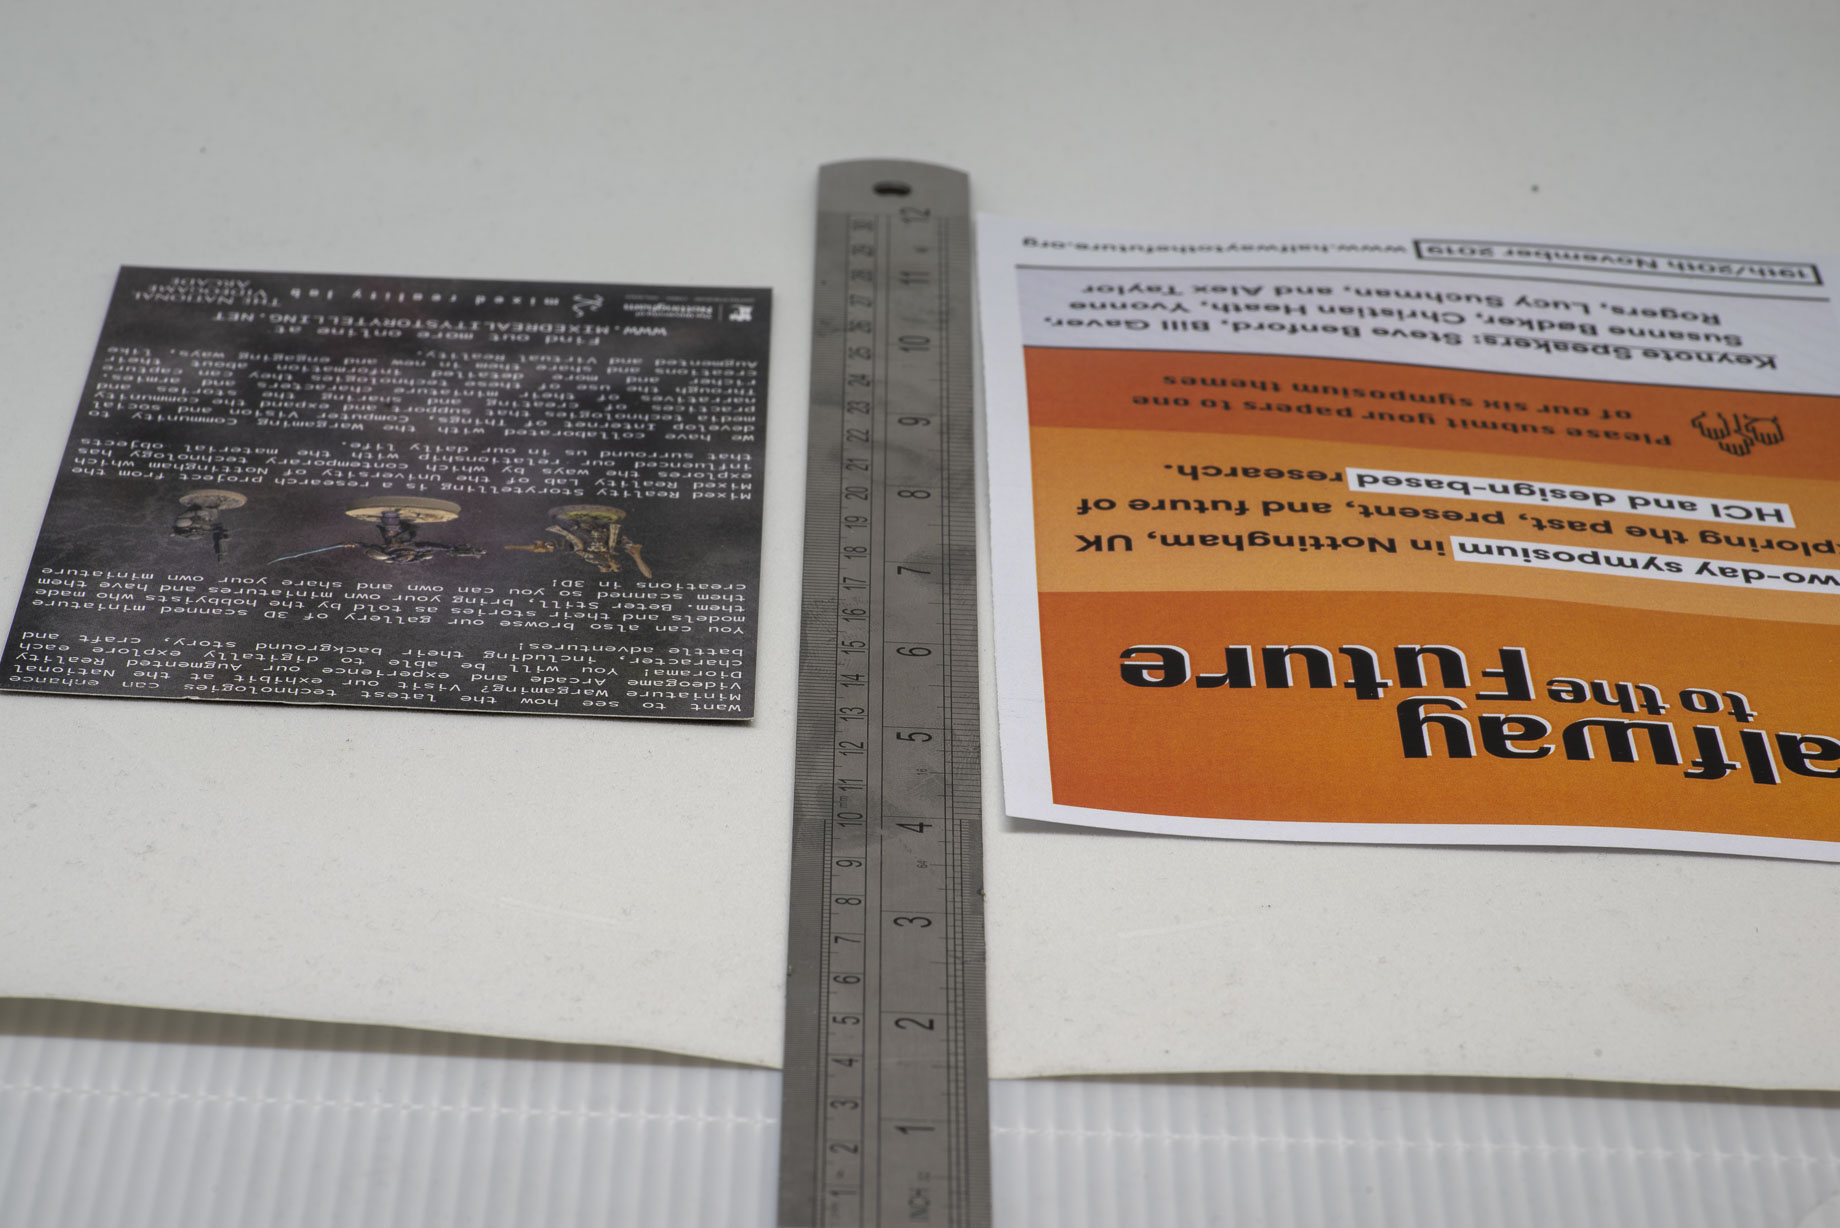
That reason is the Depth of Field. In simple terms this is the amount of your scene that will be in sharp focus, as opposed to being blurry. Lenses can be set to focus to a specific distance within a range. Many cannot focus at very close distance, but almost all of them can be set to focus at ‘infinity’. This means that you can often struggle to take clear pictures of objects up close without a specialised lens known as a Macro lens, but can always focus on the far objects and the horizon. Most common lenses can focus on objects in range from about 1 meter in front of them to infinity, this is known as the Focus Distance. The Depth of Fields however refers to the ‘portion’ of that range that will be in focus at any given time. A way to understand this it to visualise a straight ruler between your camera and your subject. Along the length of the ruler the writing will be blurred apart from a portion which is close to equal to your focus distance. As you adjust the focus of your camera lens that clear portion on the rules will move, with the clear section moving backwards or forwards as you adjust your focus to be closer or further away. But only a portion of the ruler will ever be clear, never the entire length of it. The Depth of field is the ‘length’ of that clear portion. Smaller aperture sizes allow you to have a greater ‘depth’ of the scene in focus, while larger apertures can narrow that focused depth to the size of a finger or less. This becomes important when you want to photograph several things that are set at different distances to you, or when you want to photograph a long or large object and have all of it in focus. It should also be note that in for most lenses the wide aperture results in a softer image overall, with tighter apertures resulting in crisper images.

These three fundamentals are but the tip of the iceberg that is the photography discipline. However they are a good starting point and keeping them in mind can help you quickly improve your results, diagnose issues and disambiguate the terminology in guides and gear.
To summarise:
- Understanding how light behaves and interacts with the objects you wish to photograph is a good place to start.
- Beyond artistic and creative considerations, the Exposure of a picture is one of the practical measures for the ‘quality of a photograph.
- Exposure is primarily dependent on three factors: Sensor Sensitivity, Shutter Speed and Aperture Size
- The Sensor Sensitivity reflects how much light your camera needs to create a discernible image.
- Higher sensitivity requires less light, but creates grainy pictures. Always try to keep the sensitivity low.
- The Shutter Speed is the measure of how long your camera sensor is exposed to light.
- Slower shutter speeds let in more light which is useful in dark conditions, but are susceptible to motion, producing blurry images.
- The Aperture Size is the size of the opening in the lens that focuses the light on the sensor.
- The wider the Aperture the less light, or time, you need to take a picture, but this reduces the clarity and the depth of field.
Photography for Photogrammetry
Having introduced some of the very basics of Photography, we can now consider how this apply to our particular application of 3D scanning physical objects. Just like with any other specific application of Photography, narrowing the focus of the objective introduces just as many benefits as it does issues to overcome.
In order for the Photogrammetry process to work and produce high quality models, it is imperative that the objects to be scanned are are photographed as clearly as possible with the entire object in focus. From what we read above in the fundamentals, this means that we will have to keep our ISO as low as possible, ideally never over 200 as even low levels of grain or noise in the final images will make the alignment step of the Photogrammetry process fail. It also means that we will need to keep the aperture size of the lens as small as possible – or at the best value for the specific lens we are using – in order for the image to be as crisp as possible and for the entirety of the object to be in focus for all the images.
All the above mean that we will need the subject to be very well lit, as the combination of low ISO and an a small aperture means that very little light will be reaching the low sensitivity sensor. However there is a limit to how much light can be cast on an object, and we will need to compensate by using slower shutter speeds.
This however is not a problem for most Photogrammetry work. As you are most likely scanning still inanimate objects there is – in theory – no time limit for each shot. In this case you can use shutter times that are as long as you need for a properly exposed image.
There are situations where this may not be the case of course. If you are trying to photograph an object that is outdoors or outside of controlled conditions, such as a monument in a public space, or a artefact at an archaeological dig, your object may not be moving, but the environmental factors possibly will. The sun is constantly changing position and as such both the shadows and the light of your scene will change. Other environmental factors such as the wind may also be a challenge and will have to be taken into account.
Photographing moving subjects for 3D Scanning is possible, but quite challenging and requires considerable preparation and investment. For the process to work you need to capture the object from all angles – simultaneously. The only way to do this photographically is to surround your subject with several cameras, often hundreds of them, aimed at them from every angle, and then have them all capture an image at the same time. Detailed instructions for this technique are currently beyond the scope of the ScannerBox guide, but can be pursued should the application necessitate it.