Scanning an object using Photogrammetry – Step by Step!
The following page aims to provide you with a quick step-by-step guide to creating a 3D model of a physical object by 3D scanning it using Photogrammetry. This guide will equip you with an overview of the process, the kinds of tasks and equipment involved, and the kind of equipment you might need. If you find that this is something you may wish to use in your own work then please have a look at the rest of the ScannerBox guide which goes into more detail on each of the aspects.
ScannerBox focuses primarily on the application of 3D scanning in the domain of cultural heritage and creative industries, with a particular emphasis on enabling public exhibits which visitors can interact with in real time.
Step 0. What do you need?
In order to 3D scan something using Photogrammetry you will need, at minimum, the following:
- An object (or environment) to scan.
- A way to take pictures – any camera will do to begin with, but better equipment will give you much better results.
- Photogrammetry software and a computer to run it on. There are several options for software listed in our guide.
- A way to share (or disseminate) the 3D model that will result from your scan.
Step 1. Choosing and Preparing your object
The first thing to decide is what you will scan! There are a few challenges to keep in mind here. Photogrammetry works by using several images of an object to create a detailed 3D model. This would mean that anything you can take pictures of can be 3D scanned, and this would be ‘almost’ correct.
Photogrammetry works by using computer vision to ‘make sense’ of the the content of the images and create an understanding of the shape of an object, just like our brains do all the time. However, our brains are still superior to computer vision when it comes to understanding what they are seeing, particularly with complex scenes, such as reflections and transparent or translucent objects. This means that objects with shiny or see through surfaces are very difficult or even impossible to scan using photogrammetry – for now at least. THere is plenty of ongoing work at improving both the capture techniques, and the ability of computer vision to scan difficult objects, and there are some mitigating techniques to try, which are mentioned below.
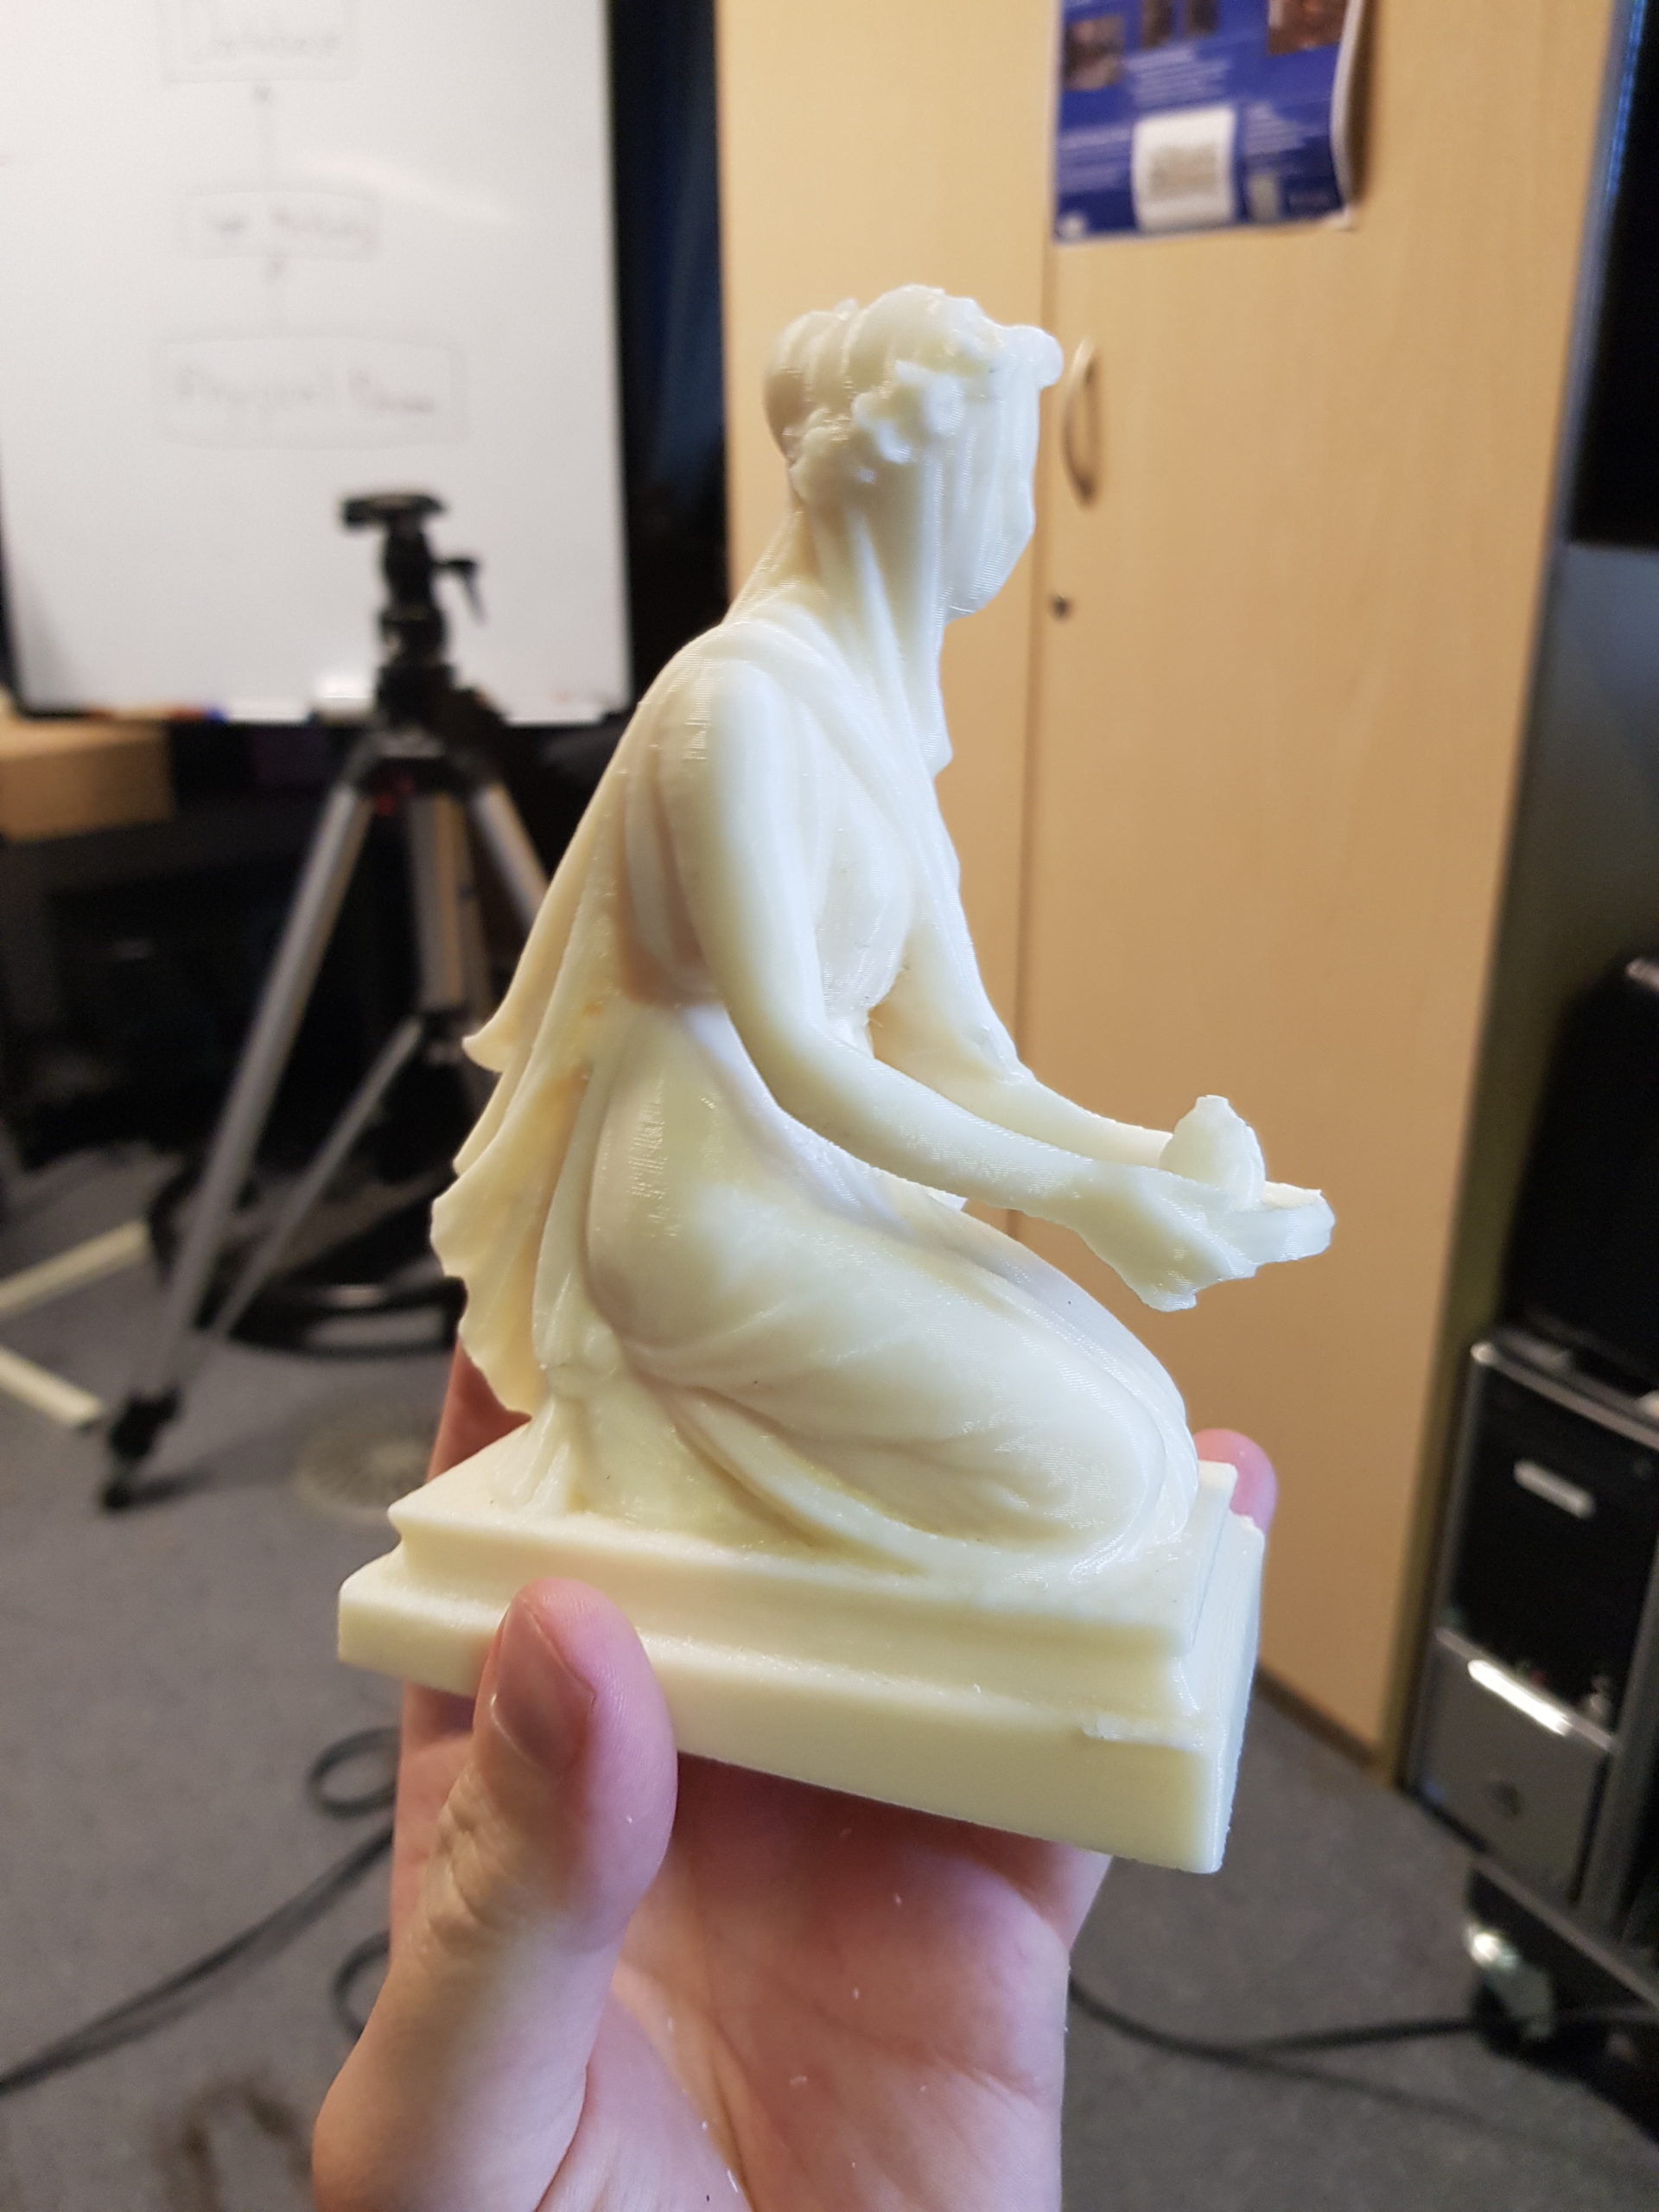
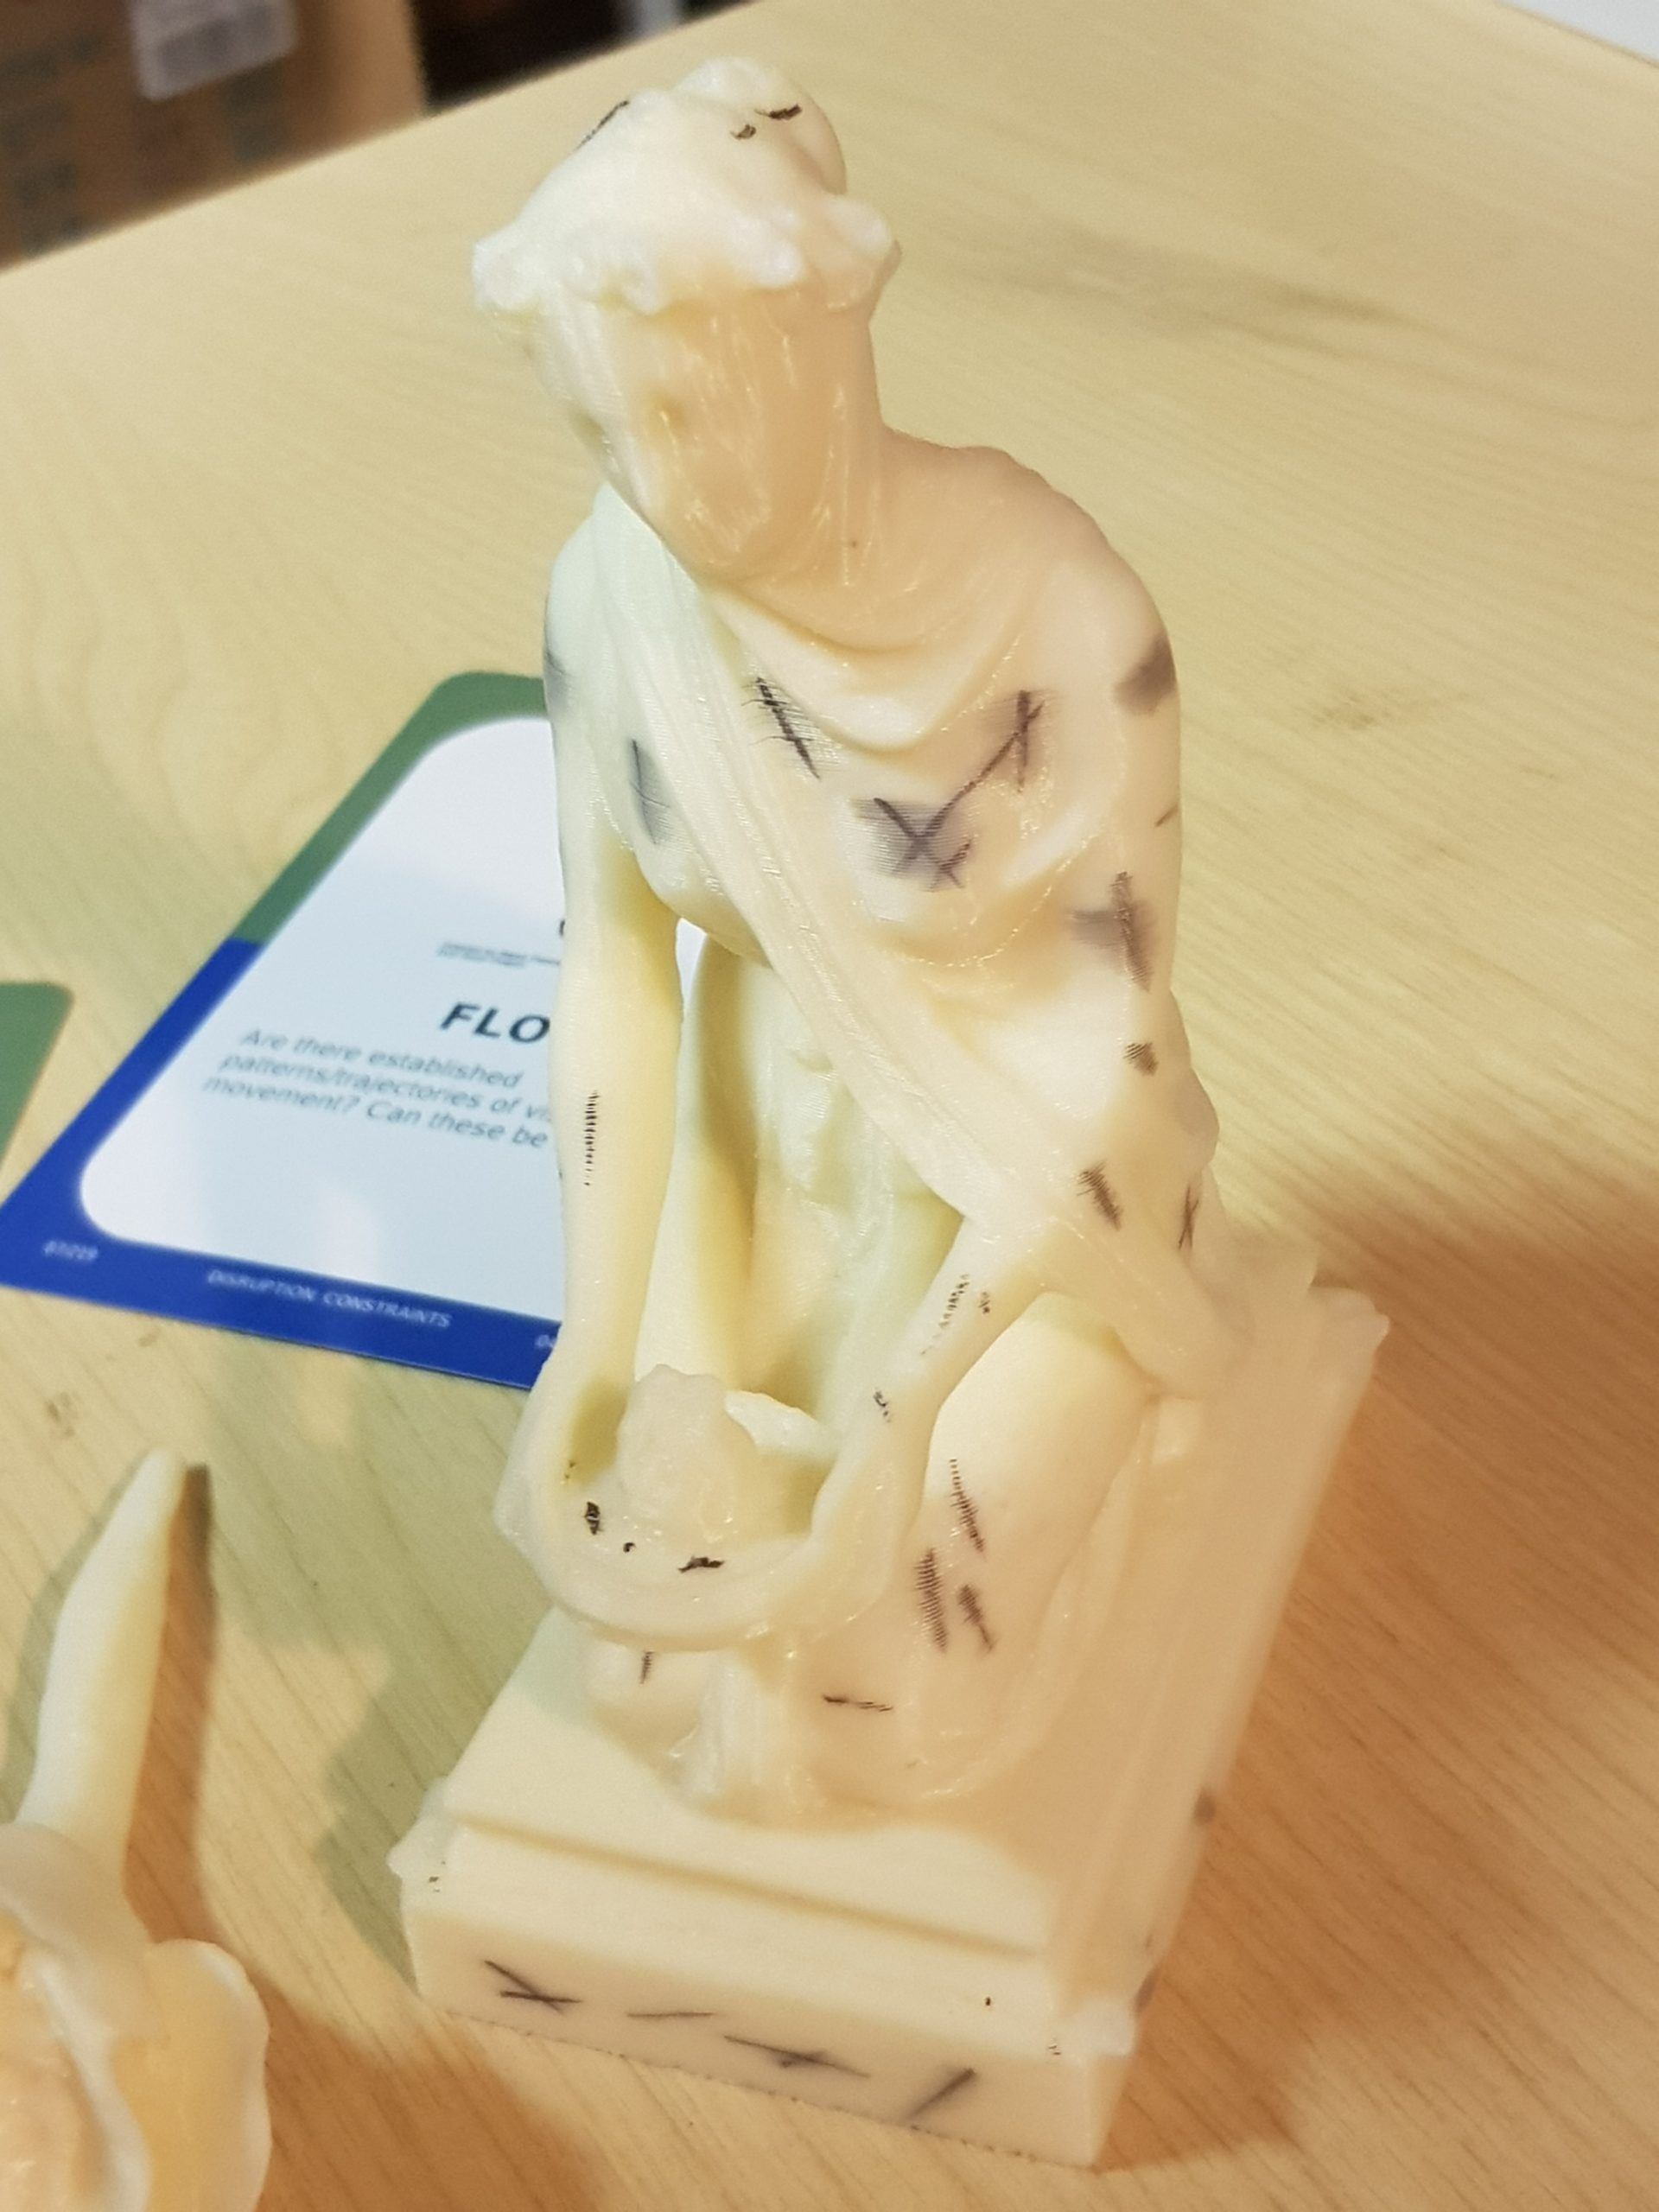
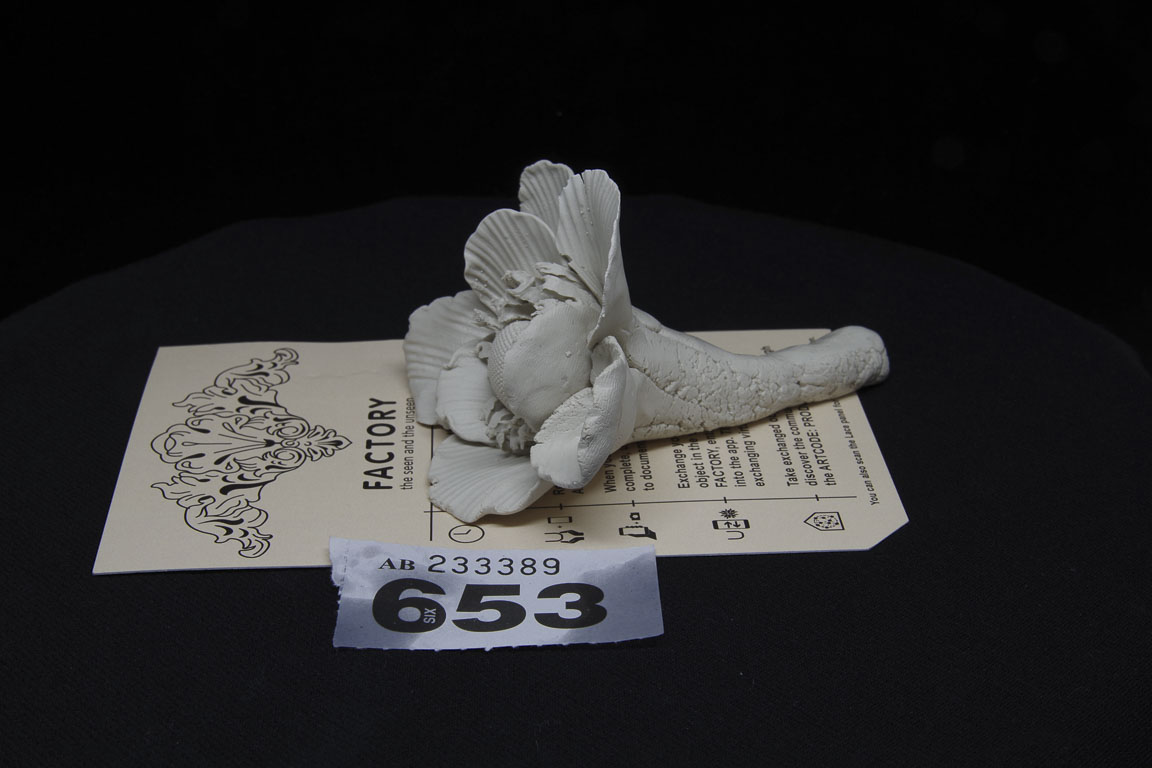
But you can indeed create, or try to create a scan of any photographed object. The scale does not particularly matter, as long as you can take a picture of it. Images from drones and satellites are often used to create 3D models of landscapes and terrain, however our example case below outlines the scanning process for an object that is about hand-sized, as in something that can be comfortably picked up. This could be one of several objects in a museum’s collection, or something that visitors brought or created during an interactive visit, such as a personal object.
For optimal results it is best to focus on objects that have rich and opaque texture with lots of detail and features. It is easier for the photogrammetry software to makes sense of the images the more detail there is to work with.
With regards to preparation, ideally you want to do very little to the object, in order to capture it in its normal state. There are a few exceptions to this.
One case is when it is necessary to scan an object with shiny or translucent surfaces. One technique that can be used is to cover the object with “Matting Powder”. This is essentially a white powder, like talcum, that removes the shine and gives objects opacity and texture, making them easier to scan. THe powder can then be carefuuly removed. Another option – faster but irreversible, is to spray the object with a matte spray. The problem of course in both cases is that it the object no longer looks the way it normally does. But if you really need to scan the shape of an object, and are not concerned too much about its colour and texture, these techniques are certainly an option.
Another challenge is the need to mount or stabilise the object you plan to scan. As photogrammetry is based on analysing the images of an object, it makes sense that any part of the object that is not photographed will not be scanned and will not appear in the final 3D model. Thus you will usually have two cases to deal with, which can be generally be split alot along those that can ‘stand’ by themselves, and those that can’t.
The first case is where you will have an object with a base, or bottom surface, that you will use to place it on a surface. A straightforward example would be something like a vase or a statue. These most often have a flat base and can stand by themselves, and there is little point to taking pictures of that surface as it is essentially a flat plane. The other case is where you have an object with no obvious ‘base’, and that you need to photograph from all sides. An extreme example would be something like a sphere or a ball, but ideally we would capture every side of every object we would try to scan, even if they have one or more flat surfaces. There are two ways to handle this: the first is to mount the object in such a way as to keep it stable and in such a position so that you can take pictures of all side of it. The other is move your object between sets of images, such as rotating it or flipping it on its side, to take pictures of its other side. This approach has benefits, but it introduces several issues and complicates the photography stage considerably
Step 2. Take pictures of the object
Beyond the choice and preparation of the object, the next major stage, and arguably the hardest and most complex, is that of creating a set of images of it. This is a seemingly simple task, but there are many things that need to be taken into consideration, both to create an optimal result and to make the rest of the process as painless as possible. It can also be quite an intimidating proposition due to the amount of photographical skill and knowledge that is seemingly necessary. The ScannerBox page on the Photography Guidelines goes into more detail on what you need and what your options are.
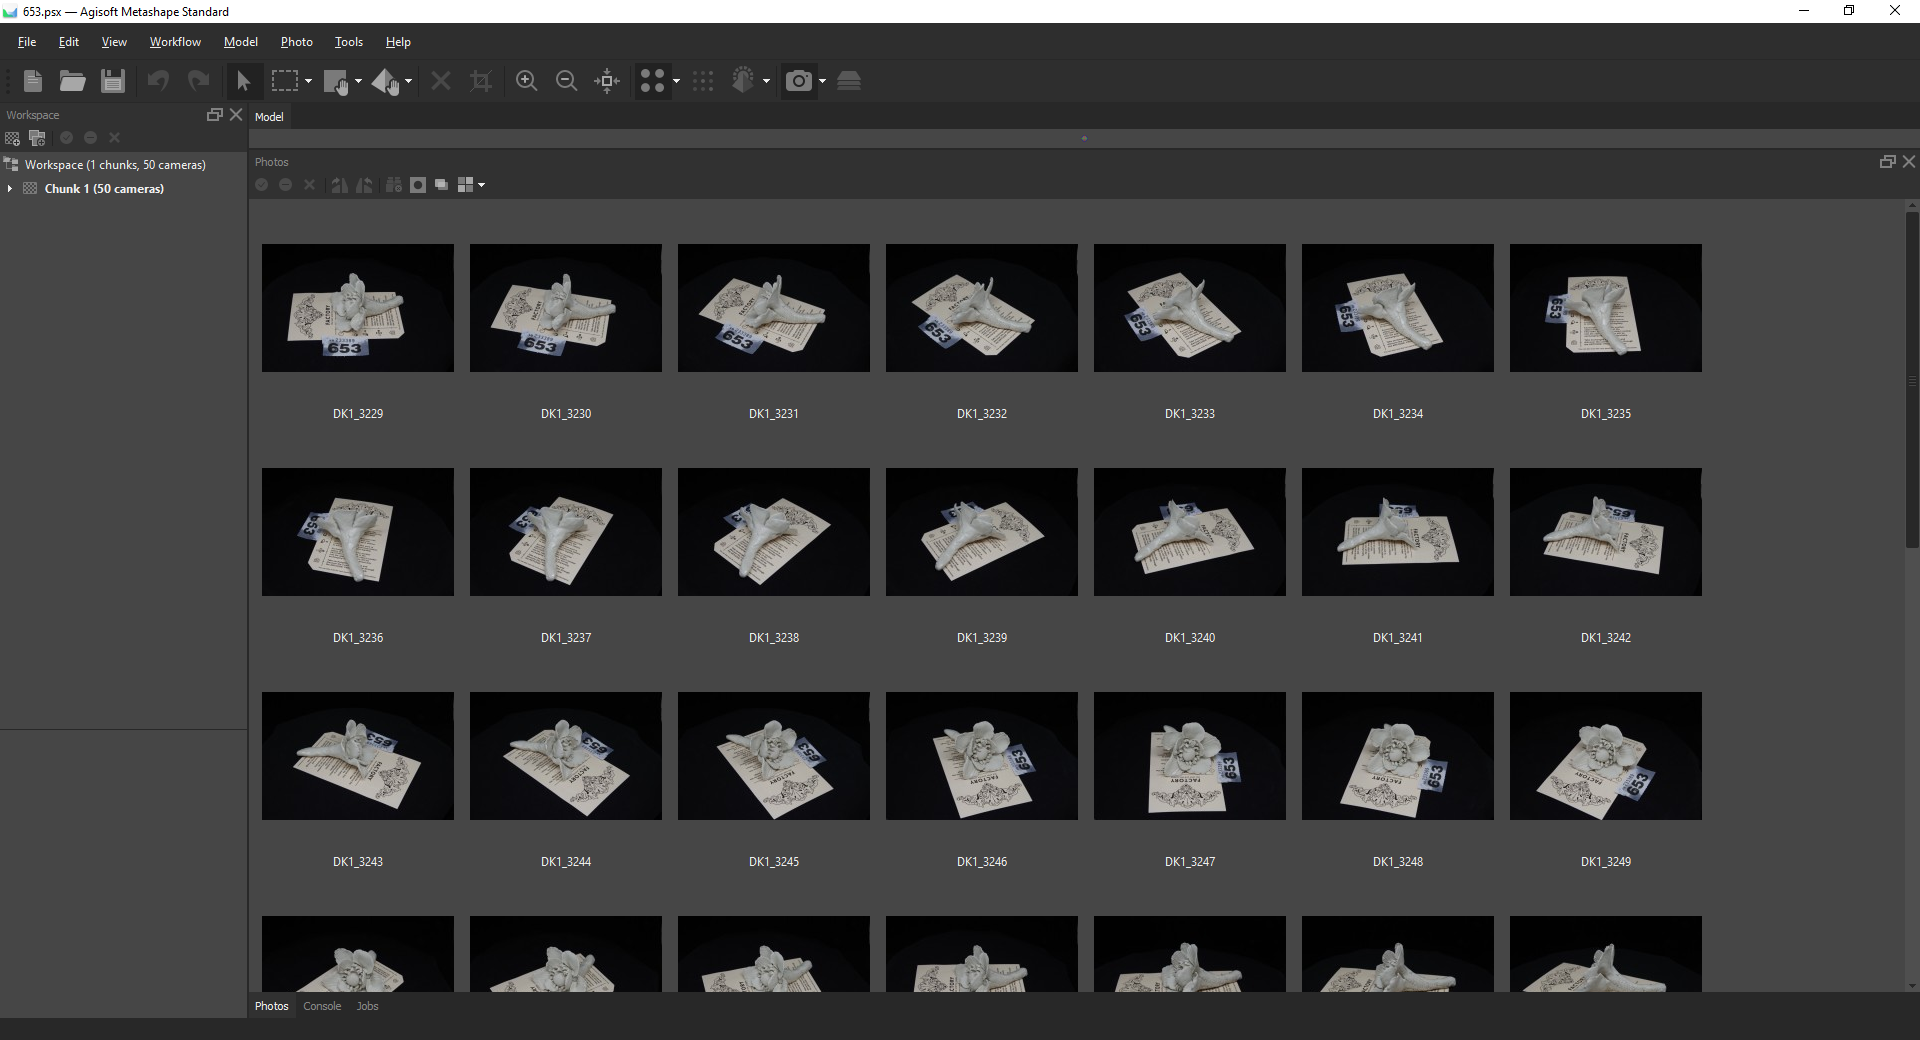
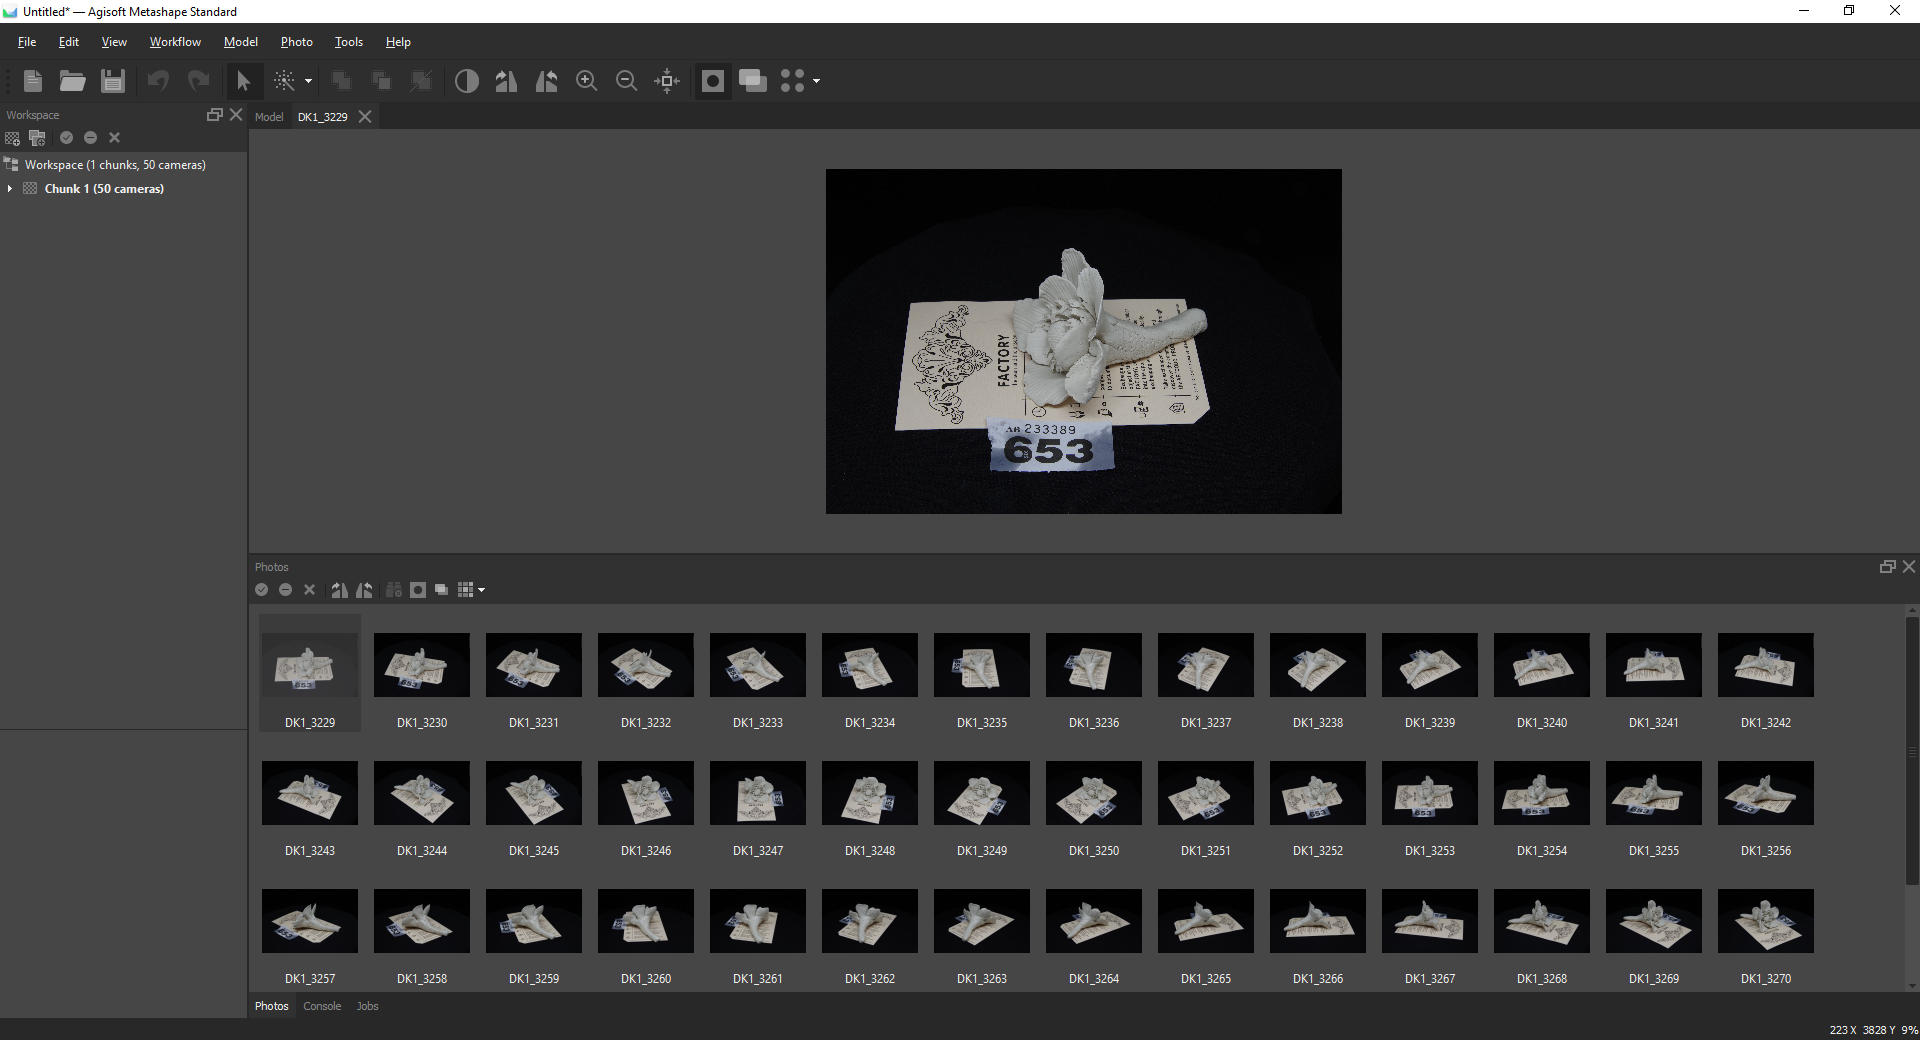
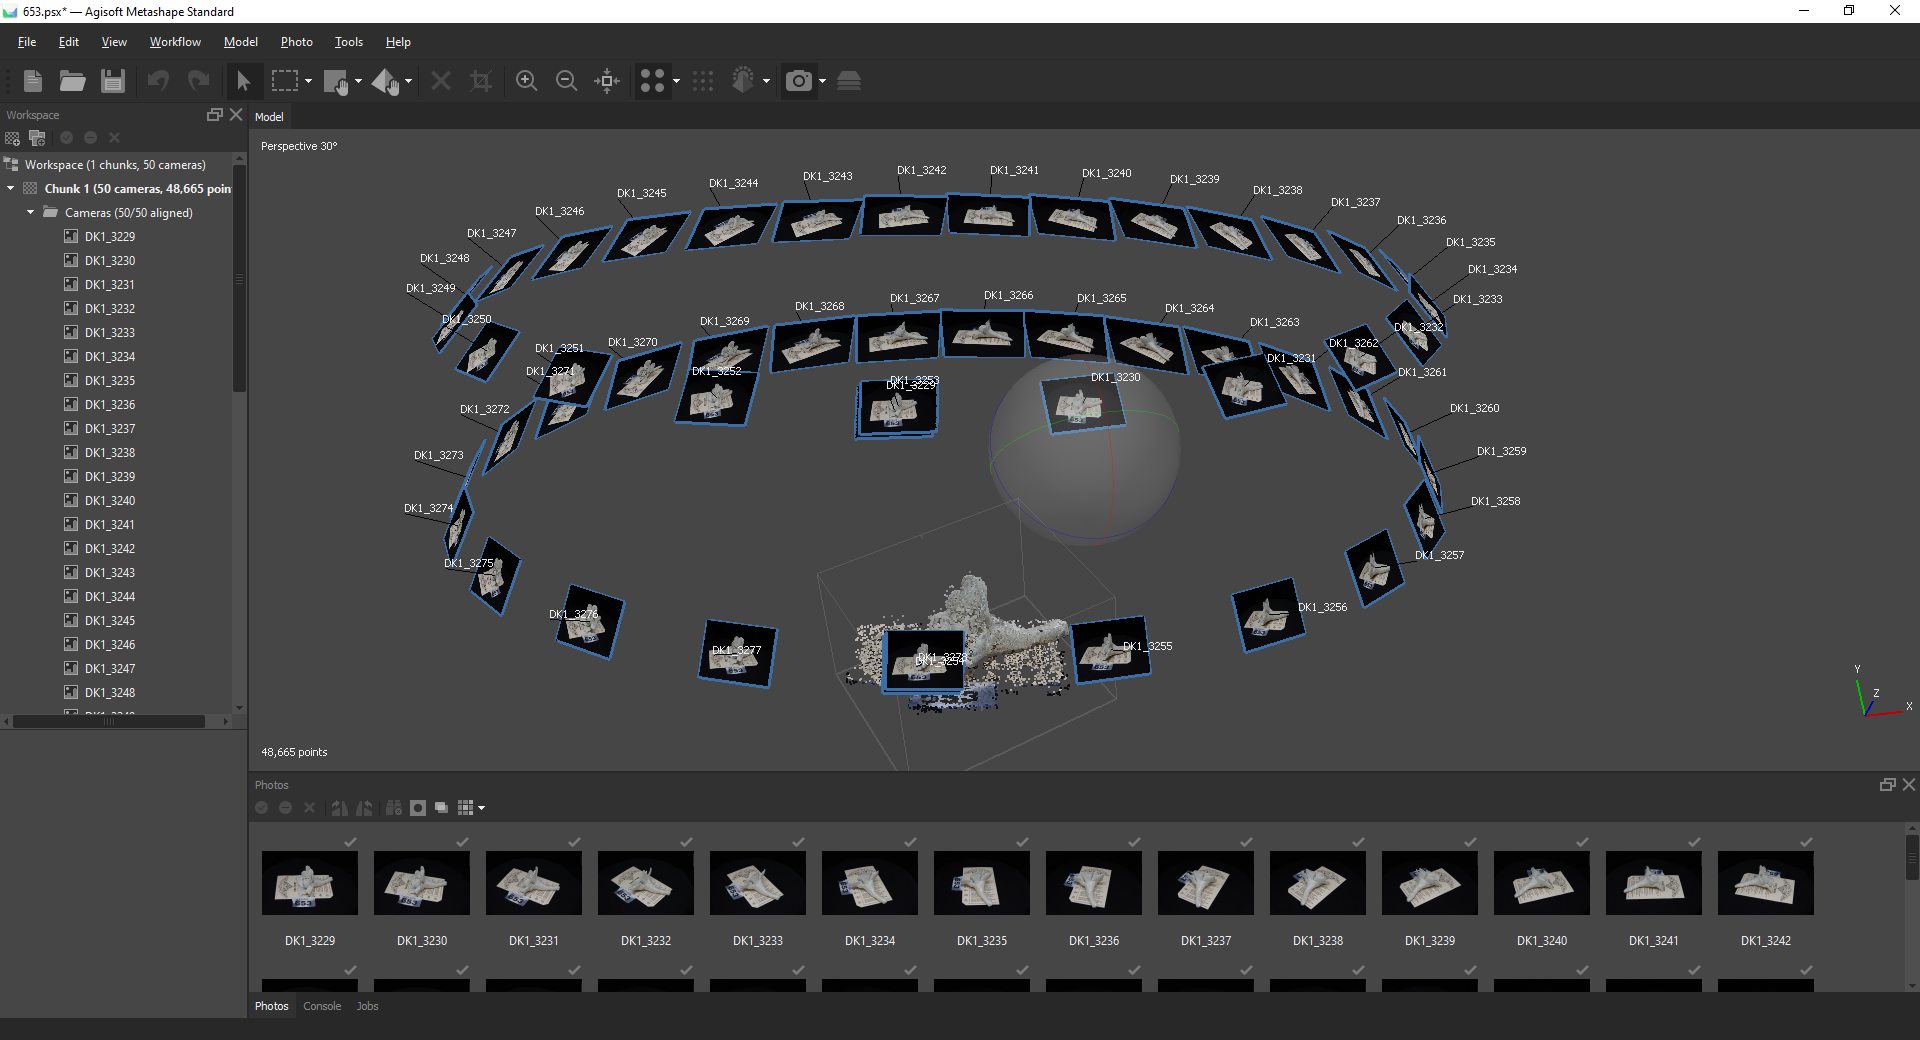
Having said that, the core task is relatively straightforward: You need to take a picture of the object from every visible side, maximising your coverage, while having a lot of overlap of the objects between each picture. This basically means that you will take a picture of the object, move it – or your camera – slightly, then take the next picture. Then you will move again and take the next picture. And so on until you have taken as many pictures of the object as possible from every possible angle. One easy way to do this is to place your object on a moving or rotating platform, such as a wheeled table or turntable, so that you can systematically change it’s position for every shot instead of moving your camera.
There are several things to keep in mind however. Each image should have plenty of overlap with the previous one. Foe example if you are rotating an object before each picture, try to only move it about 10 degrees. A good starting point is to try and have about 36 images of an object per rotation. However just rotating the object will not be enough, you will also need to raise or lower the angle of the shots as well in order to get pictures of the top and bottom of it. In the example where you are using a camera on a tripod aimed at an object on a turntable, then you would raise or lower the height of the camera. In that scenario we would recommend three rotations – or ‘spins’ – of 36 images per height, which would give you 3 sets of 36 images for a total of 108 images.
The next thing to consider is the background of your images. In order to get optimal results it is best to use a featureless background that contrasts the object you will be taking a picture of. Thus this is usually a flat coloured surface like a white, black or other block colour sheet. A bright green colour can also work well, similar to a green screen used in filming. Having such a contrast will help separate the object in the foreground from the background and will aid the photogrammetry software to generate a more accurate model as we shall see in the next section.
A final consideration is to enhance the detail of the object to assist with the photogtammrtry process. If the object you are trying to photograph is relatively featurelss in both shape and texture than the software may have issues aligning the images. Examples of such object might be a plain coffee mug or bottle, or stainless steel tube.
Step 3. Process the Images into a Model
Once you have an appropriate set of images for the object you want to scan you are ready to generate your 3D model! The good news is that the process from this point on is relatively automated, assuming you have taken into account the considerations we mentioned above!
The photogrammetry process can be summarised in the following steps:
- Import Images
- Image Alignment
- Sparse Point Cloud Generation
- Dense Point Cloud Generation
- Mesh Generation
- Texture Generation
Depending on your chosen photogrammetry software (see our recommendations here) the exact method of each step will be slightly different, but the approach is generally the same.
I. Import and prepare the Images
This step is repetitively straightforward and involves getting the images you took of the object you wish to turn into a model, into the software. At this point you should have copied the images from your camera onto the computer that you will be using for the processing. We would recommend that you put the images for each object into a separate folder – where you can also save the project file.
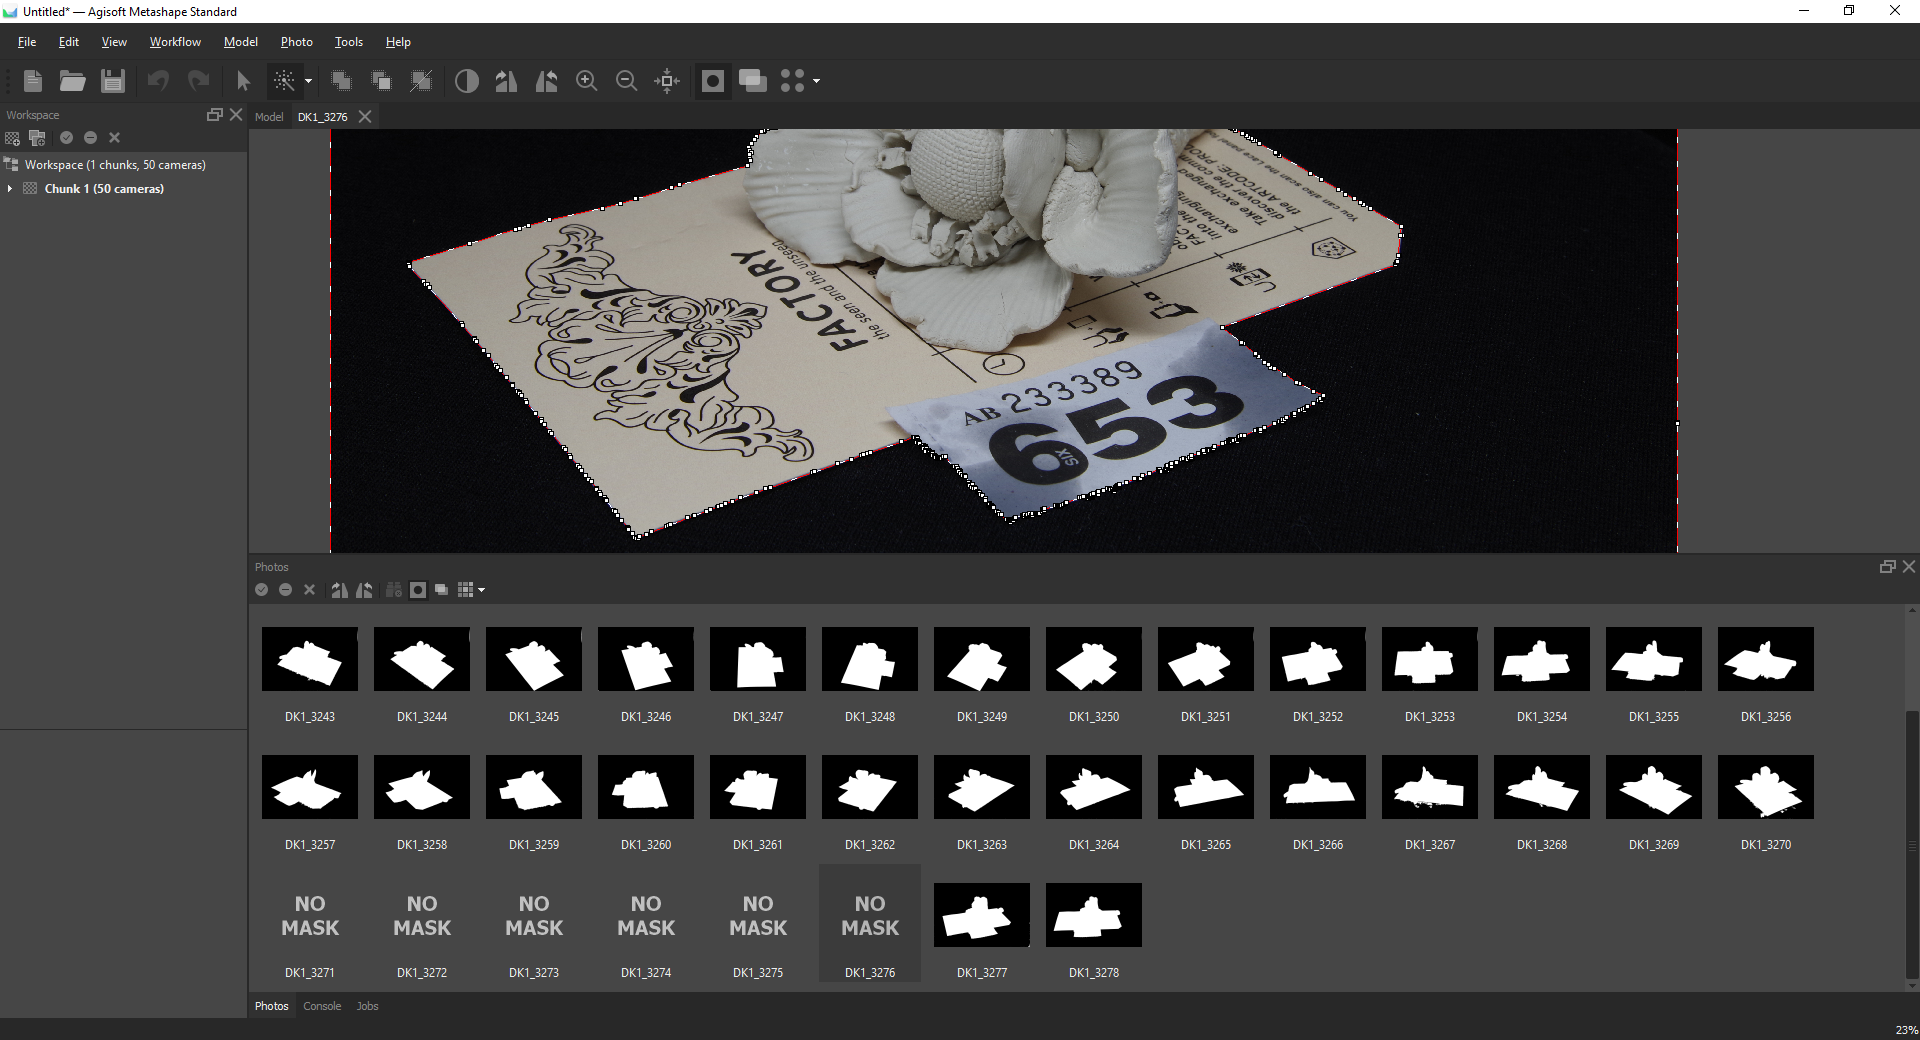
You can use the “Import/Add Photos” dialog in your software, but in many cases you can simply drag and drop the photos from your folder straight into the software. At this stage you can decide whether to mask any of the images. Masking involves selecting the parts of the images that the software should ignore. There reason to do this is if your pictures have been taken in an environment where the object is hard to pick out from the background. Ideally you will have minimised this issue by following the photography guidelines here – in which case you can skip this step!
II. Align the Images
The next major step is to align the images. The good news here is that what used to be a laborious manual process is now a very effective automated step. Assuming you have followed the suggestions in the Photography guidelines, and the object or environment is not particularly tricky, then the alignment step should complete without any particular issues.
You may find that some of the images cannot be aligned, or their alignment is obviously wrong. This can have several causes, and these can be mitigated by masking the object in the images as mentioned in the previous step, or by providing additional images and removing the problematic ones.
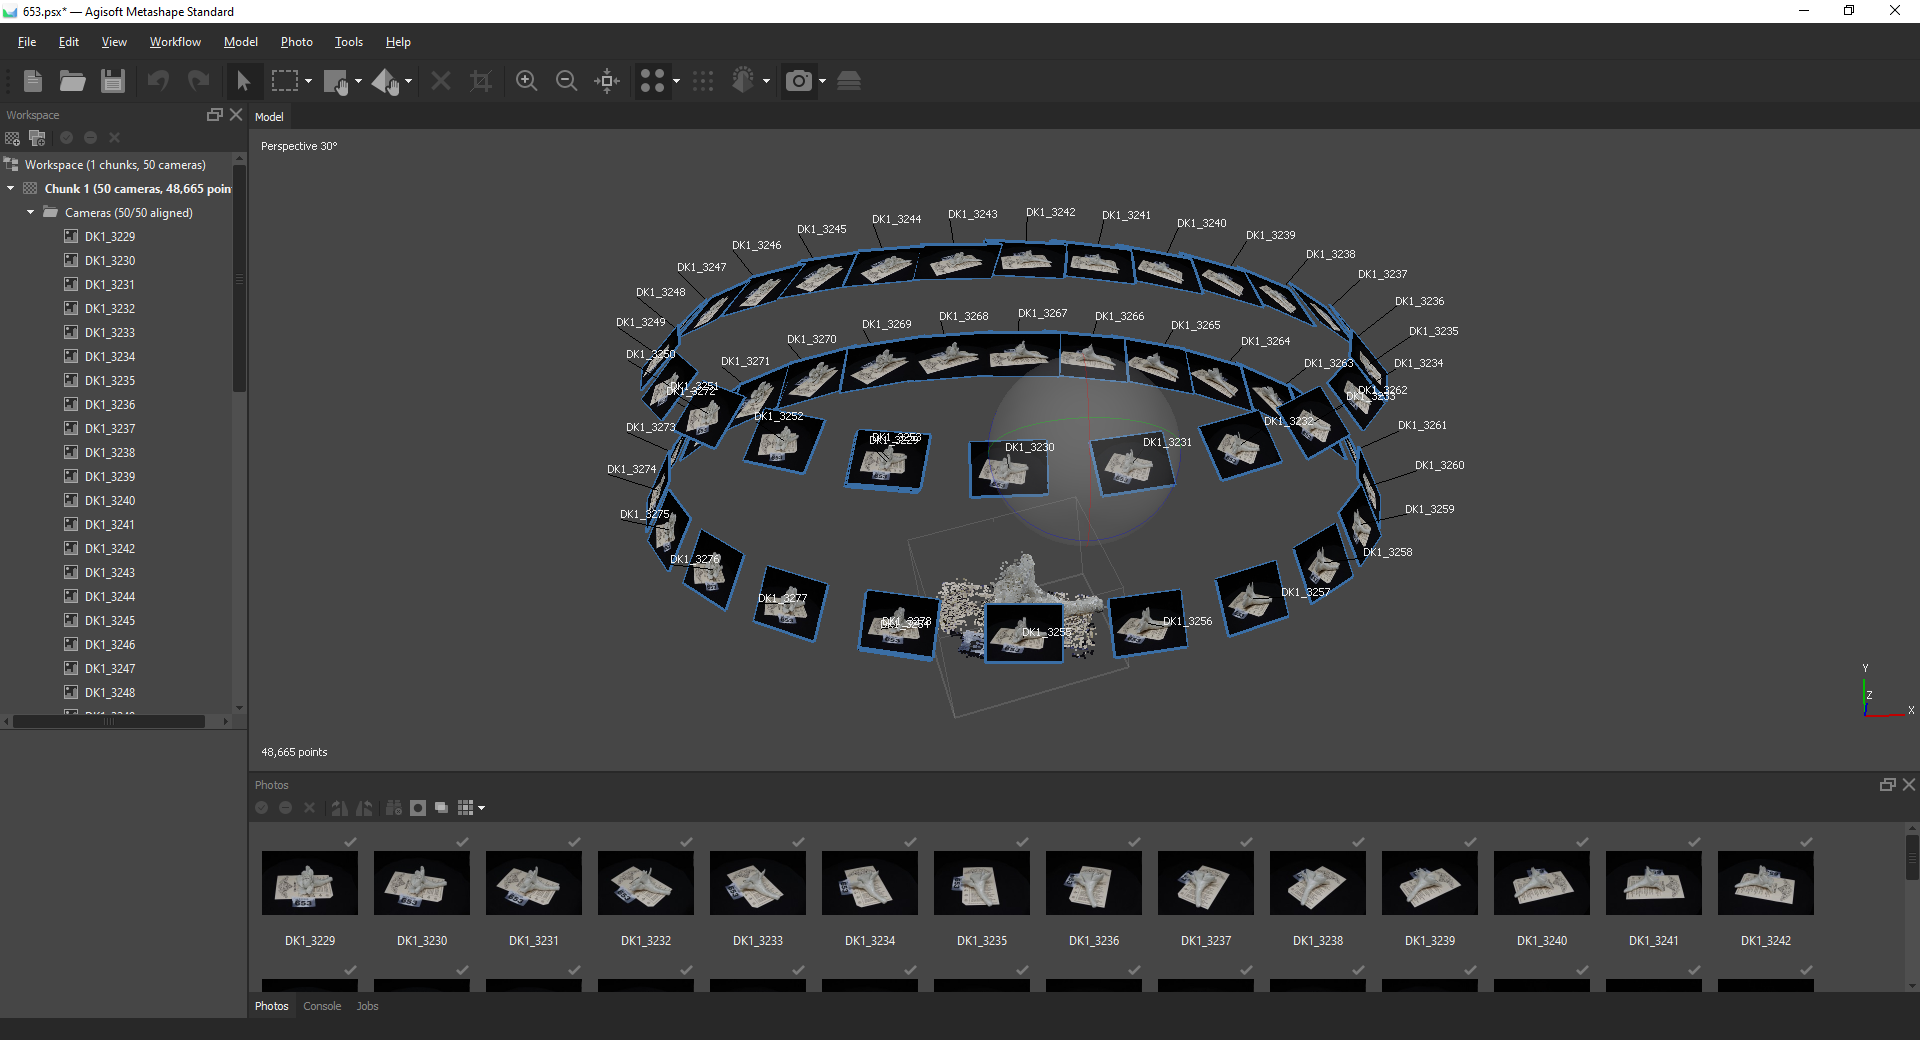
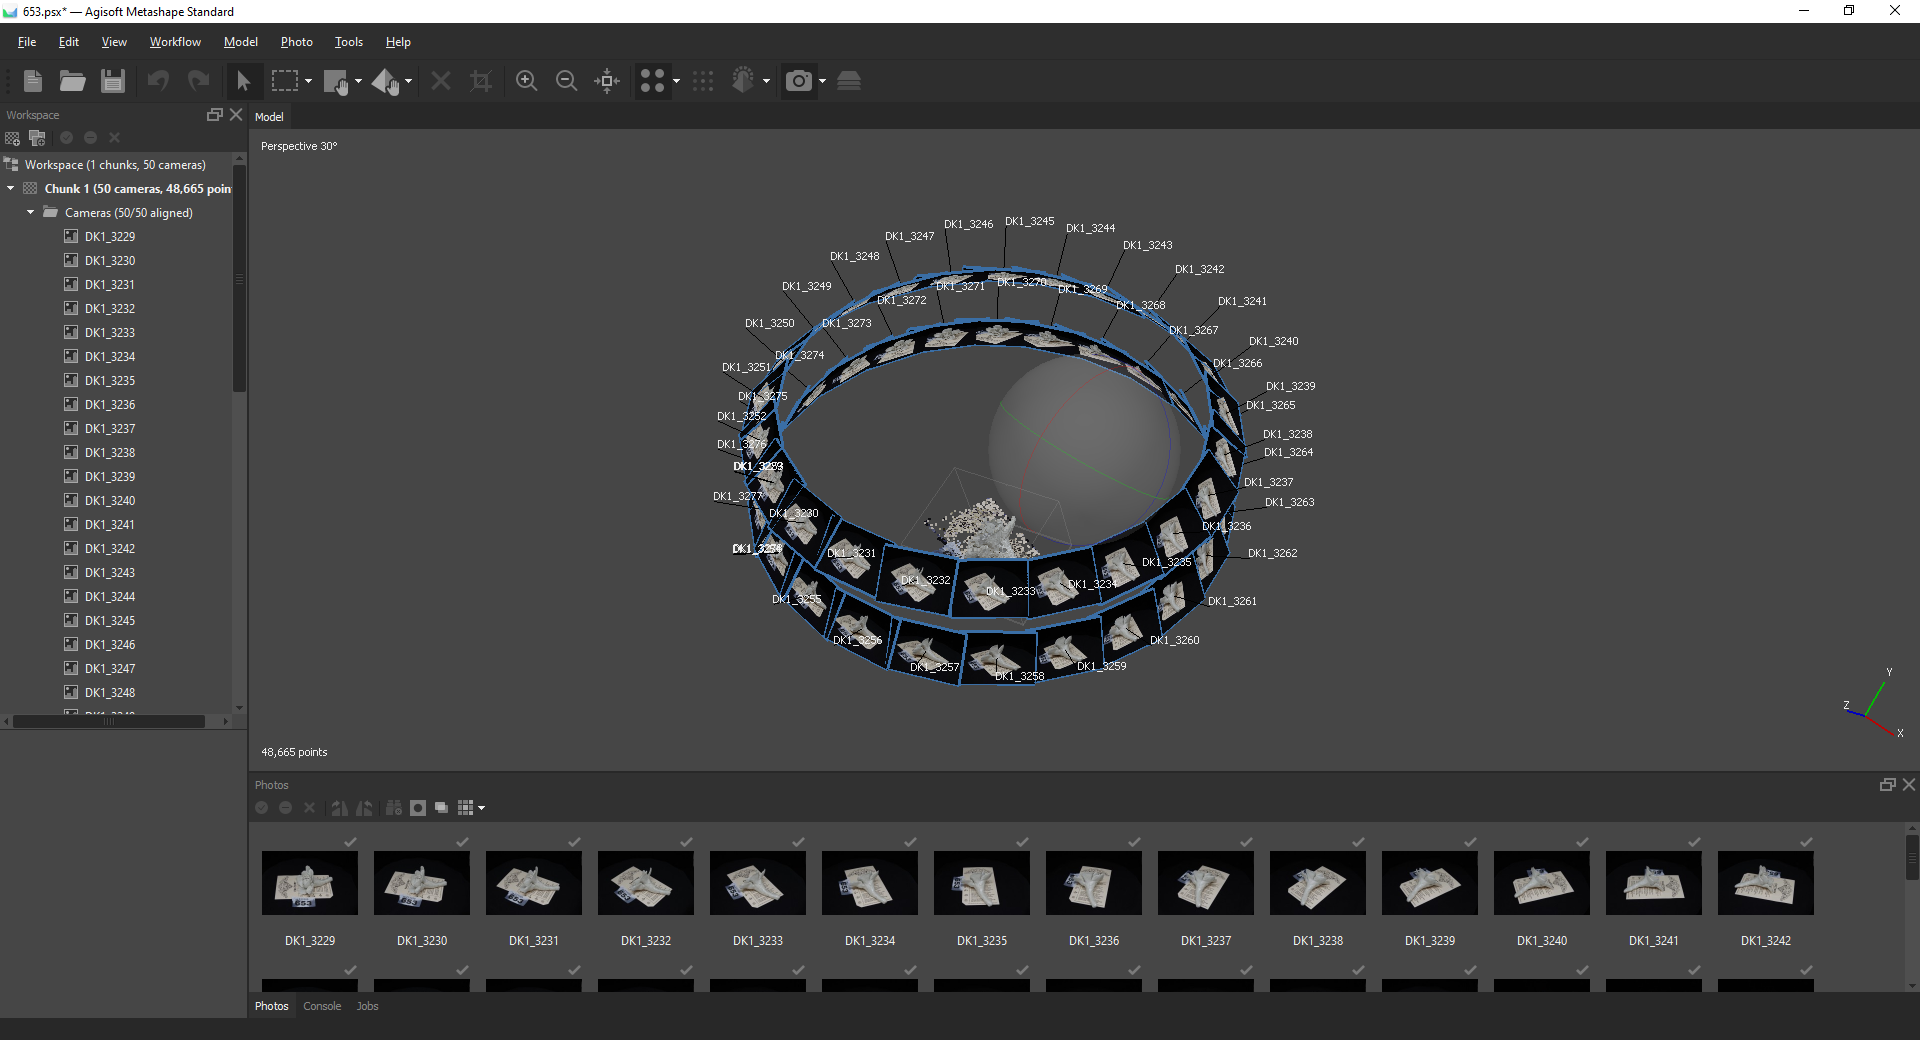
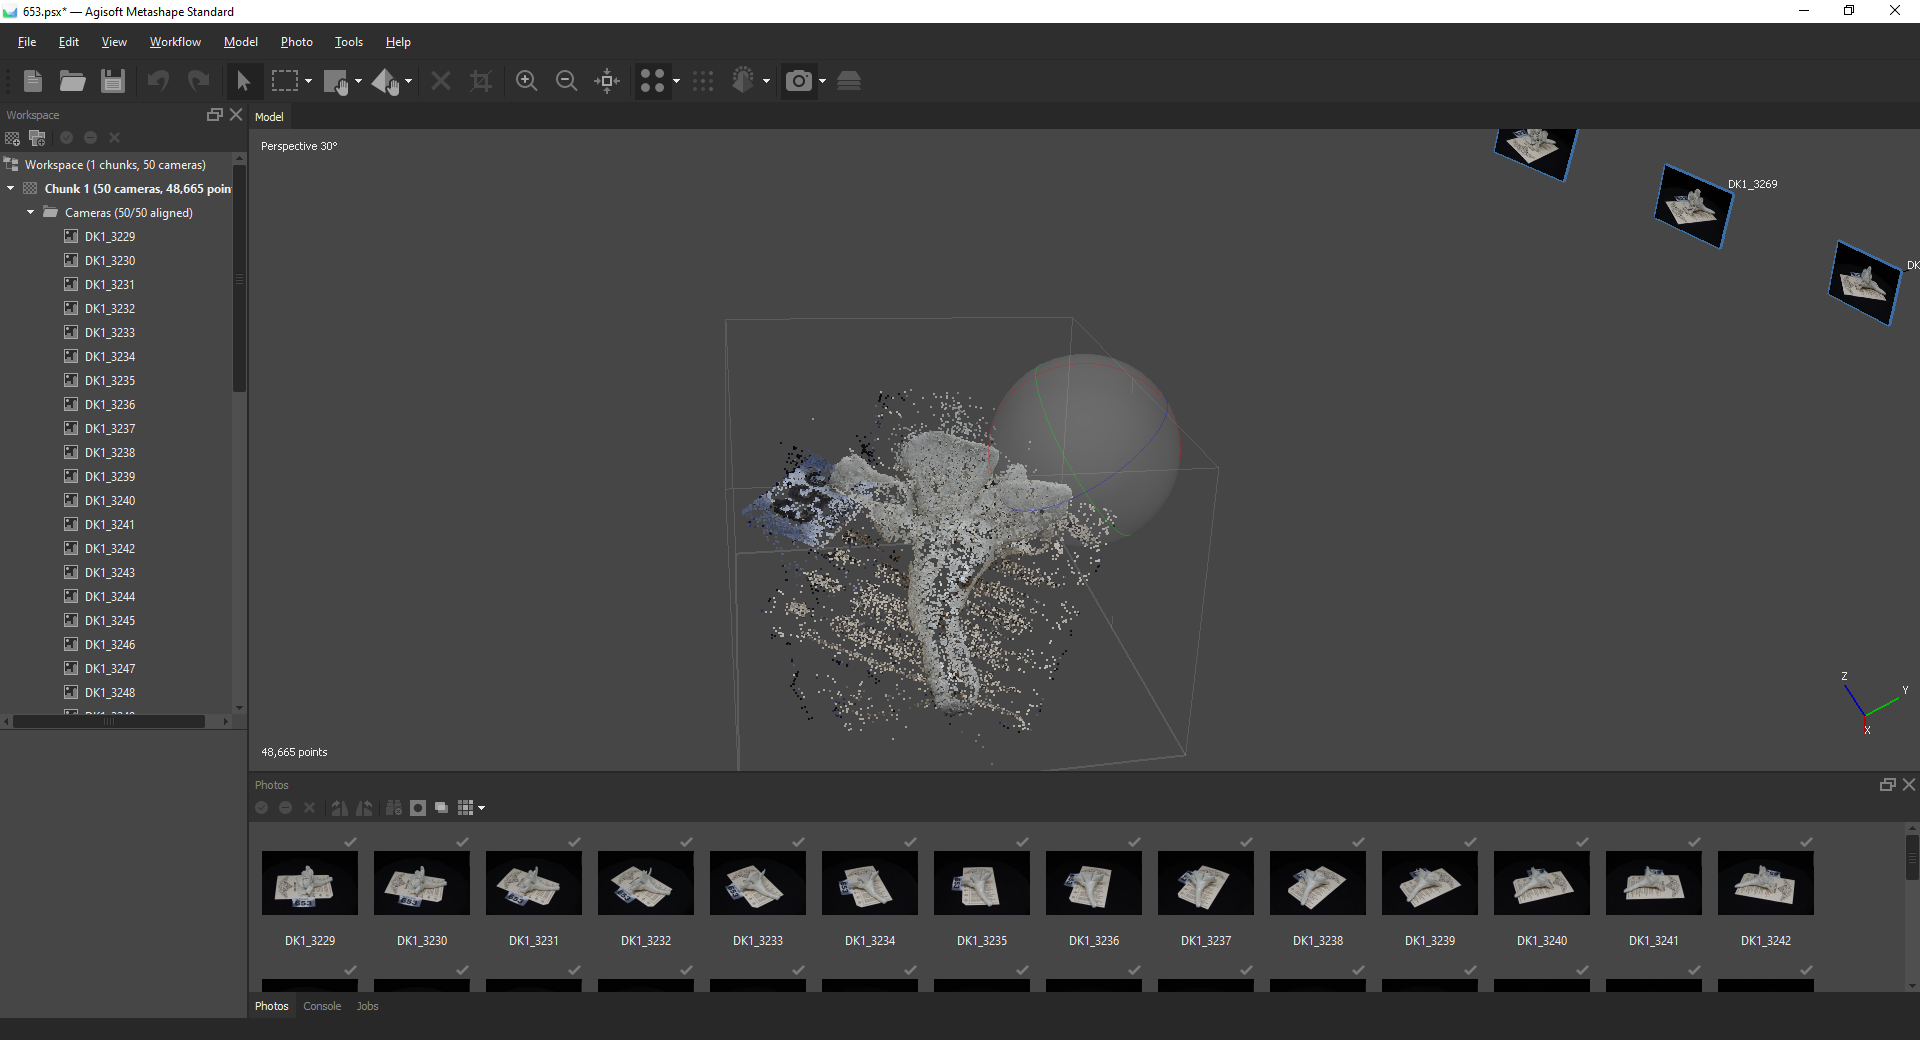
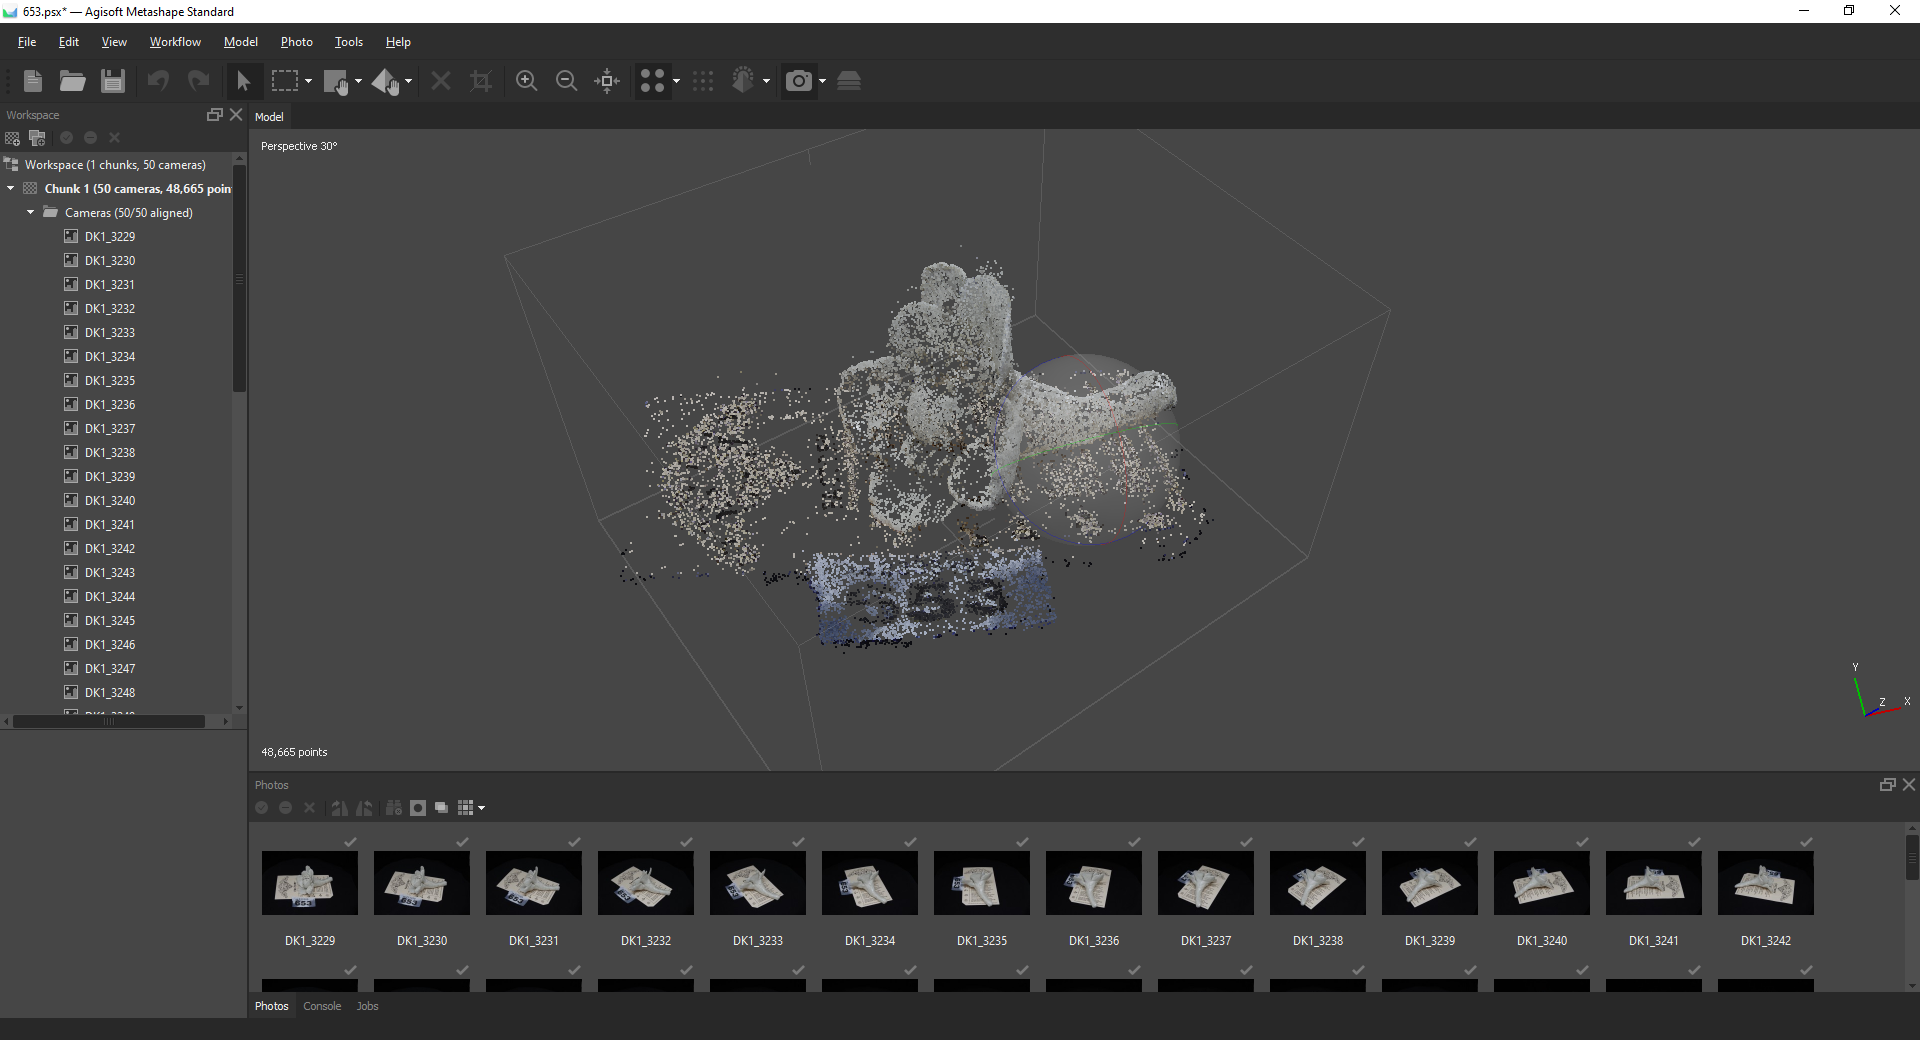
III. Generate the Sparse Point Cloud
You will find that this step is done automatically as part of the Alignment process in many of the Photogrammetry applications, however we will describe it here for completeness. Essentially the sparse point cloud is a collection of points in 3-Dimensional space that reflect the key tie points that the Photogrammetry algorithm has identified from the images. If the alignment step has worked correctly then the point cloud should resemble the object, especially when viewed at a distance..

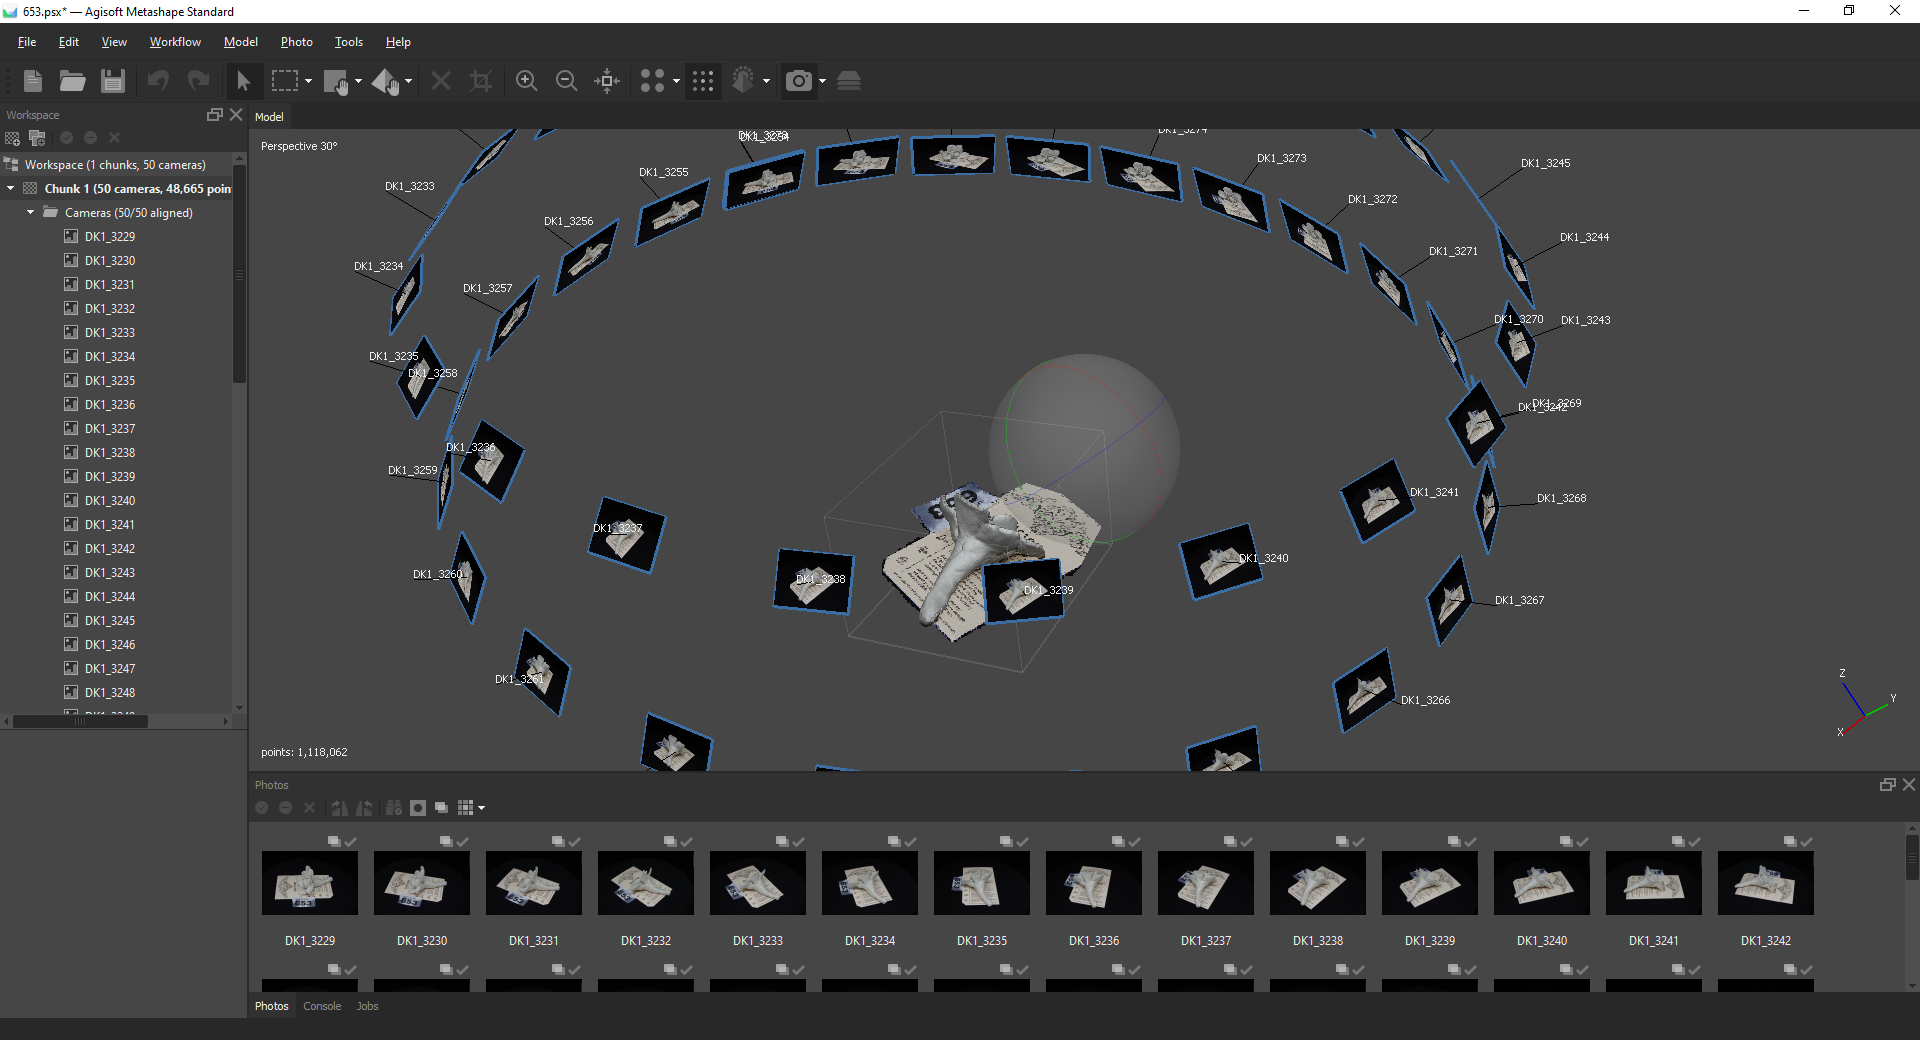
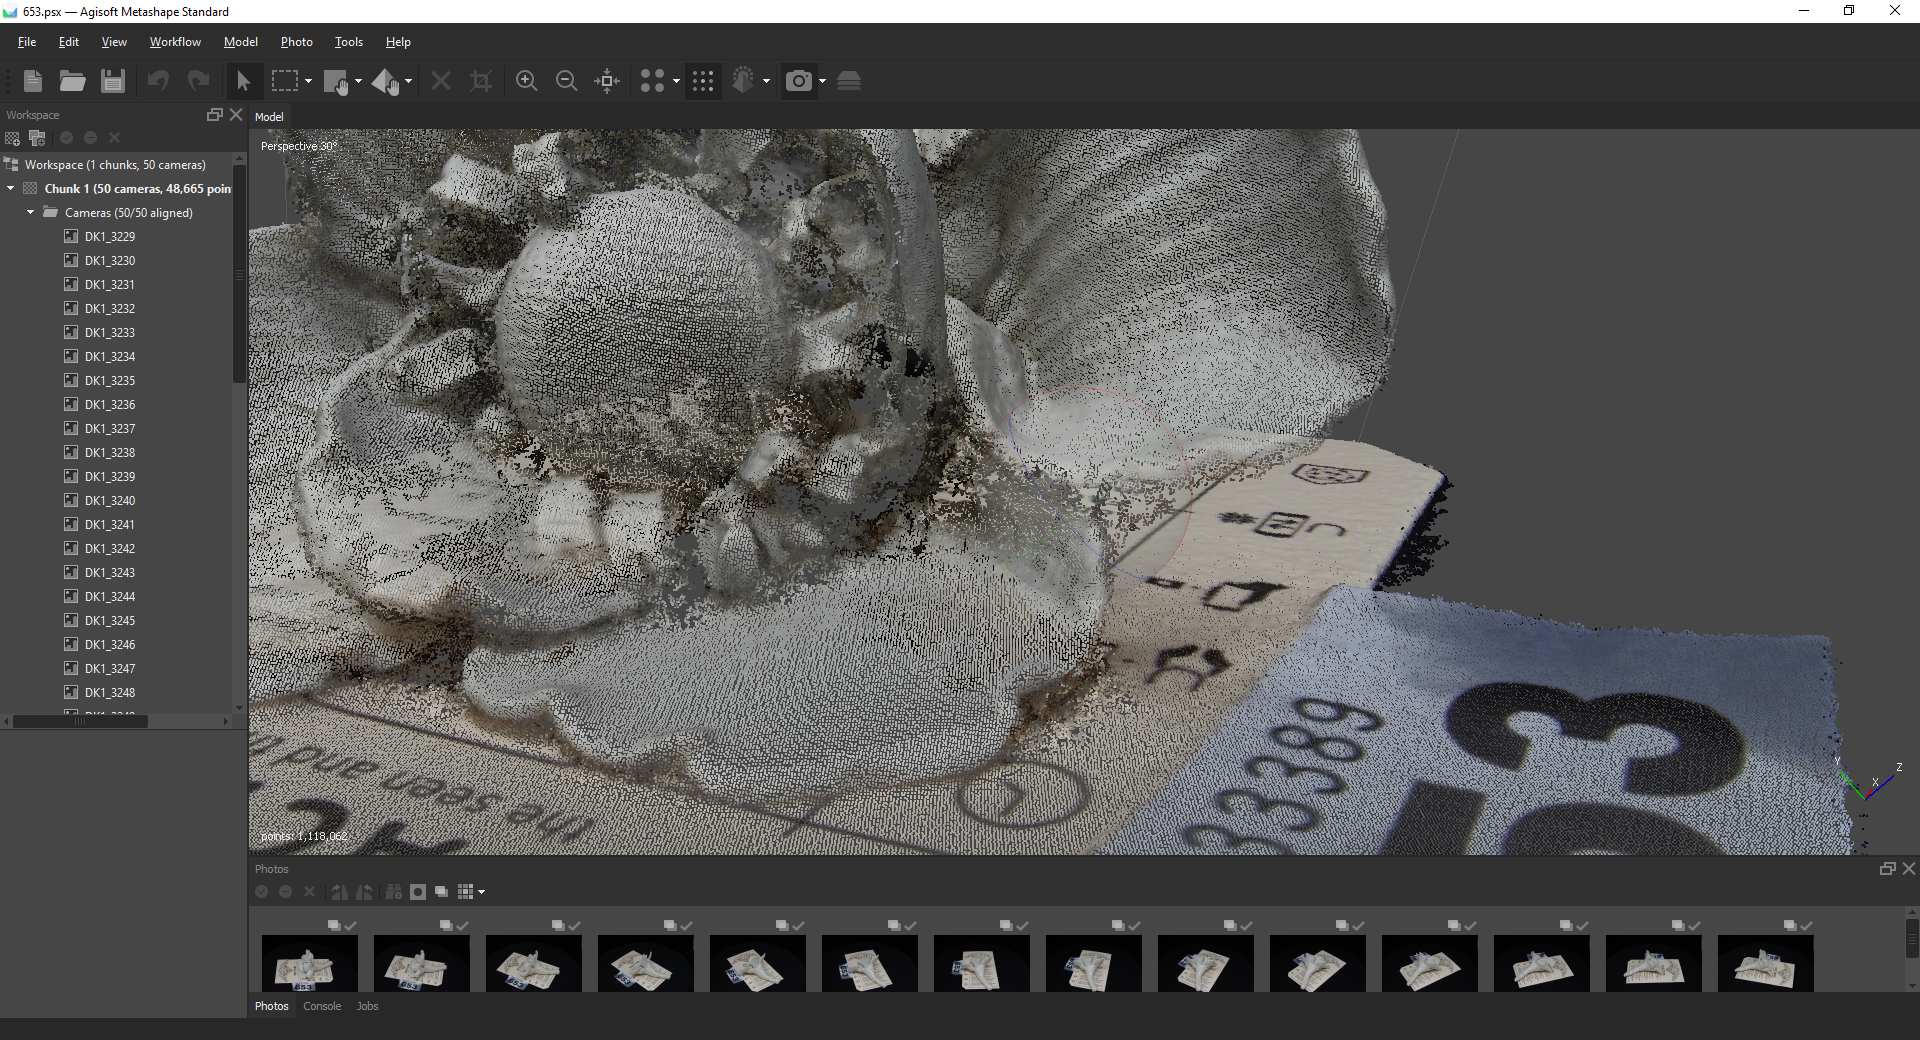
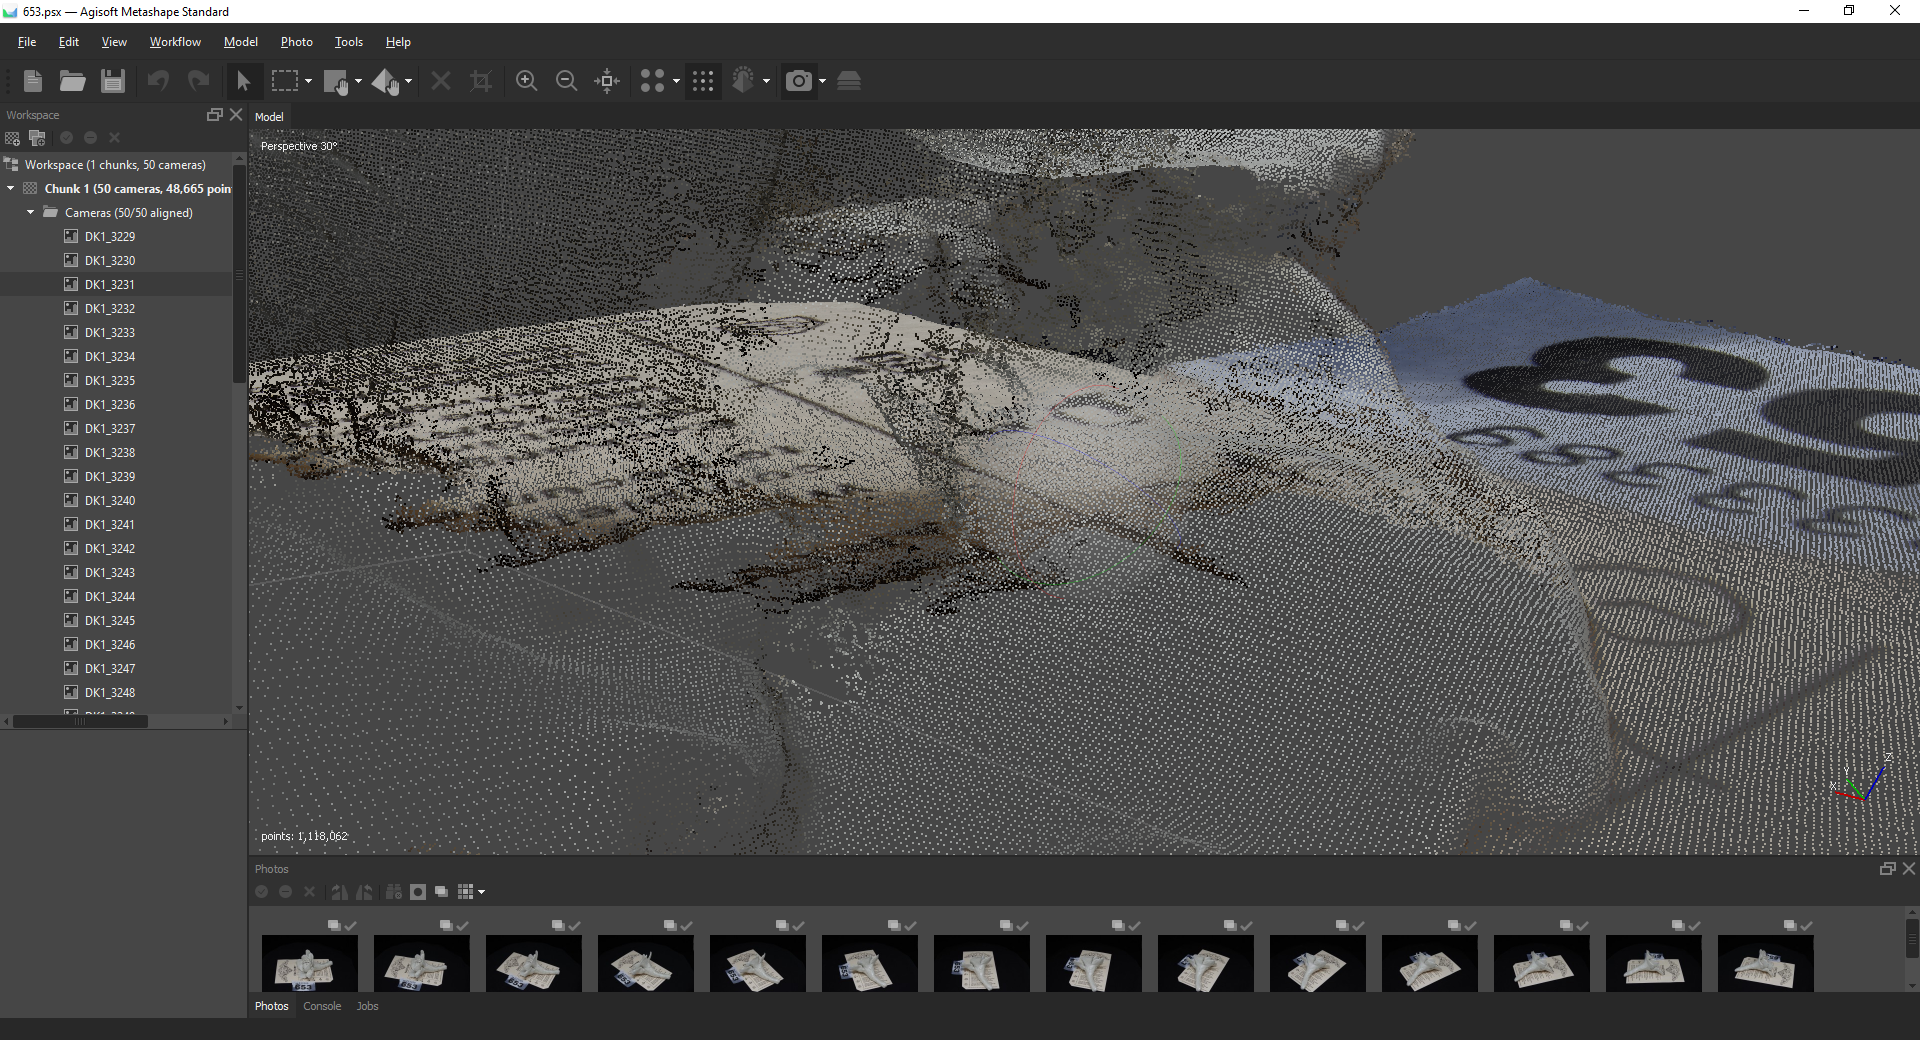
IV. Generate the Dense Point Cloud
Once you have the Sparse Cloud, that means that you have enough key tie points to generate a Dense Point Cloud. As the name implies the same as the Sparse Point Cloud in nature – essentially just a cloud of colour points in 3D space, however their number is dramatically increased and their presence fills in the majority of the detail of the eventual model. In fact from a distance the cloud can look like a solid object. In truth the vast majority of optimised digital 3D modelling is essentially a collection of points in space (called Vertices). However they are presented to use as a connected Mesh, as we will see in the next step. Generating the dense point cloud is an automated process that is handled by the Photogrammetry software, assuming you have done the groundwork by providing appropriate images.
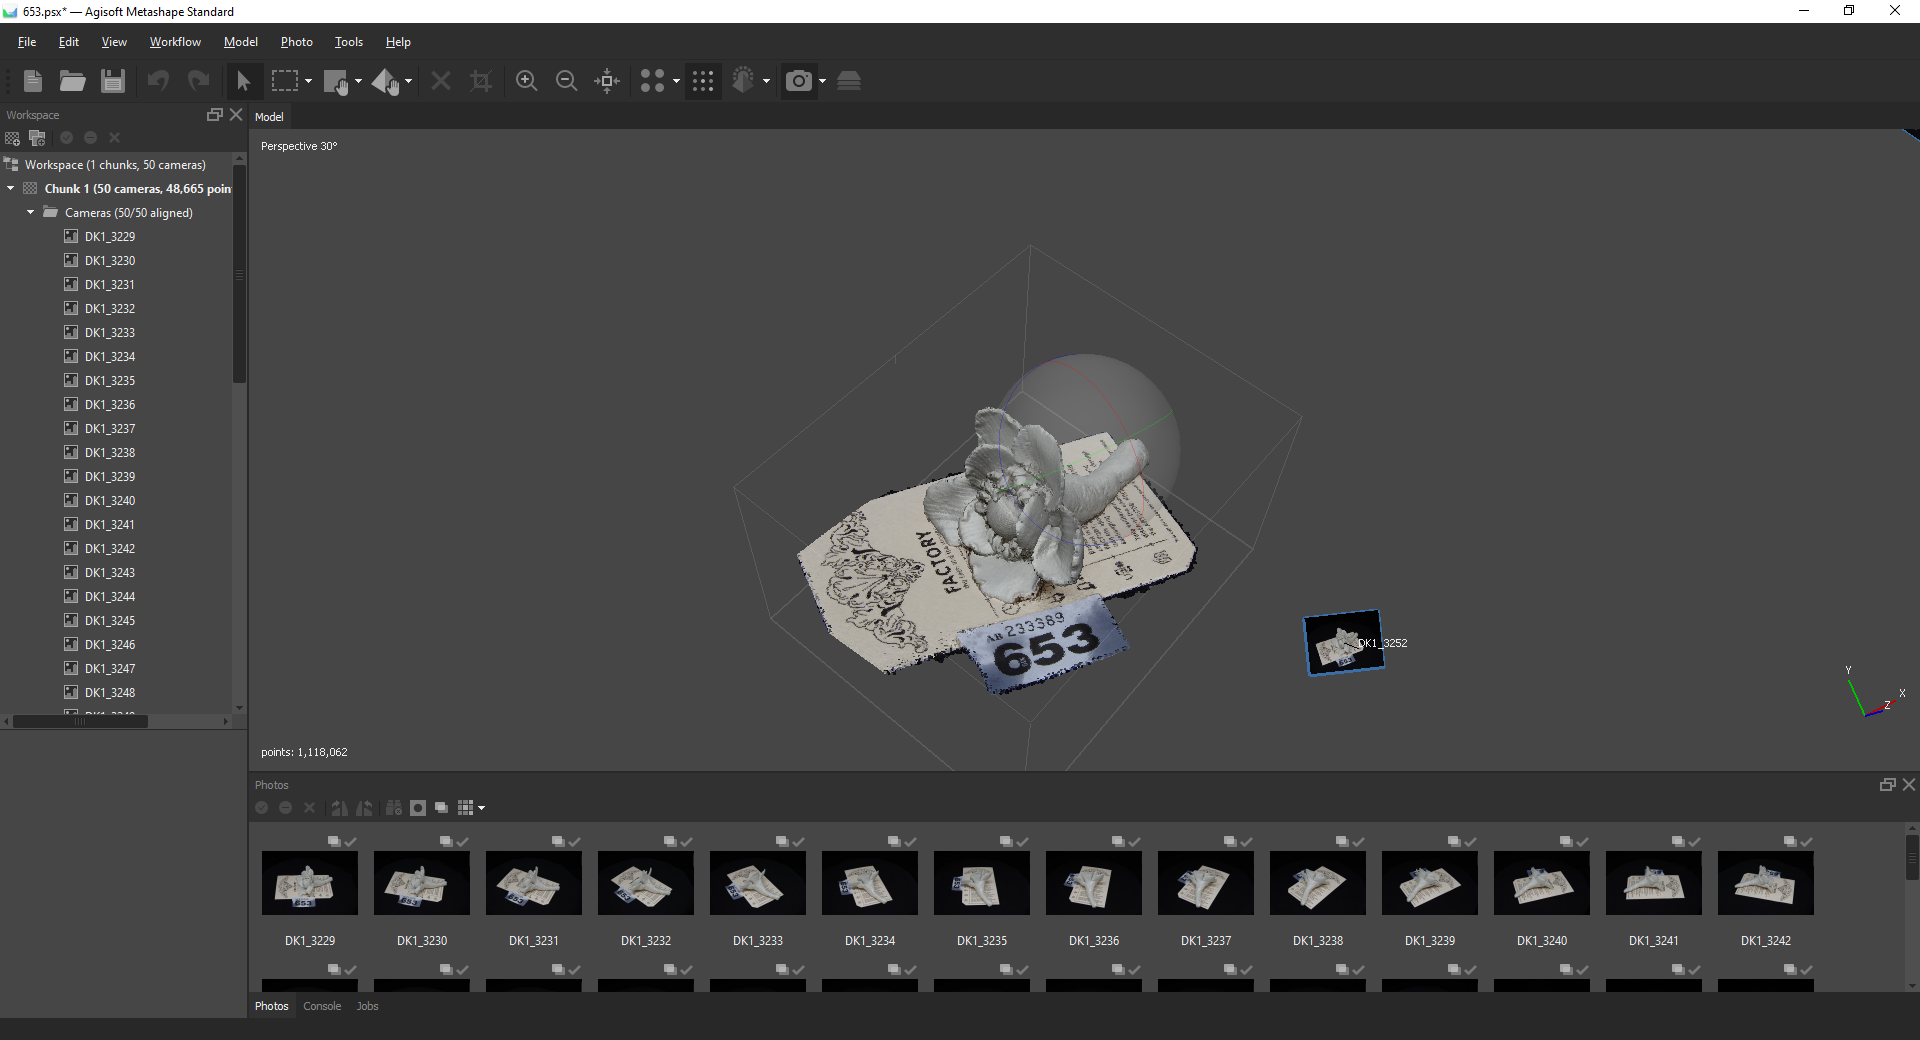
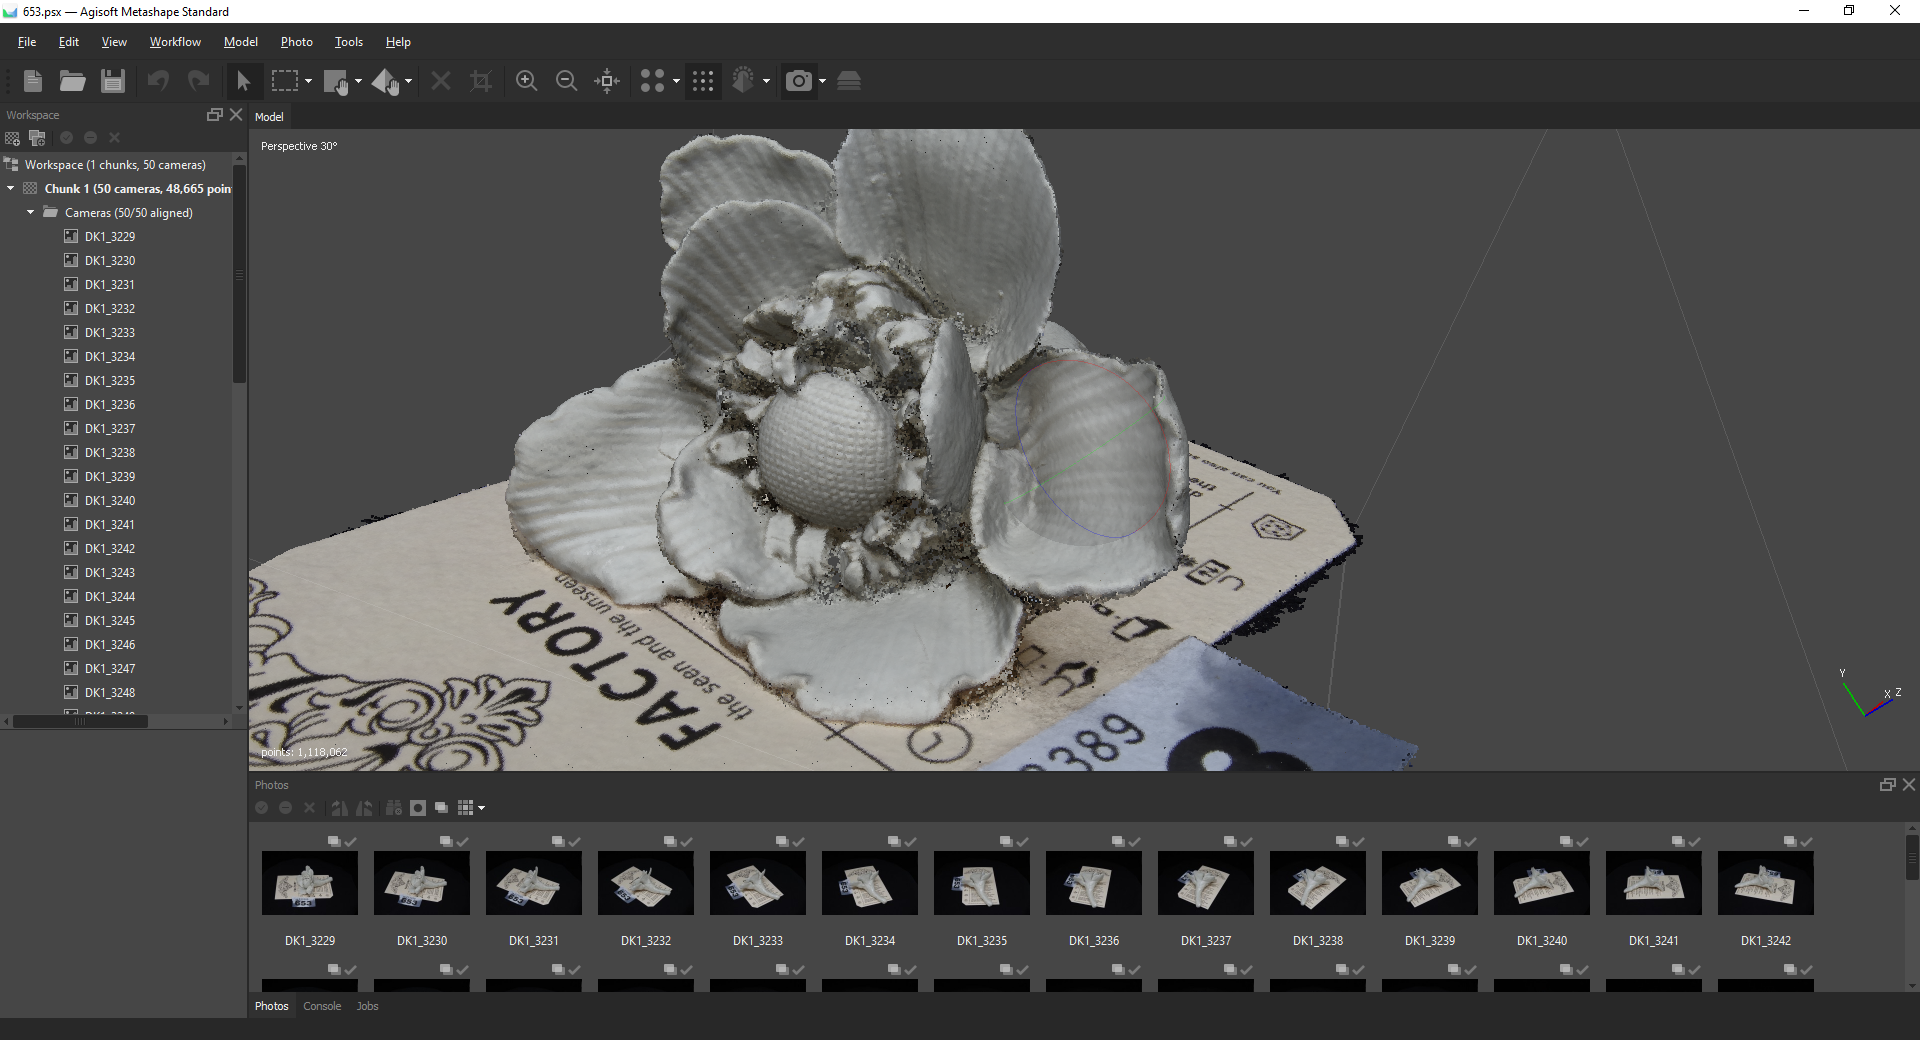
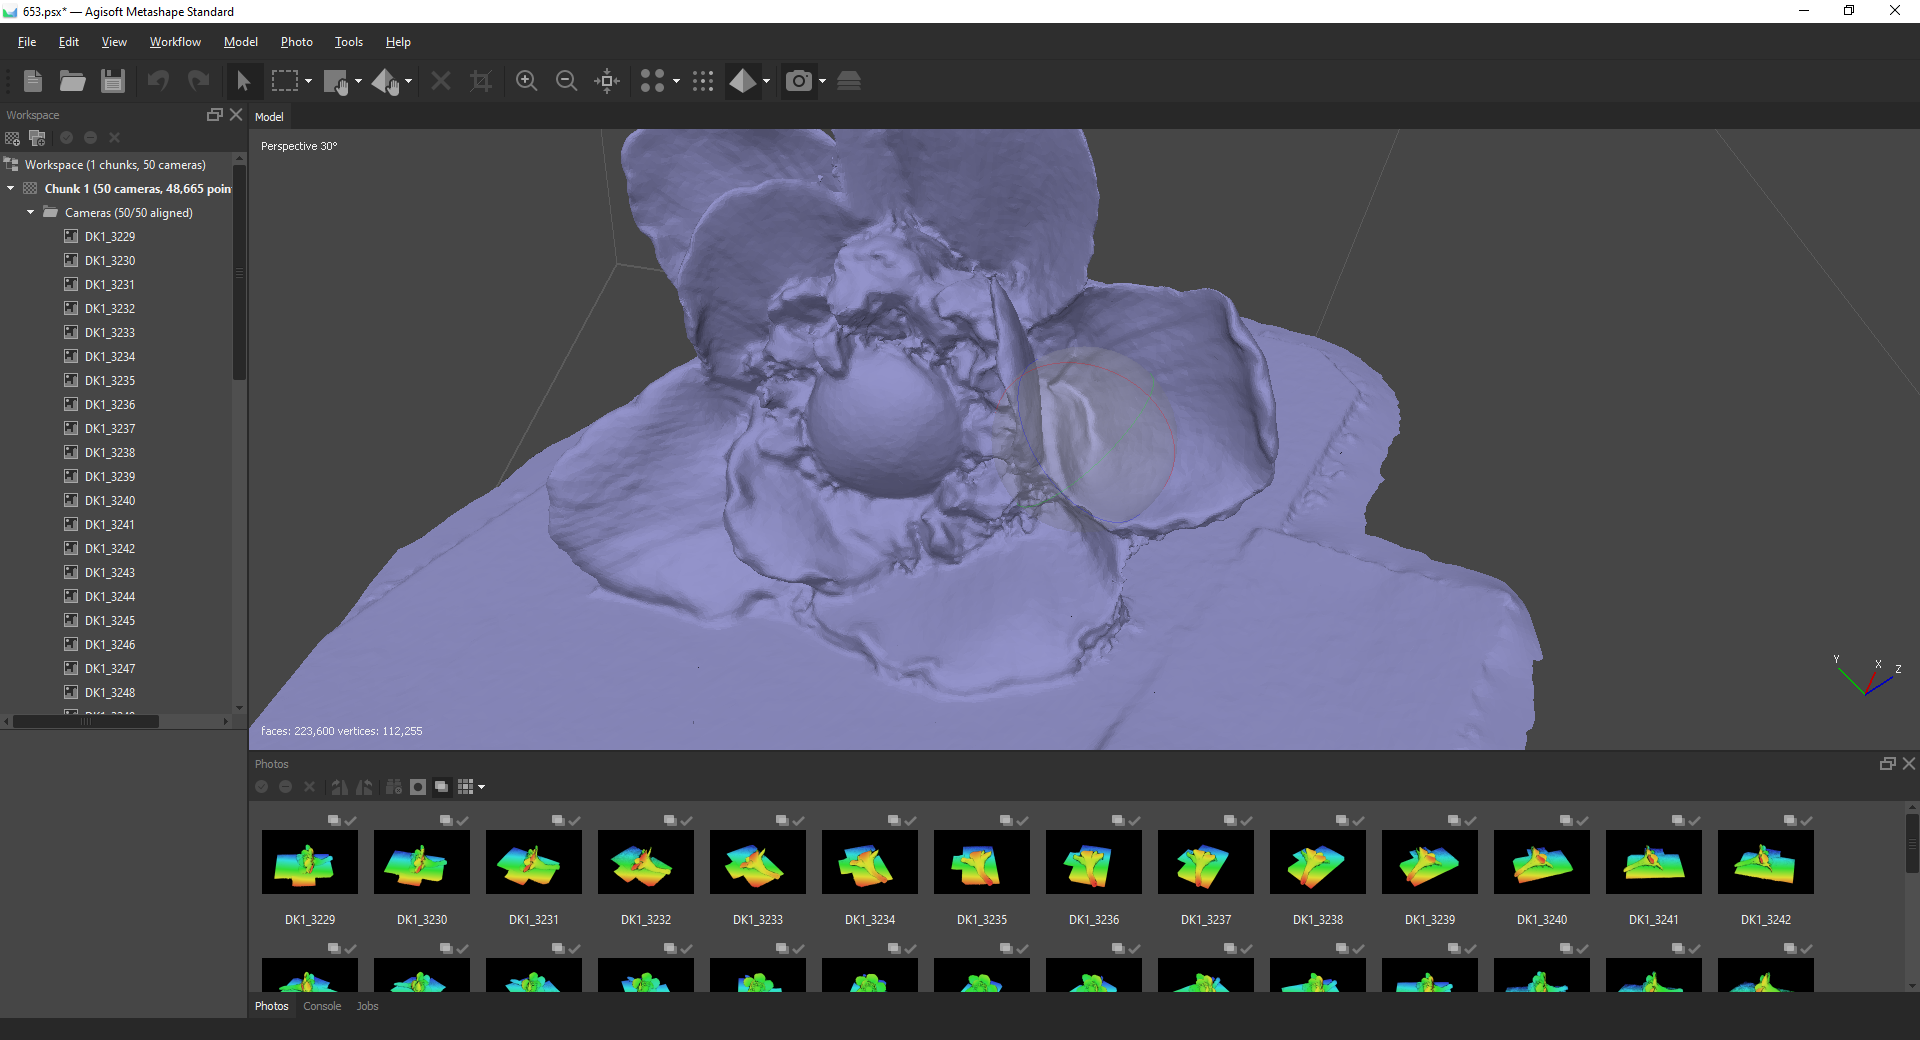
V. Generate the Mesh
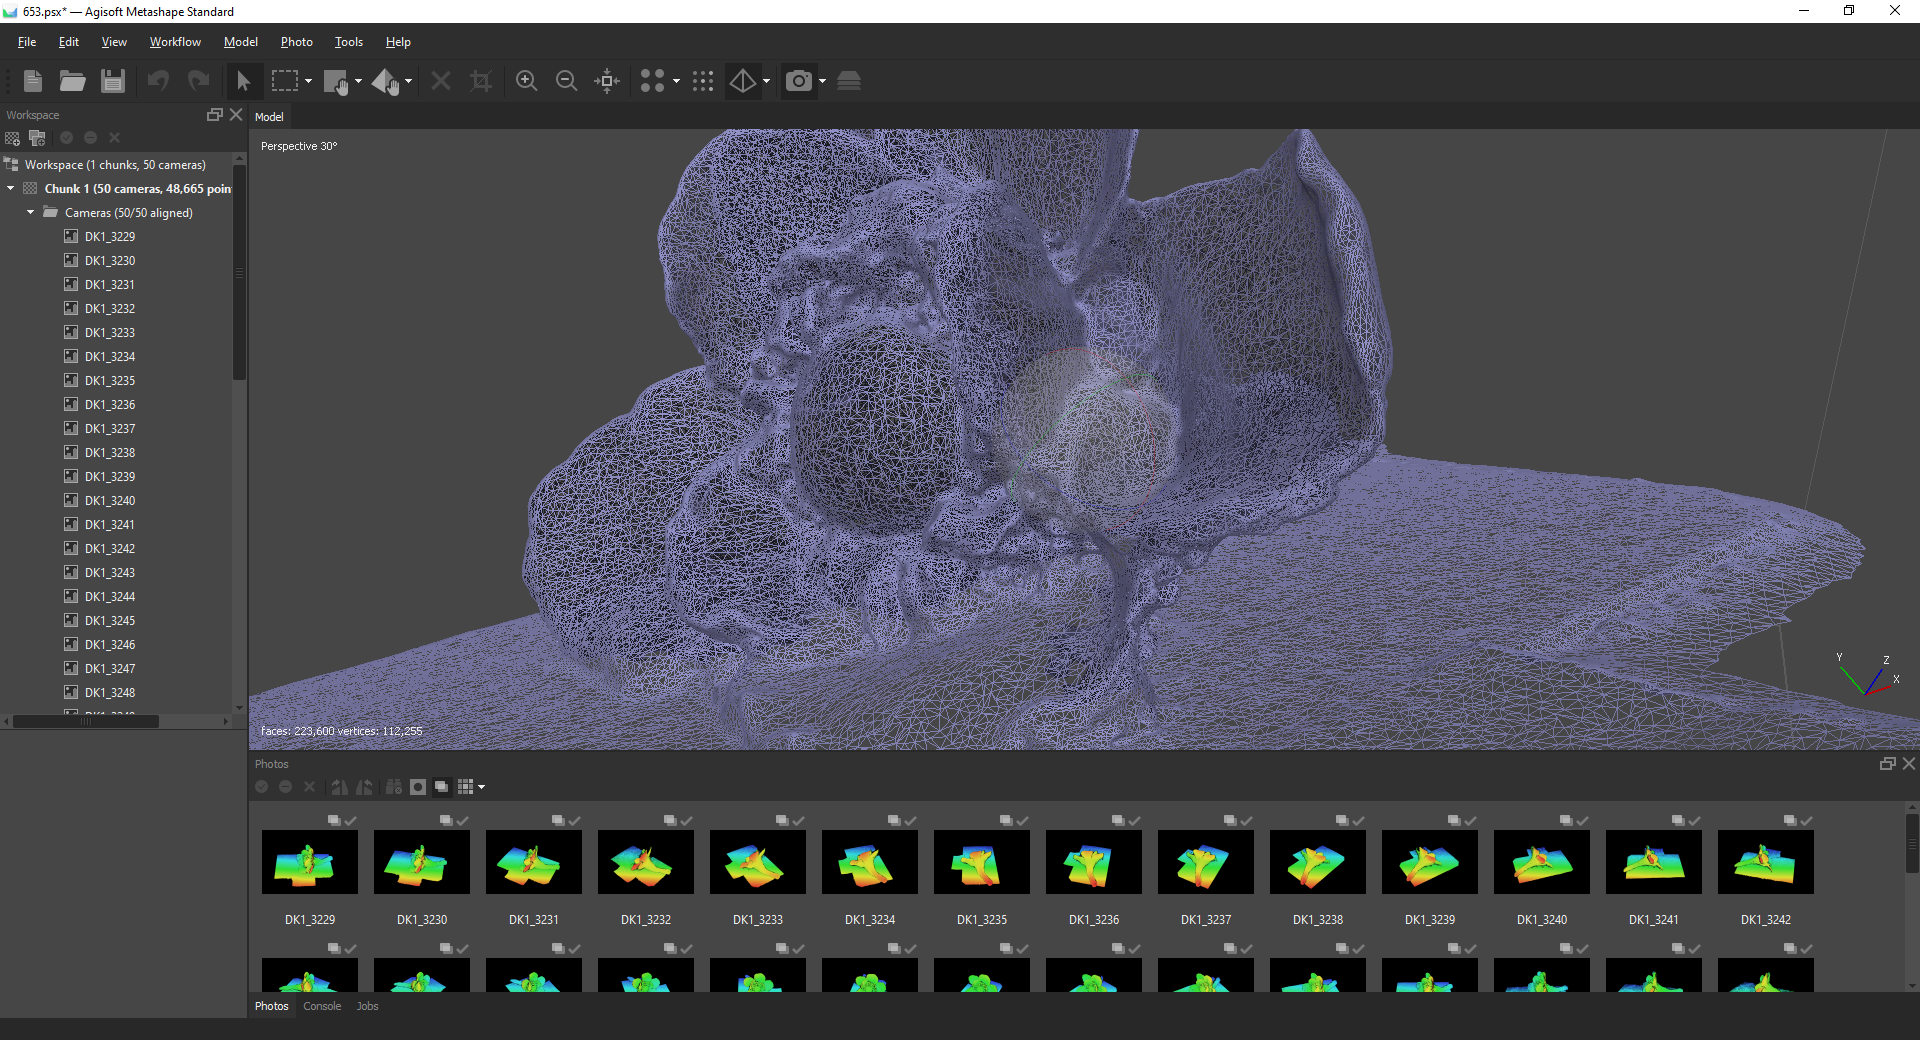
With the Dense Point Cloud providing all the key detail, the next step is to generate a Mesh of the points! Luckily this too is an automated process. As described above, almost all the 3D models we see in Digital media are essentially a collection of connected points – or Vertices – in 3D space. To make this work, each Vertices in a cloud is connected with at least two others to create a triangle, known as a ‘Face’ or a ‘Polygon’. When all the vertices are formed into connected polygons they form the Mesh, which is essentially the final geometric shape of our object! This can be clearly shown when you look at any 3D object up close – ideally with a view that displays their “wire-frame”. Every one of the complex 3D objects we see is essentially a bunch of Triangles! And the Mesh Generation step of the Photogrammetry process generates the ones that will form the object we scanned.
VI. Generate the Texture
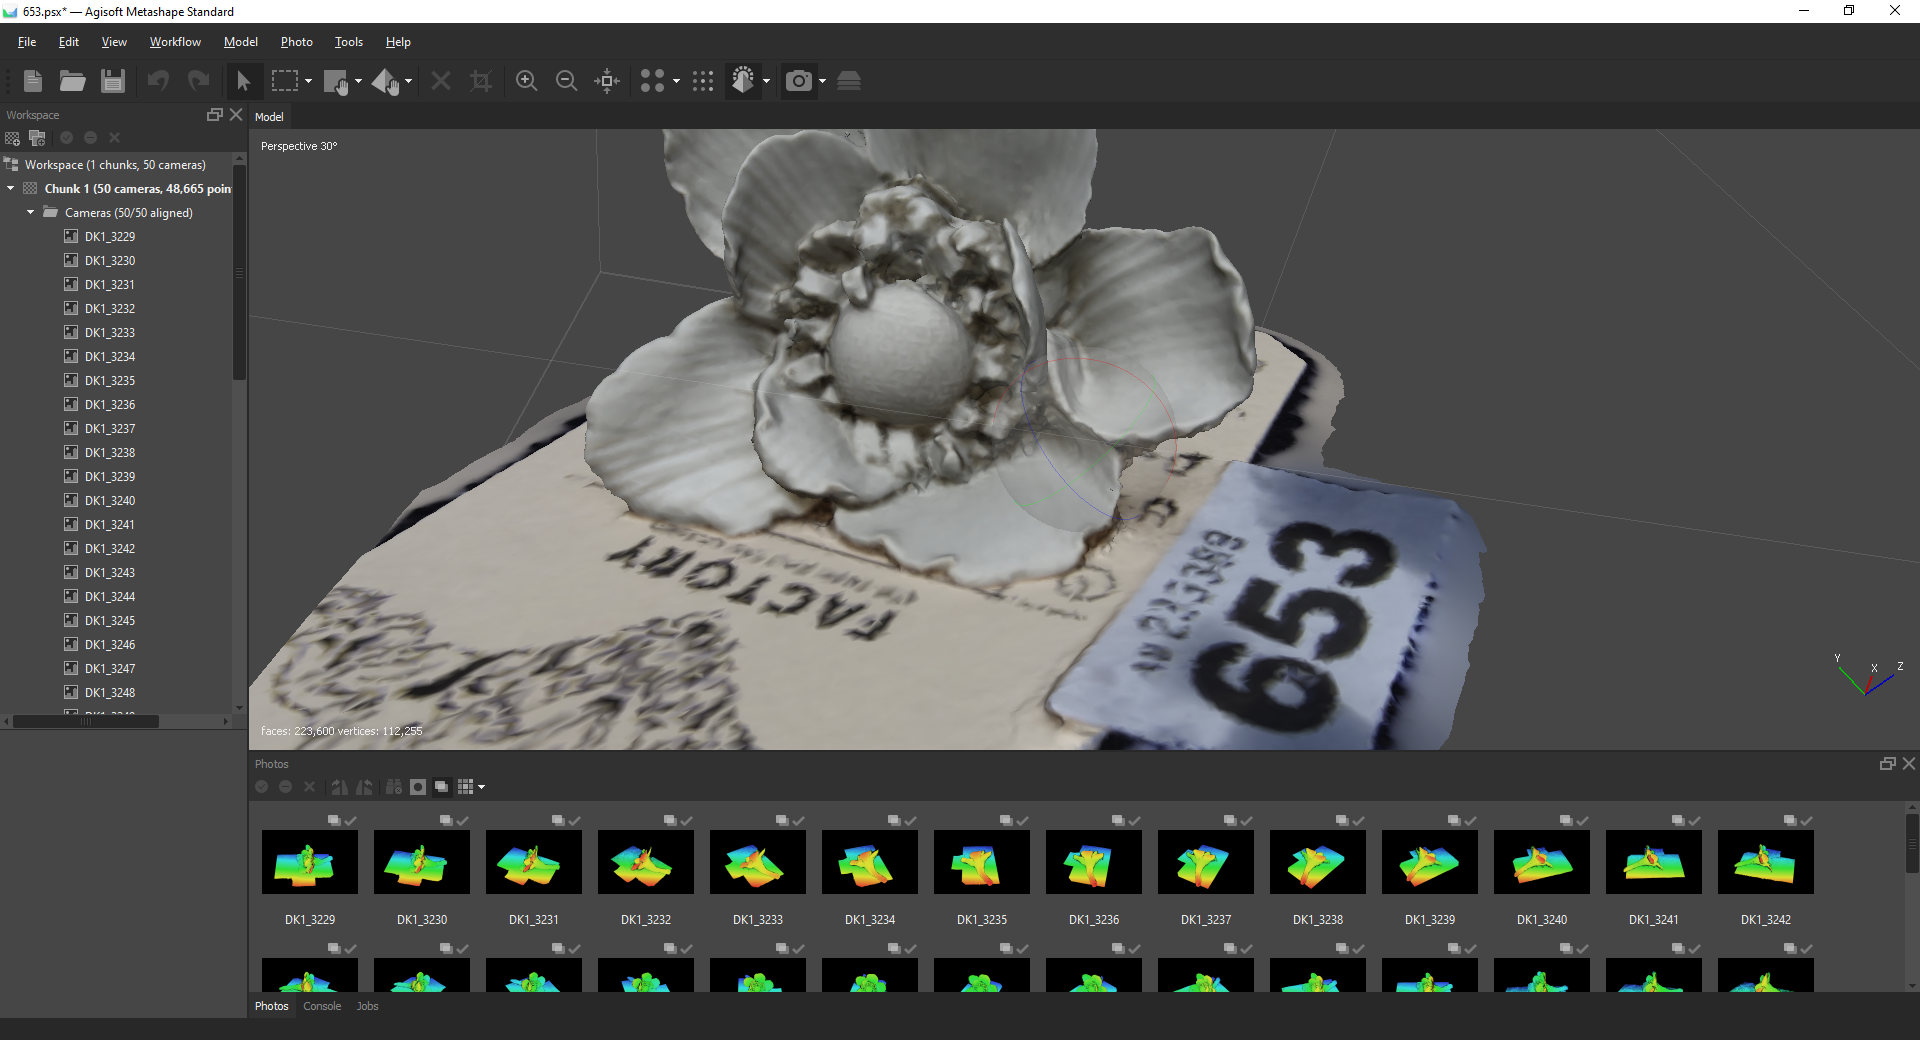
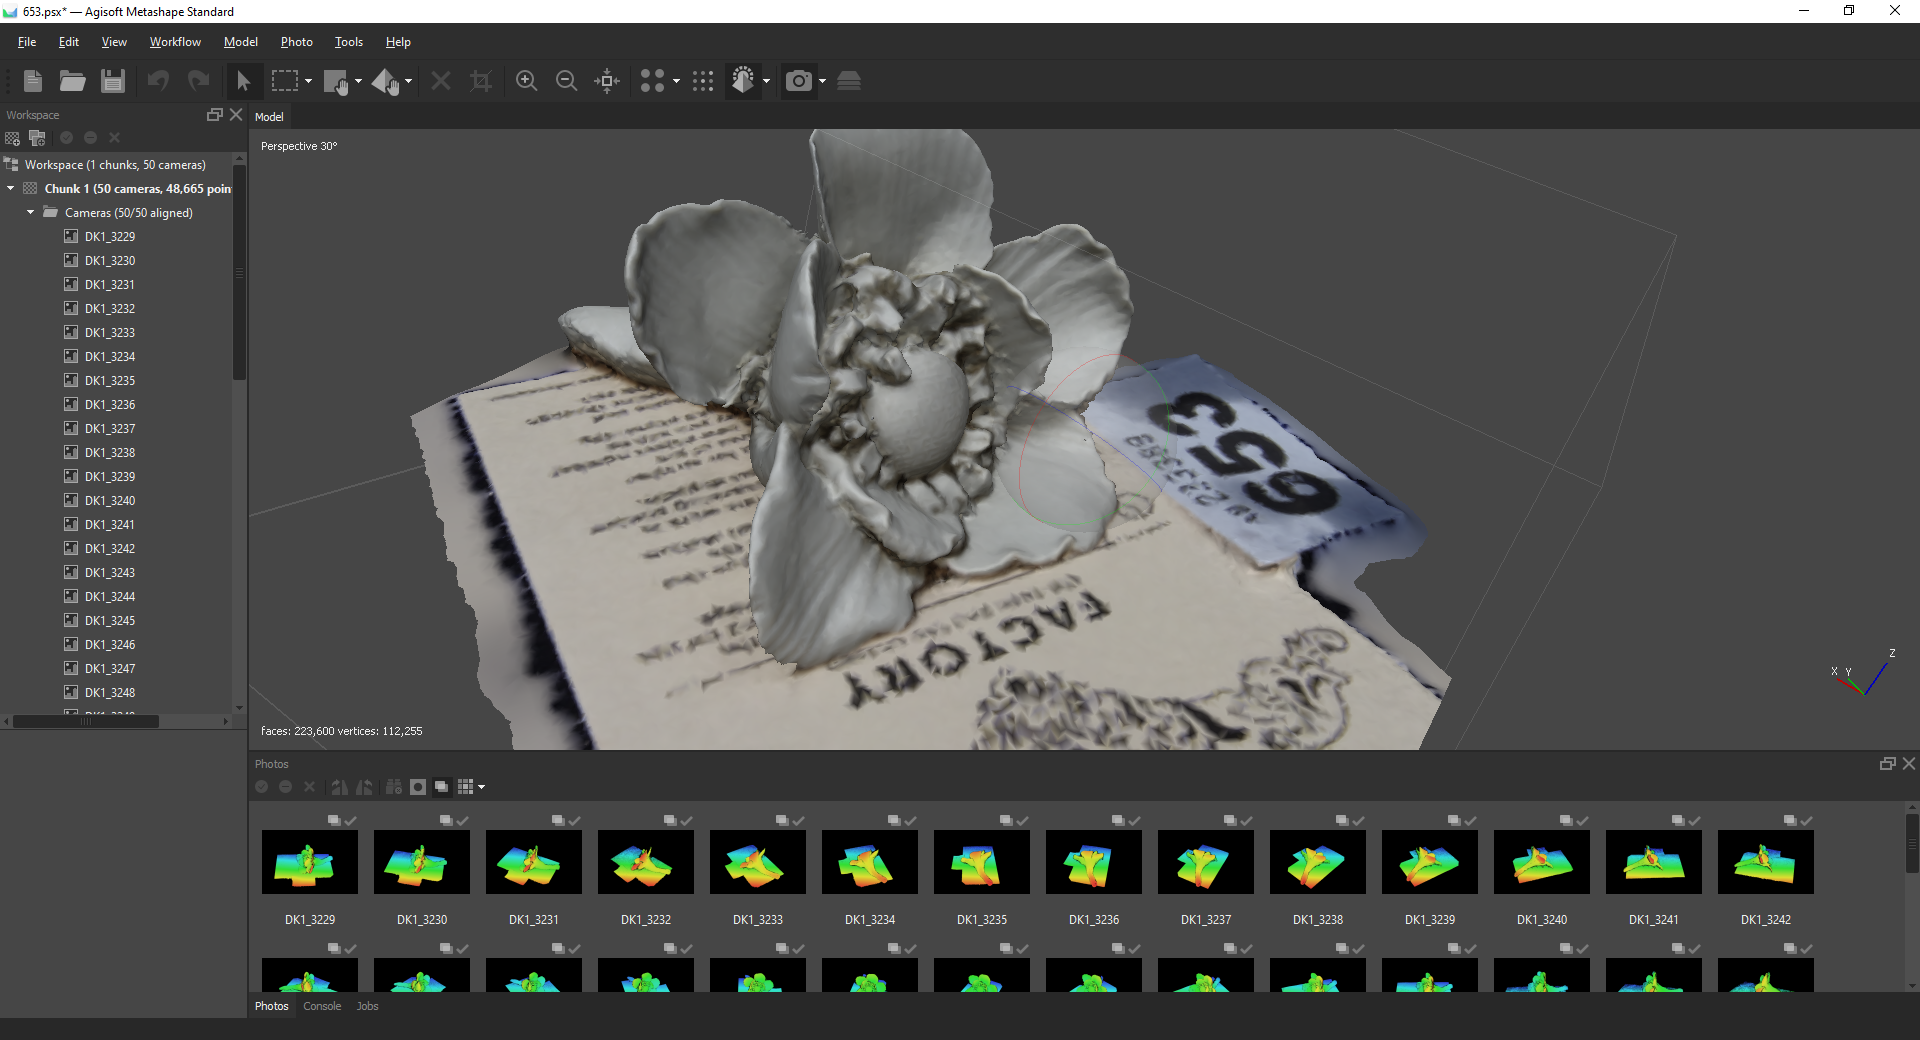
So far we have generated a collection of coloured points in 3D space, and ‘Connected the Dots’ to generate our Mesh. At this point we should have a geometric shape that is identifiable as our object. And it will also have some colour but its texture will most likely not look exactly like the original object. The reason for this is that the polygonal mesh we generated so far can only present so much detail. The rest needs to be shown by the ‘Texture’. In 3D graphics terms the texture is essentially an image that we ‘wrap’ around the mesh to give it surface detail. All the Photogrammetry applications can generate an appropriate photo-realistic texture by using the many images that were used to generate the 3D model.
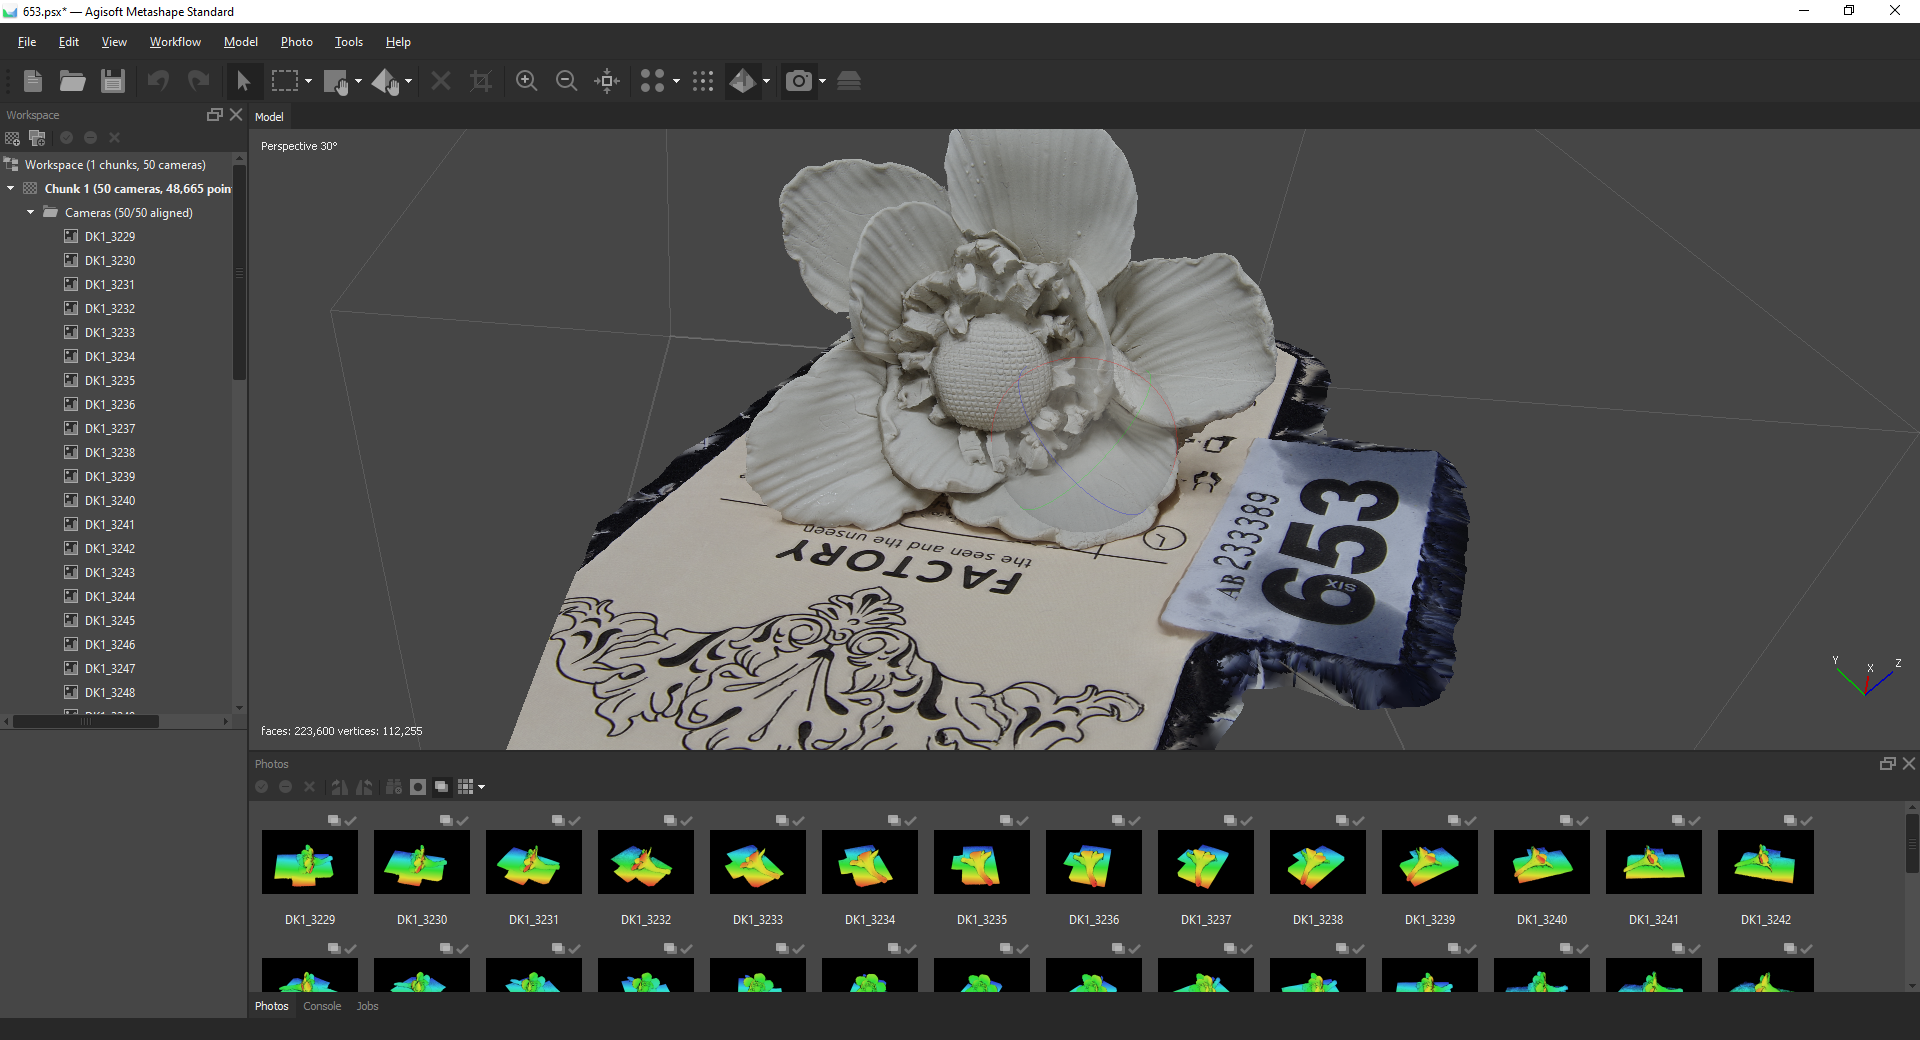
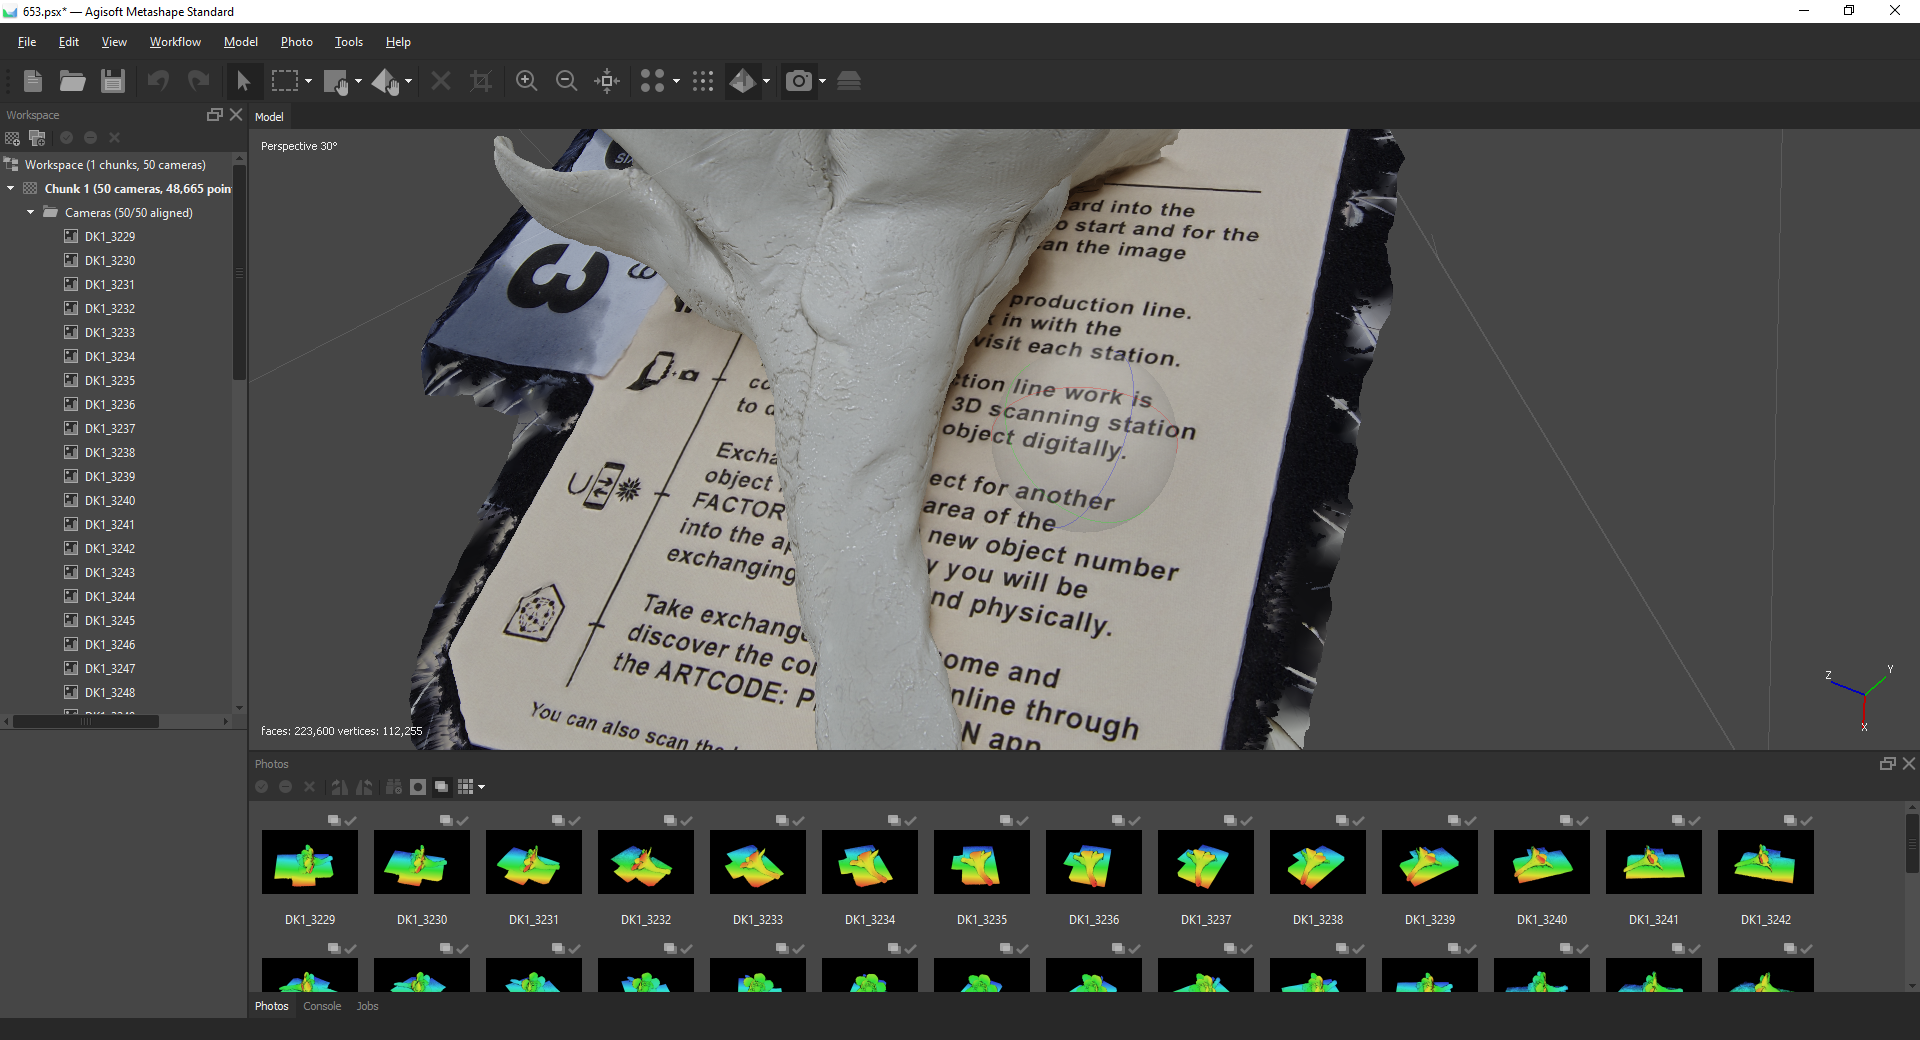
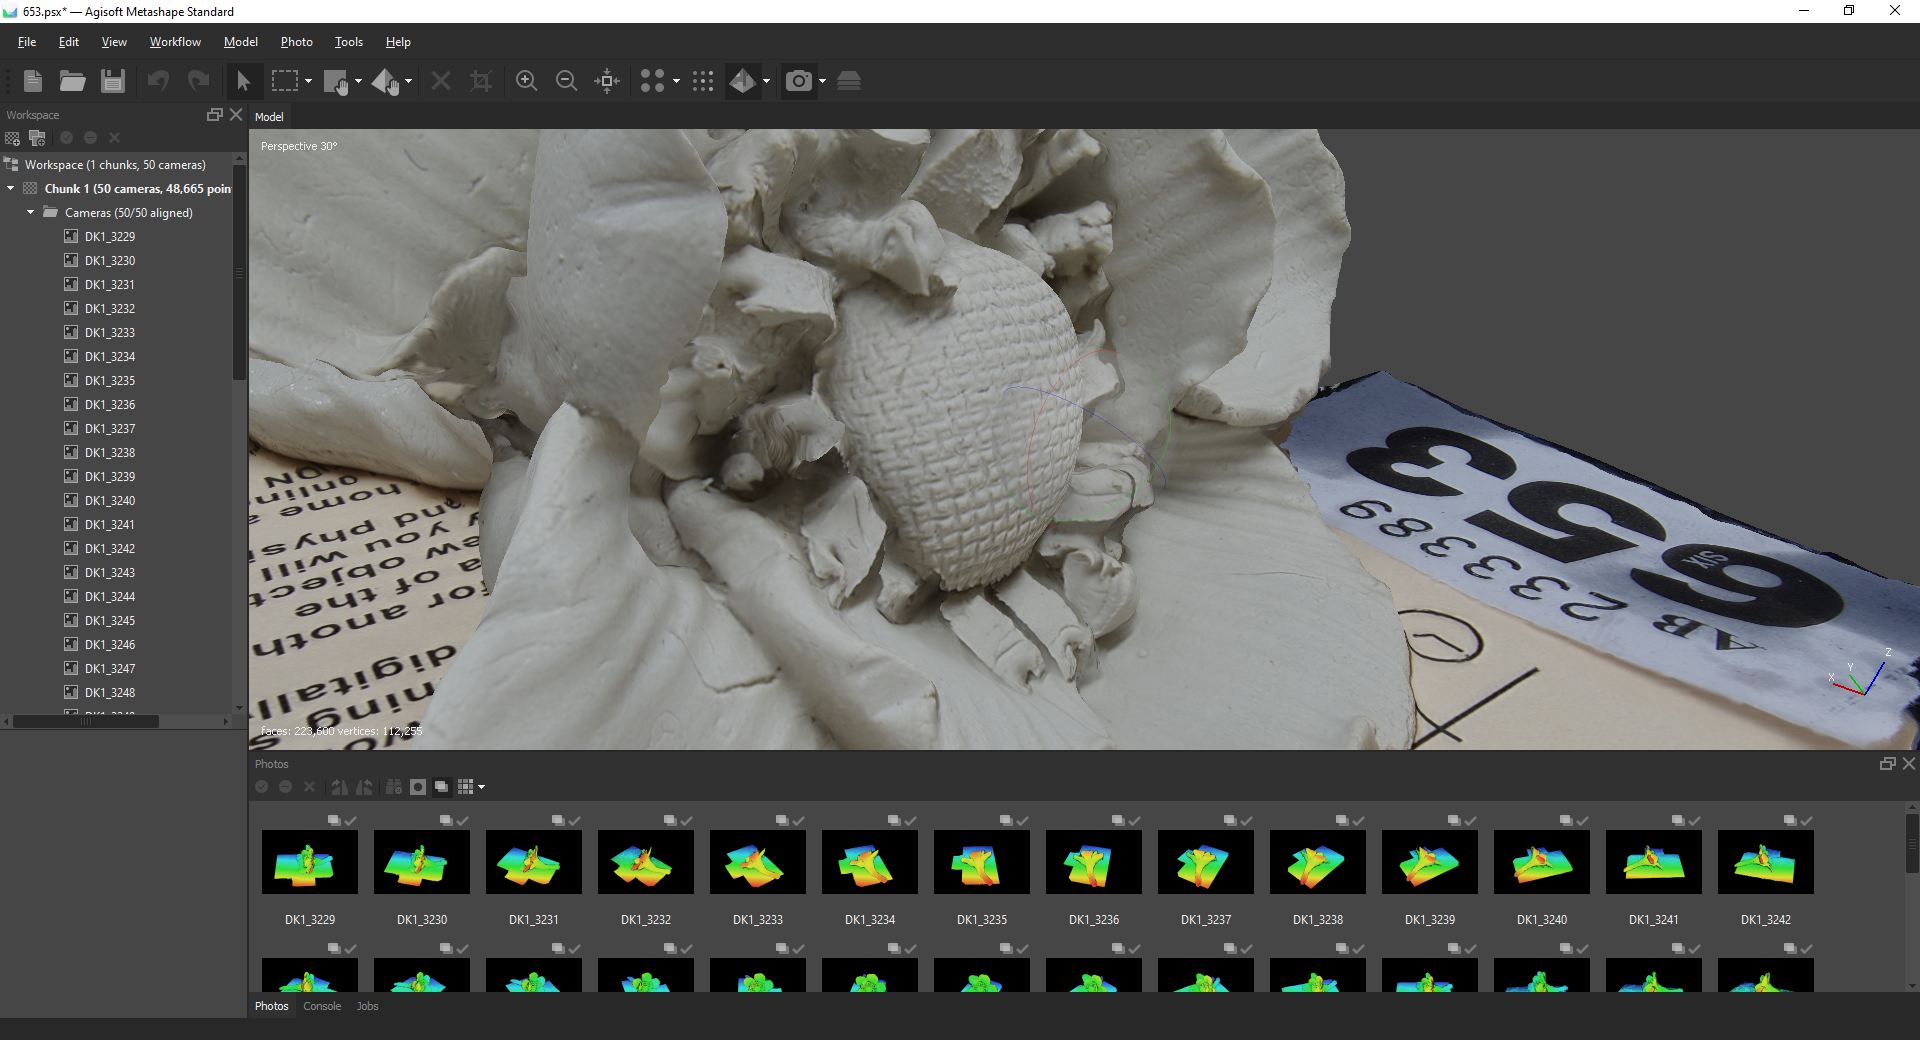
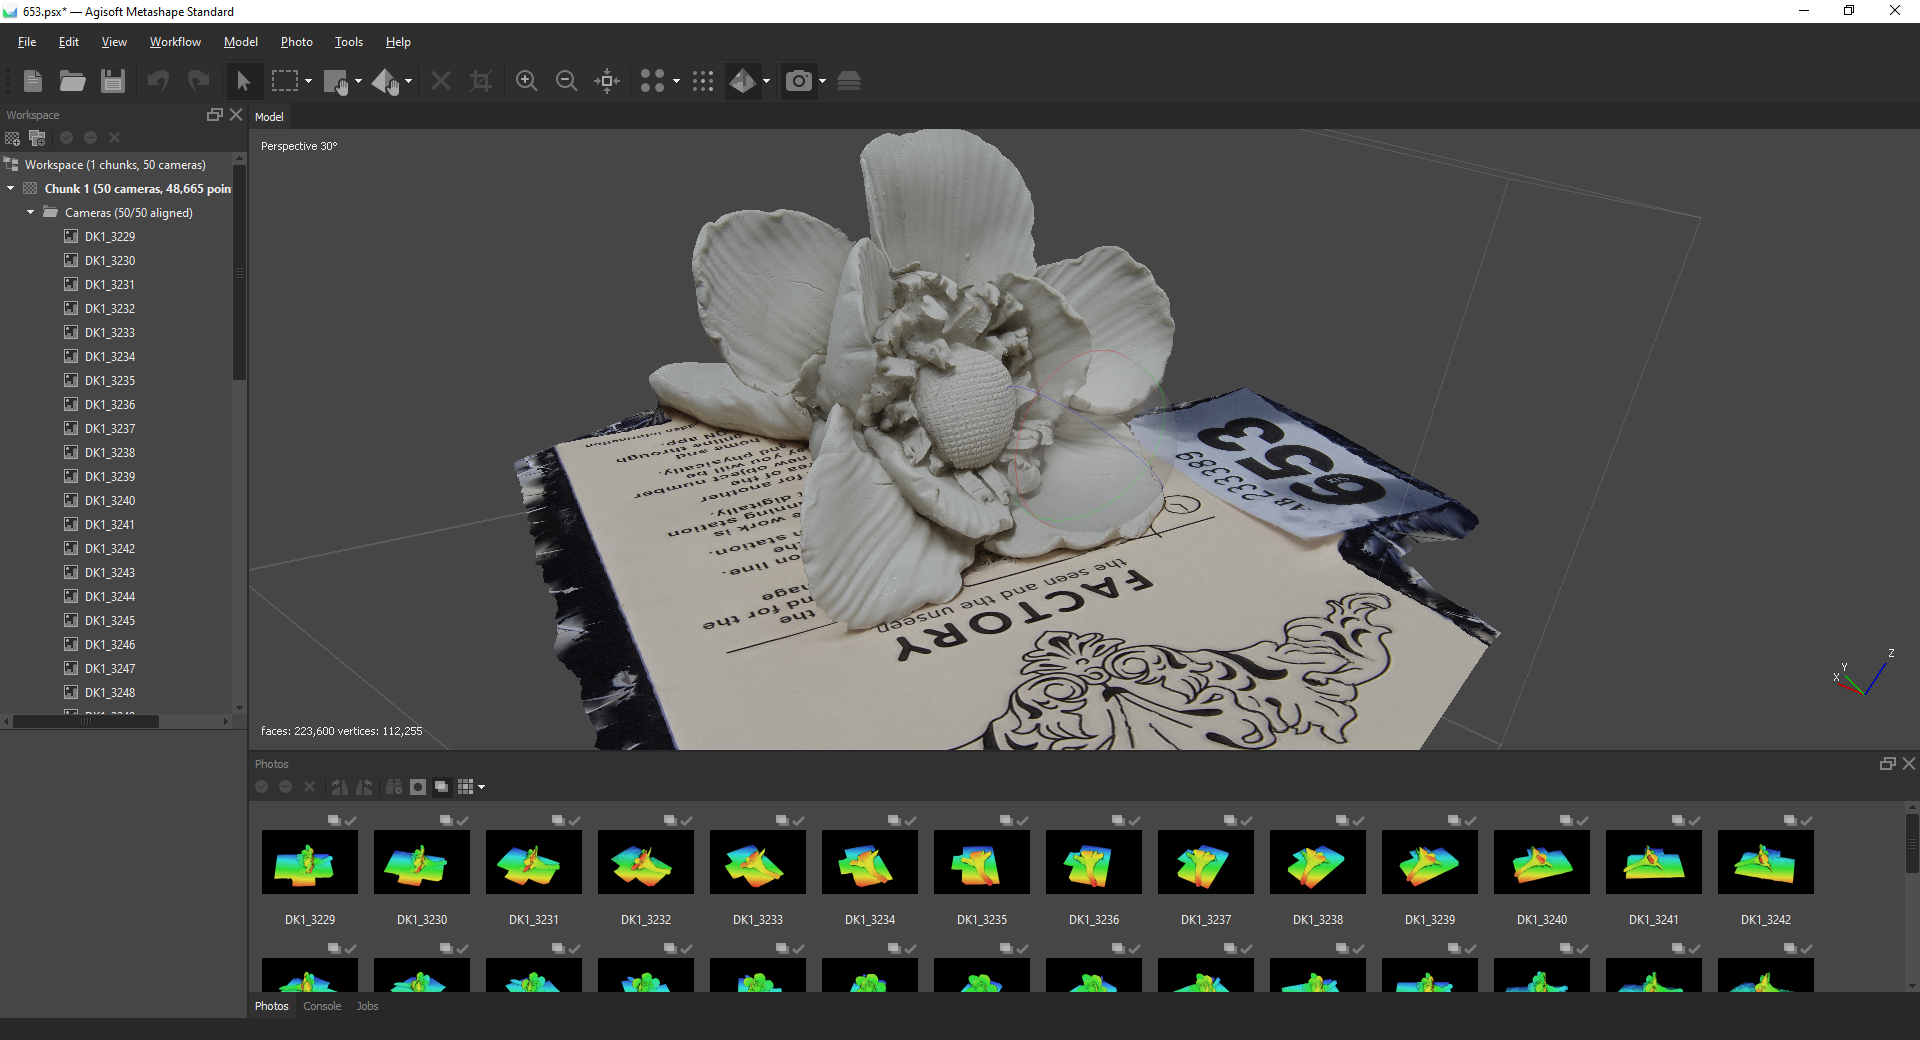
Step 4. Share the Model
Once you have your 3D model then you can use and share it! Here is one we made earlier:
Just like with other creative media there are now an increasing number of channels to share your content. 3D models are in some ways easier and in other ways harder to share when compared to content such as video and audio. They are easier becasue the file sizes you are dealing with are usually considerably smaller than video, but they are harder because their very nature means that you need some form of curation in order to convey your meaning or message.
While you can control almost every aspect of a video – from perspective to soundtrack – sharing a 3D model or scene, where the viewer has control of the perspective and the environment is a tricky and interesting challenge for any content creator! Several online platforms have come into being that give creatives the medium and tools to share their creations with audiences. Essentially these can be considered as ‘Youtube for 3D models). Some examples include Sketchfab.com, TurboSquid.com, Verge3D and others. And you can also create your own with Web compatible 3D engines such as Unity3D. The advanate of such platforms is that they can provide you with the storage, hosting and ready-made tool chain to present and curate your creations. Several Museums already to so, such as – with the help of Scannerbox! – the National Museum in Belgrade and our VRtefacts partners the Museum of Making at Derby Silk Mill.